Screens
This section will cover all the settings you need to know about screens.
- Click on Screens in the navigation bar.
- Here you will see all the screens you have purchased. 1 x Screen = 1 x Licence.
How to add a screen
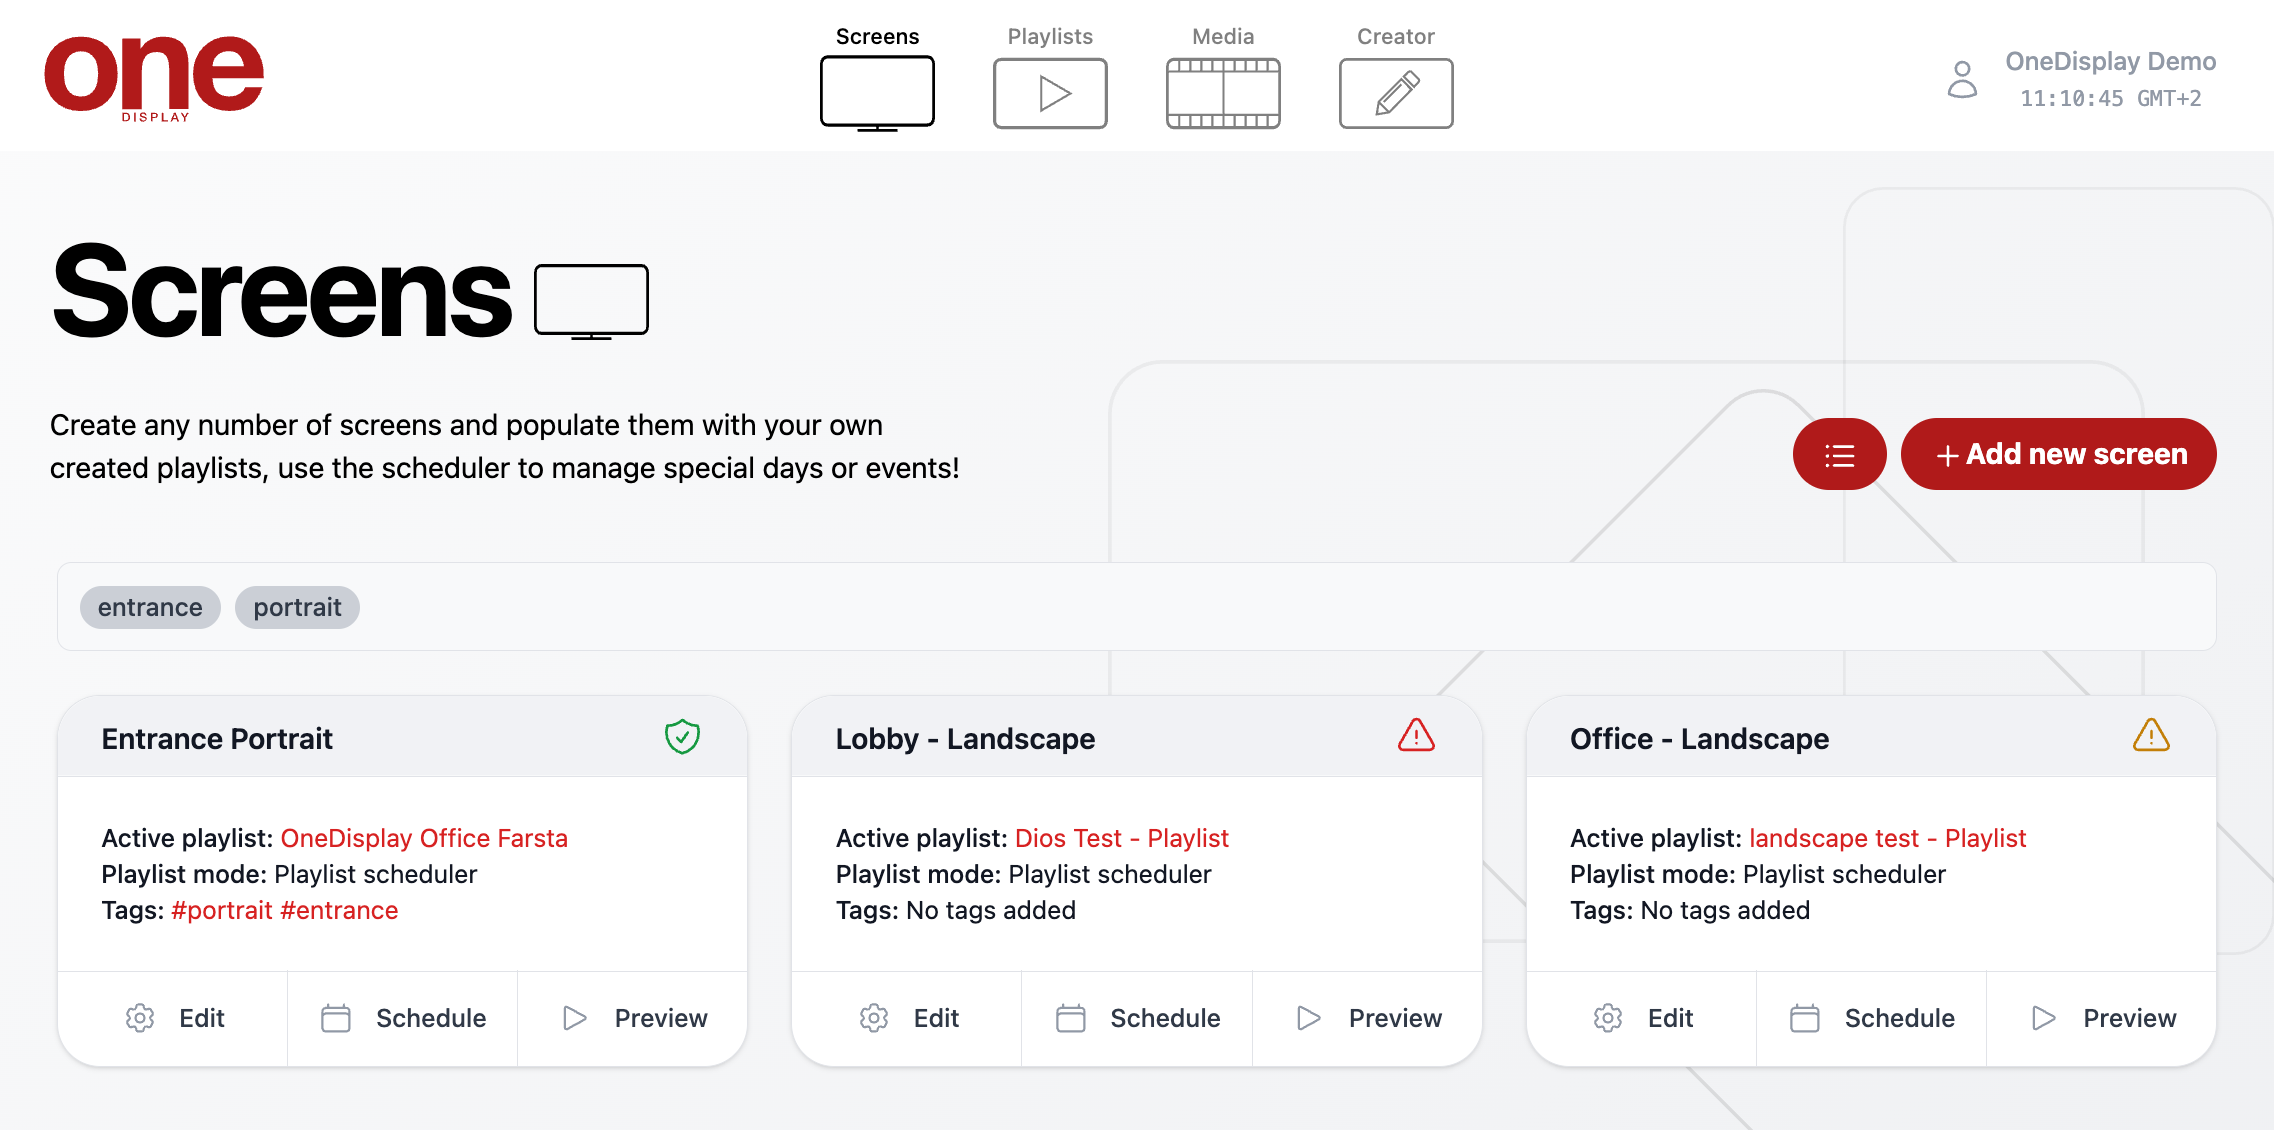
- Click on + Add new screen.
- Enter a screen name. If you have pre-made playlist, select it from the dropdown section entitled Playlist. If you haven’t created a playlist, leave the Playlist section on its default of Create a new playlist. One will automatically be created for you.
- When you are finished click on Create screen.
Screen Settings
- Click on Edit. This will bring up a range of options you can customize to your liking.
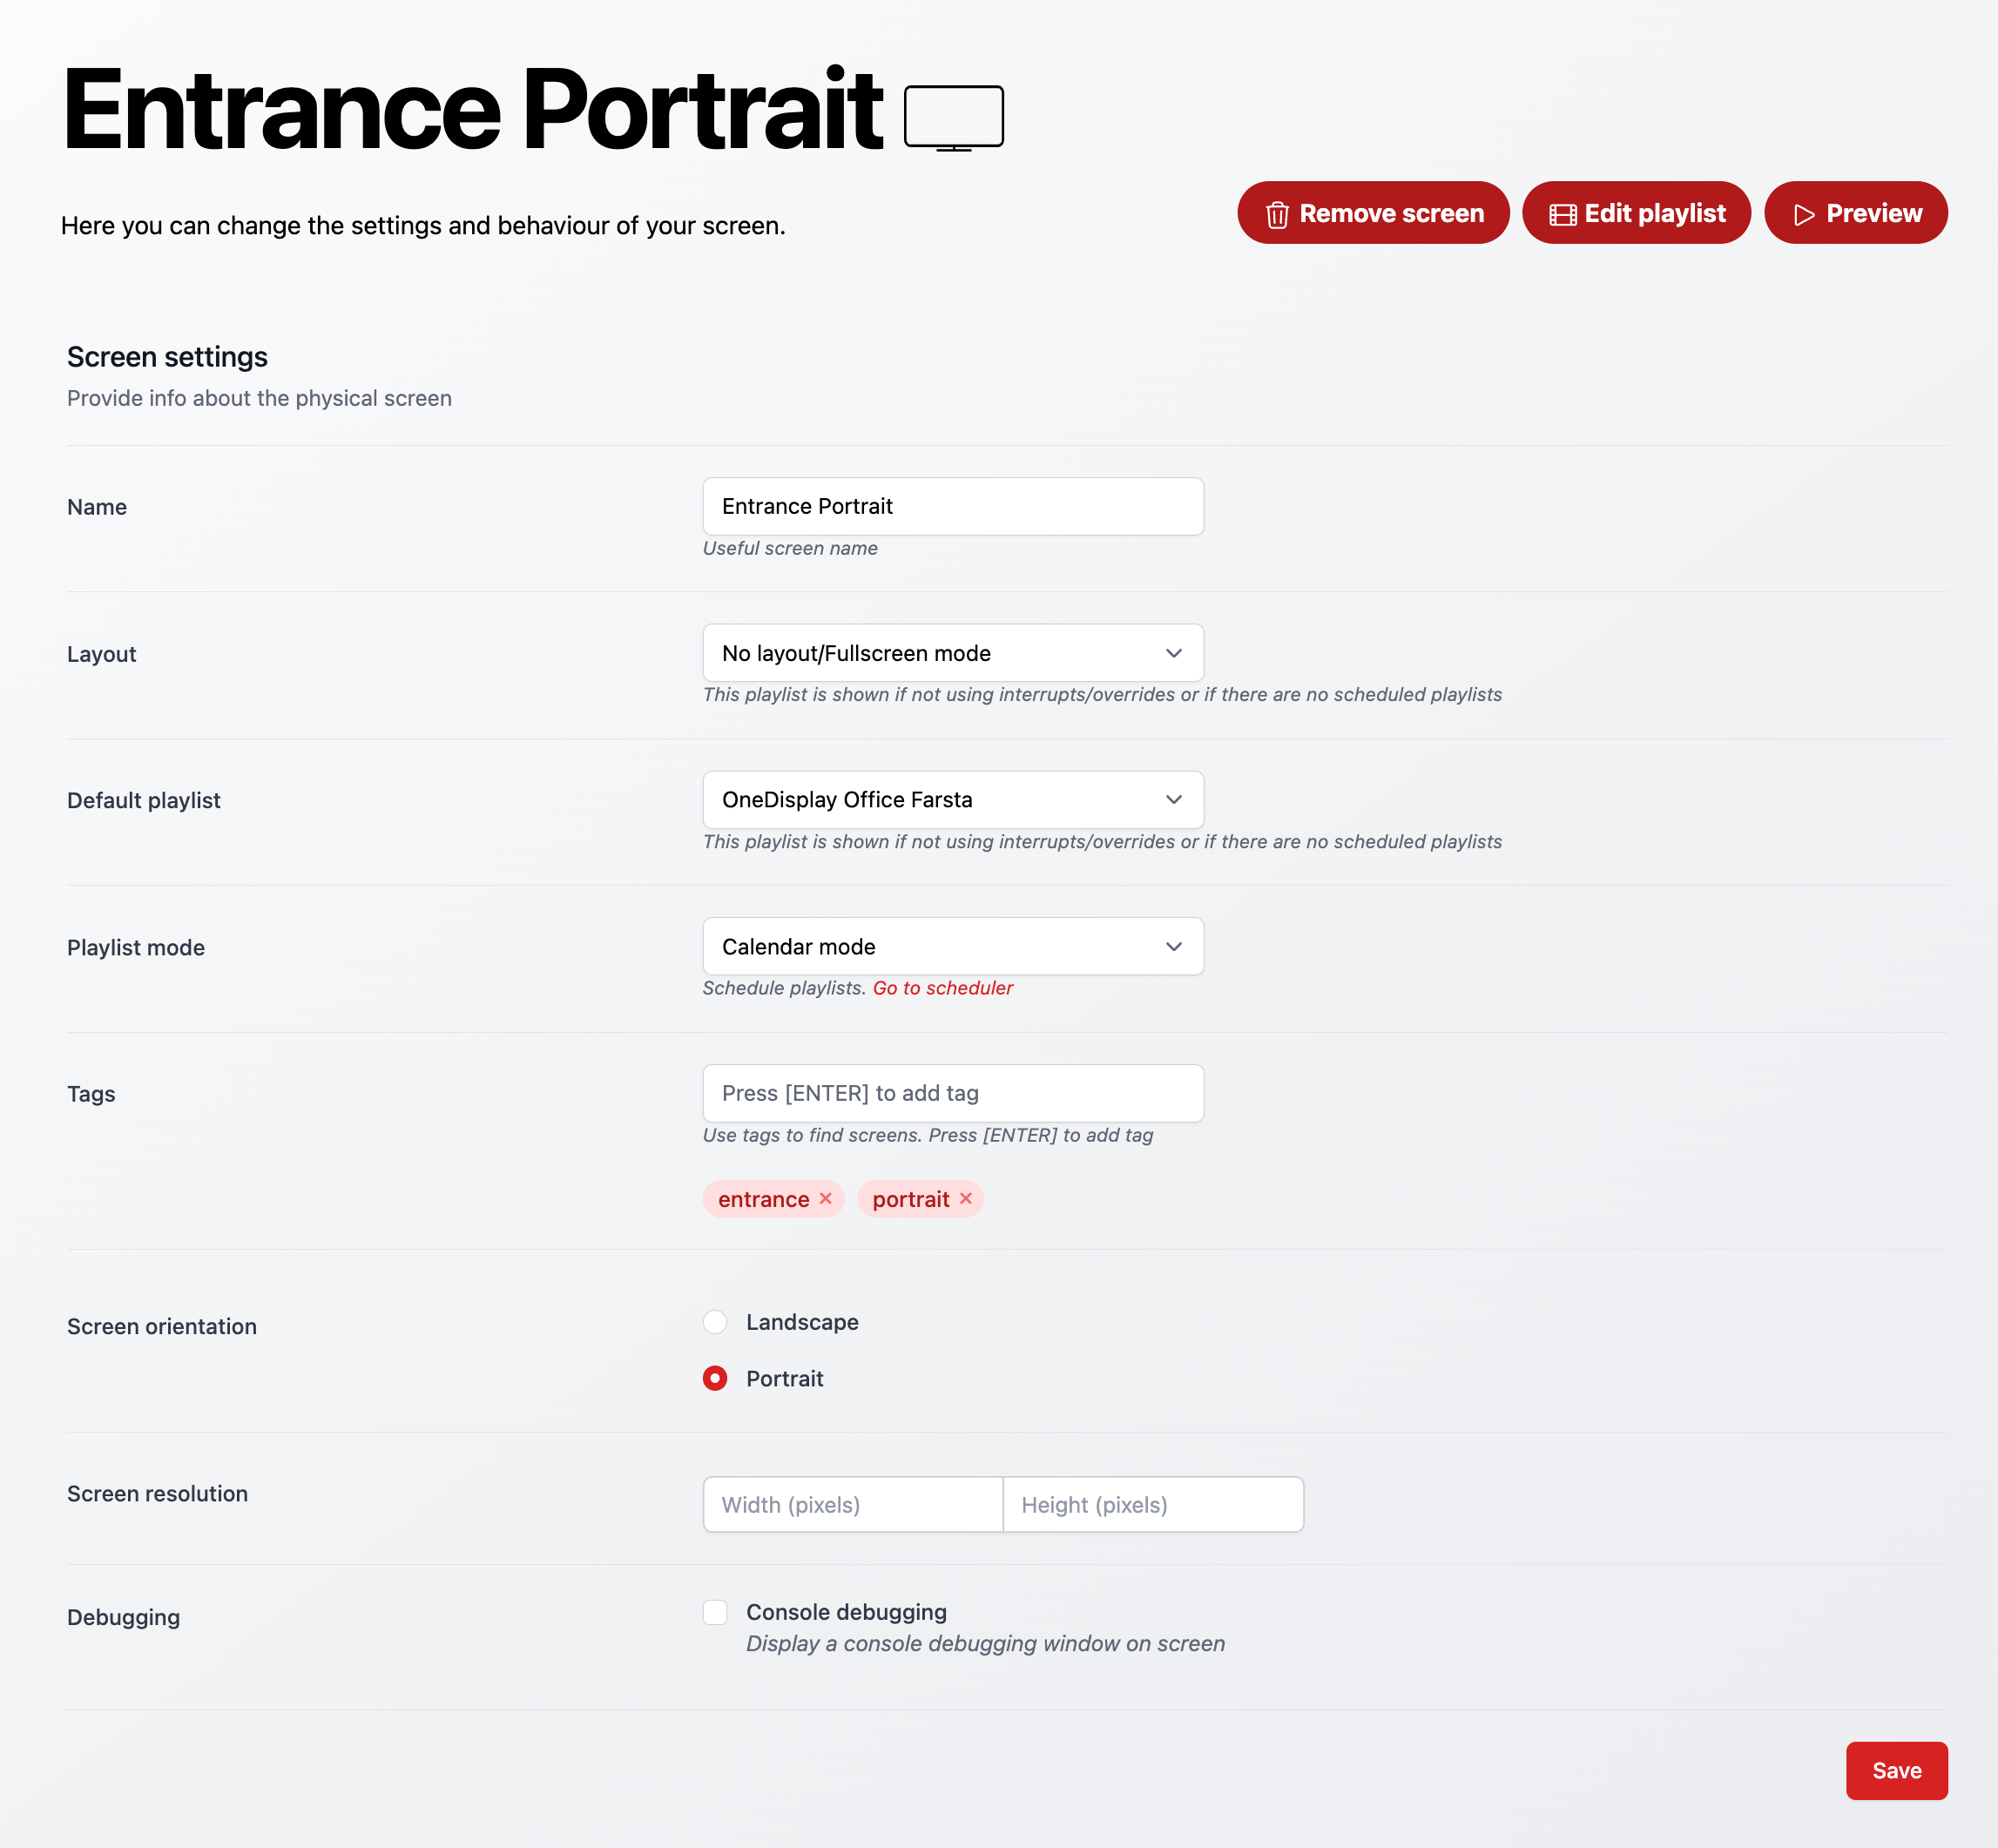
- Name- Rename your screen name.
- Layout- Choose your desired layout from the dropdown list if applicable.
- Default playlist - Choose your default playlist you want the screen to show from the
- Playlist mode - Leave as the default Calendar mode unless you are running an earlier version of OneDisplay.
- Tags - Enter relevant tag names. Click save.
- Screen orientation - Select Landscape or Portrait depending on the orientation of your screen. Click save.
This is only for preview purposes and will not affect your physical screen. - Screen resolution - Enter the resolution of your screen.
This is only for preview purposes and will not affect your physical screen. - Debugging - Check Console debugging to preview system information on screen.
This is primarily used for system maintenance by a qualified Engineer and not required for everyday use.
Remember to always Click Save after making any changes.
Scheduling via Screens
- Schedule chosen playlists to override your default playlist. Once your schedule has finished it will revert back to your default playlist.
- The schedule function can be found on the main Screens tab at the bottom of
any one of your screens.

- In the list view it can be found via clicking on the calendar icon on the right hand side of the screen.
- Click on Schedule. This will open up a new screen.
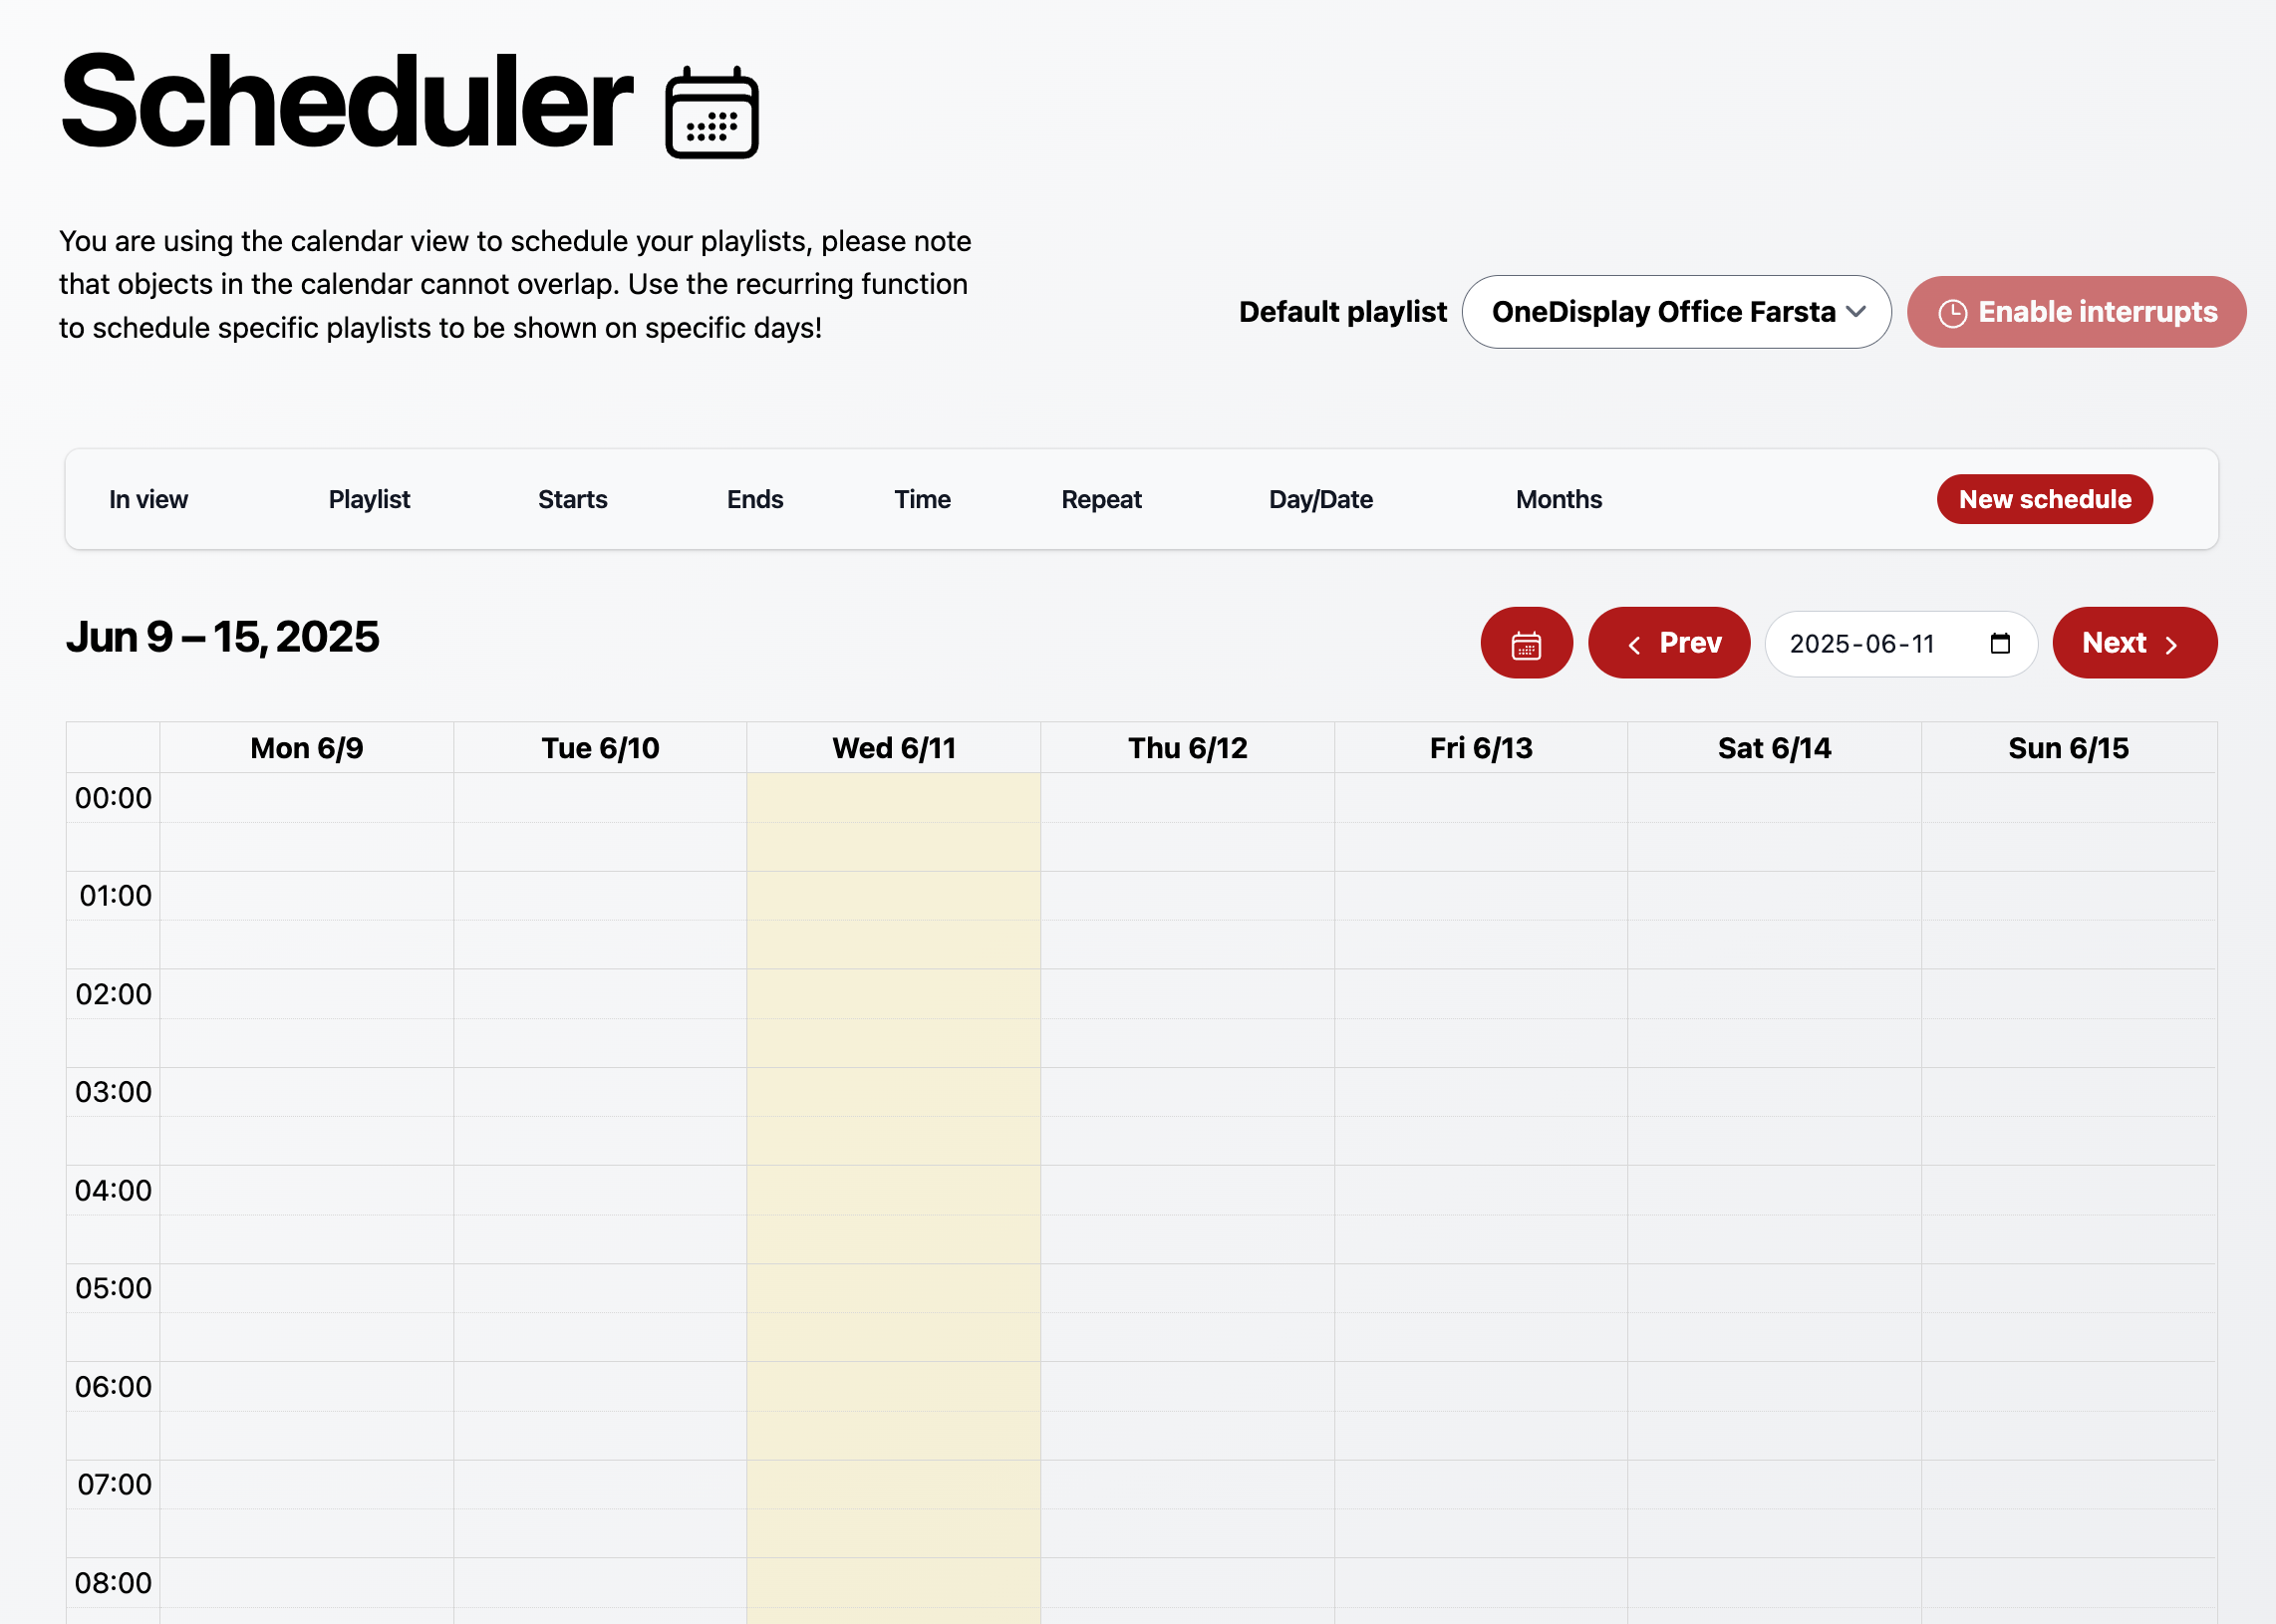
- Next to Default playlist you will see which playlist is set to default/fallback for your screen.
Add New Schedule
- Either click on the New schedule button or navigate to the calendar screen and click on your date and time. You don’t have to be precise. We can edit these later.
- A prompt box will appear looking similar to this:
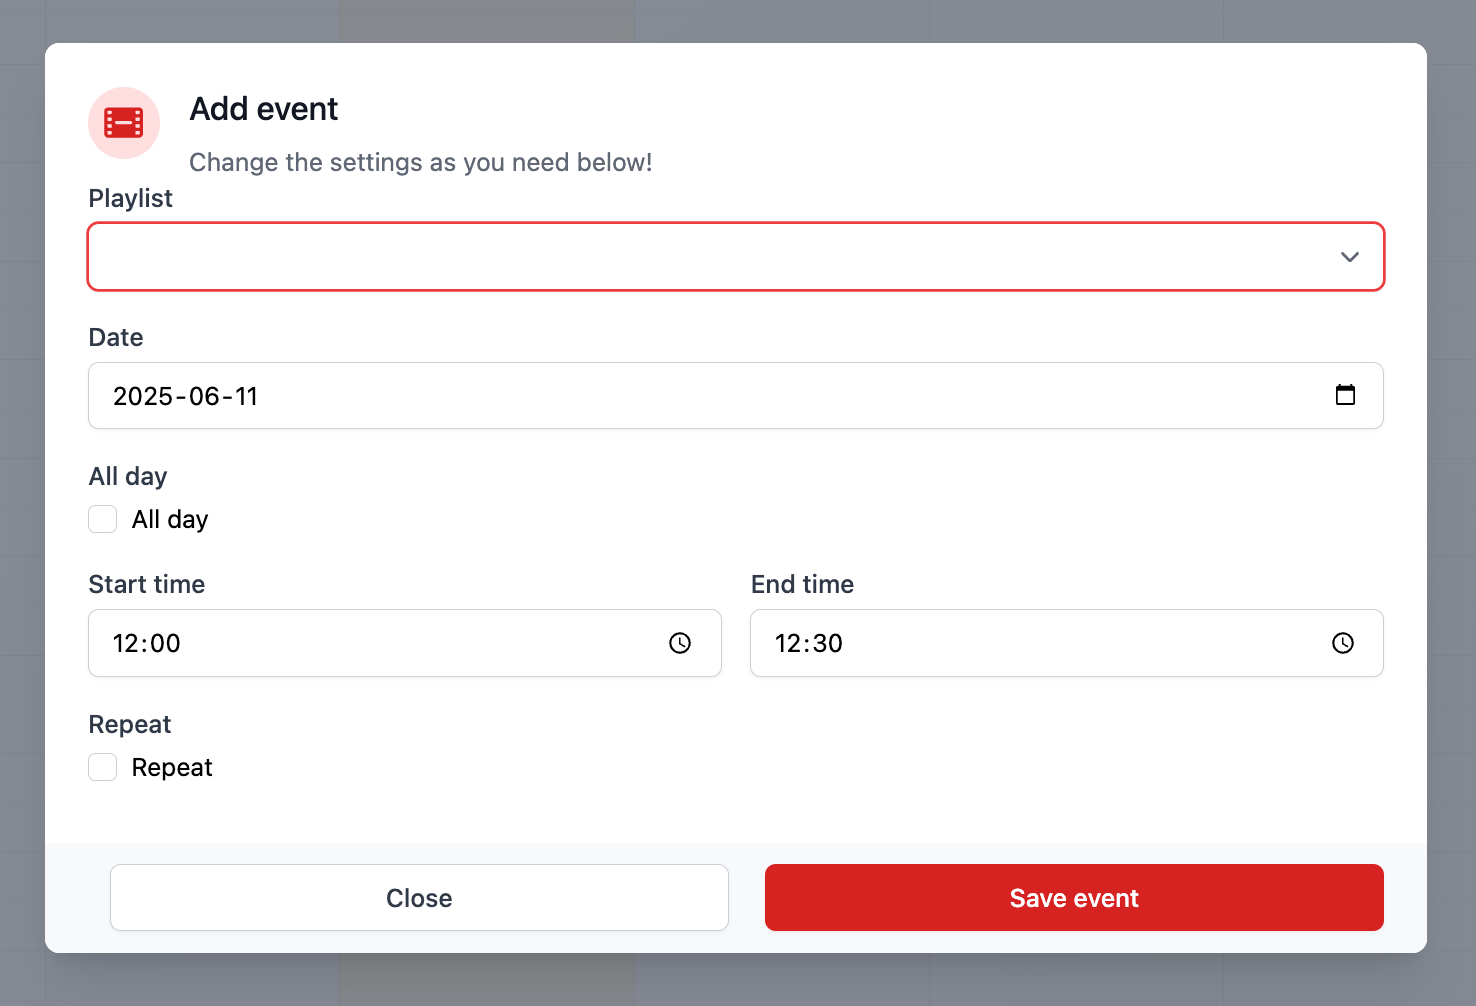
- From the Playlist dropdown menu, choose which playlist you wish to interrupt your current playlist.
- Edit dates and times and click Save Event. The scheduled playlist will now appear in the main schedule screen.
Advanced Scheduling
- Whilst scheduling an event click on the Repeat checkbox.
Repeat Frequency: Daily
- In the Repeat interval box enter the number of days you wish the event to
occur.
For example: 1= Everyday, 2 = Every 2 days, 3 = Every 3 days etc
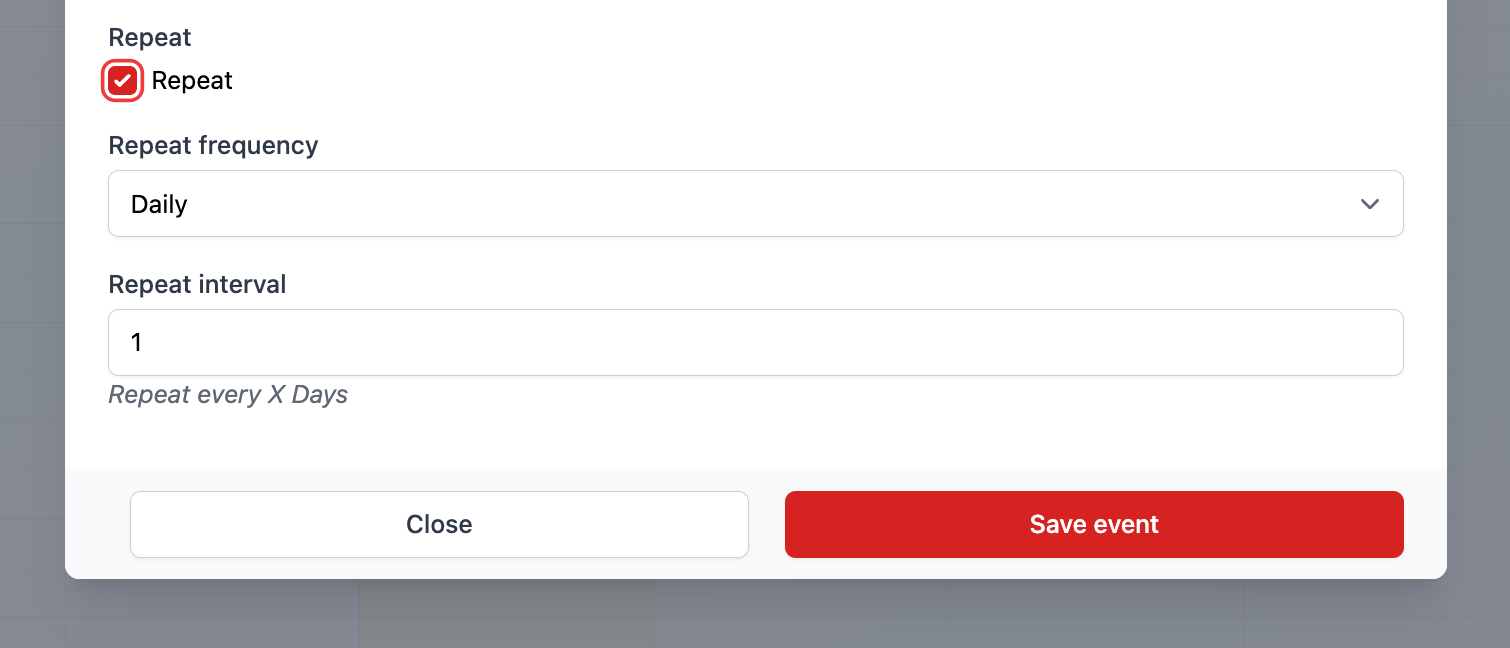
- Click Save event.
Repeat Frequency: Weekly
- In the Repeat interval box enter the number of weeks you wish the event to occur as explained above.
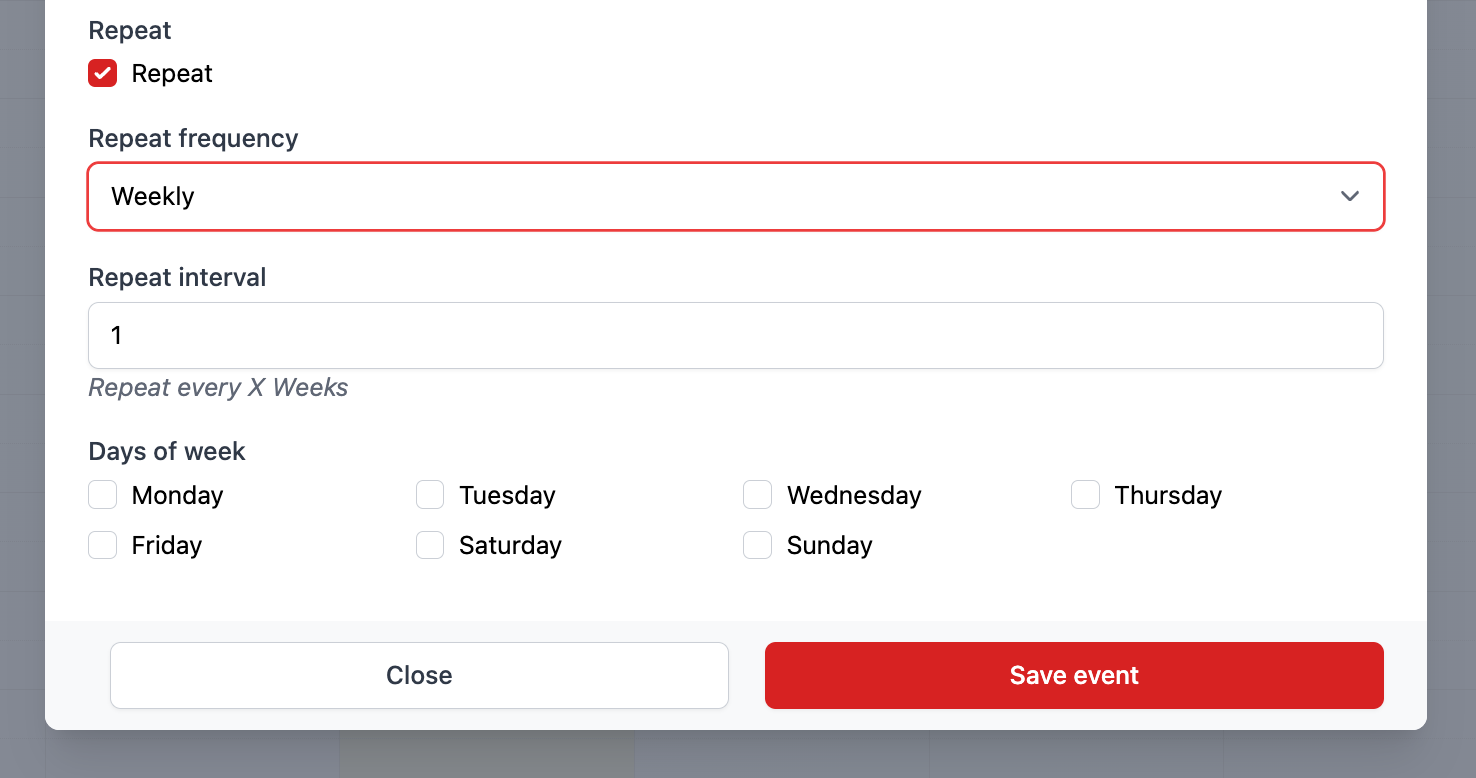
- You will then be given the additional option of choosing which days of the week via the checkboxes.
- Click Save event.
Repeat Frequency: Monthly
- In the Repeat interval box enter the number of months you wish the event to occur as explained above.
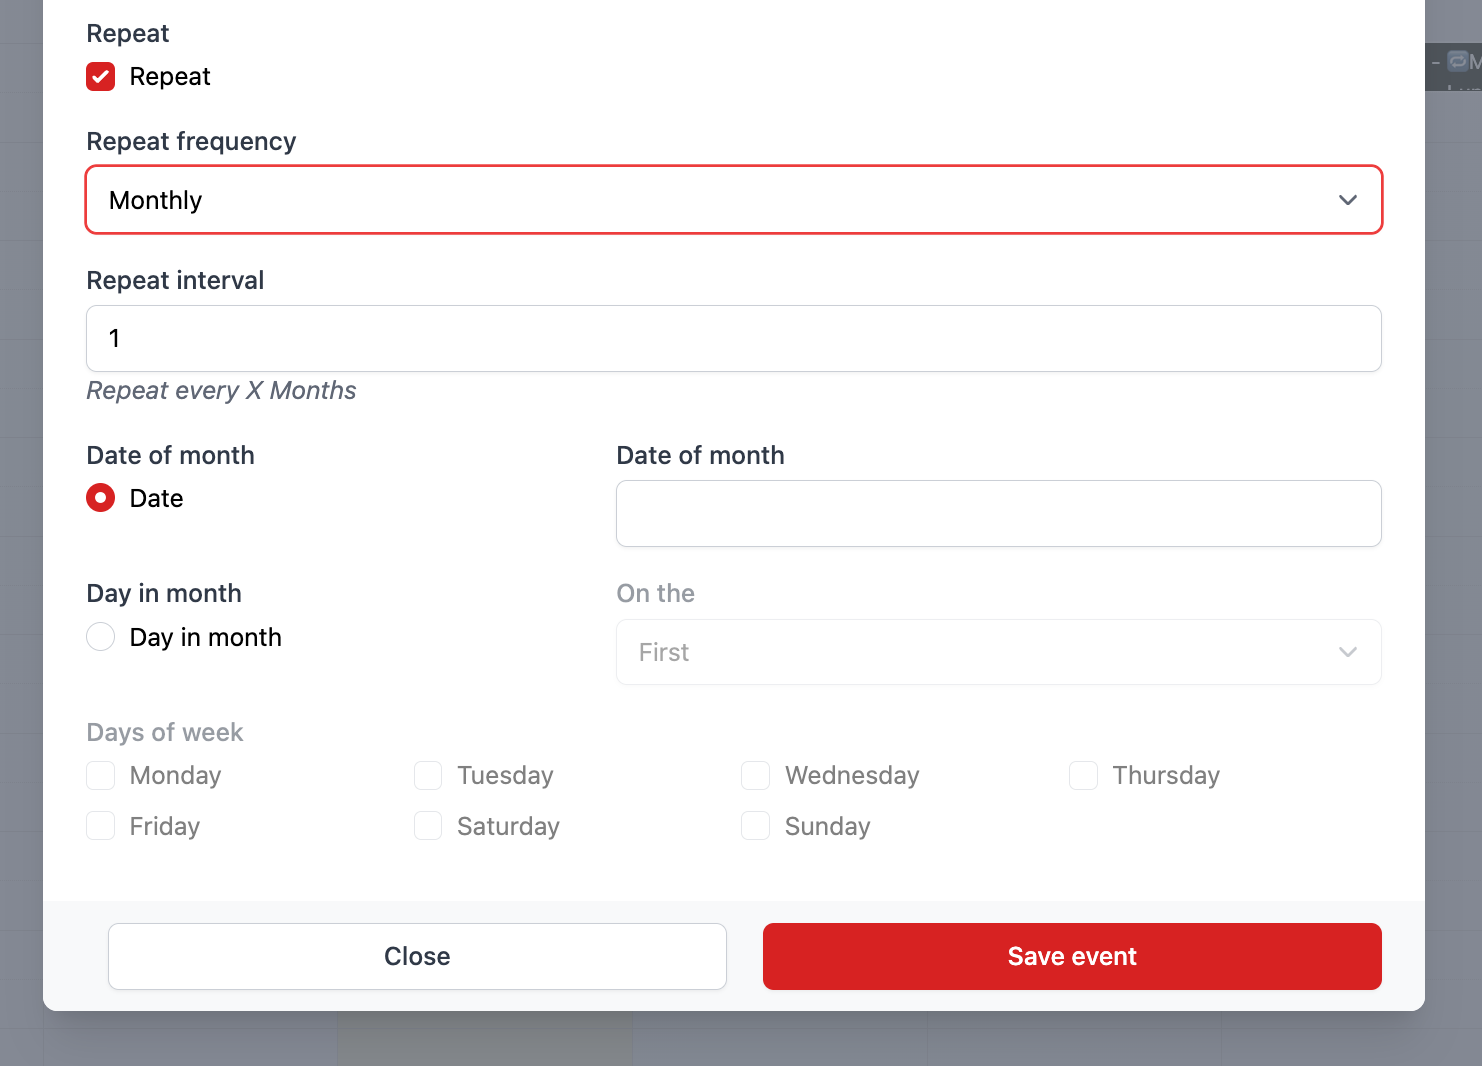
- You will then be given the additional option of choosing a specific Date of the month or Day in month.
- For the Date of the month enter the date by number.
- Alternatively click Day in month.
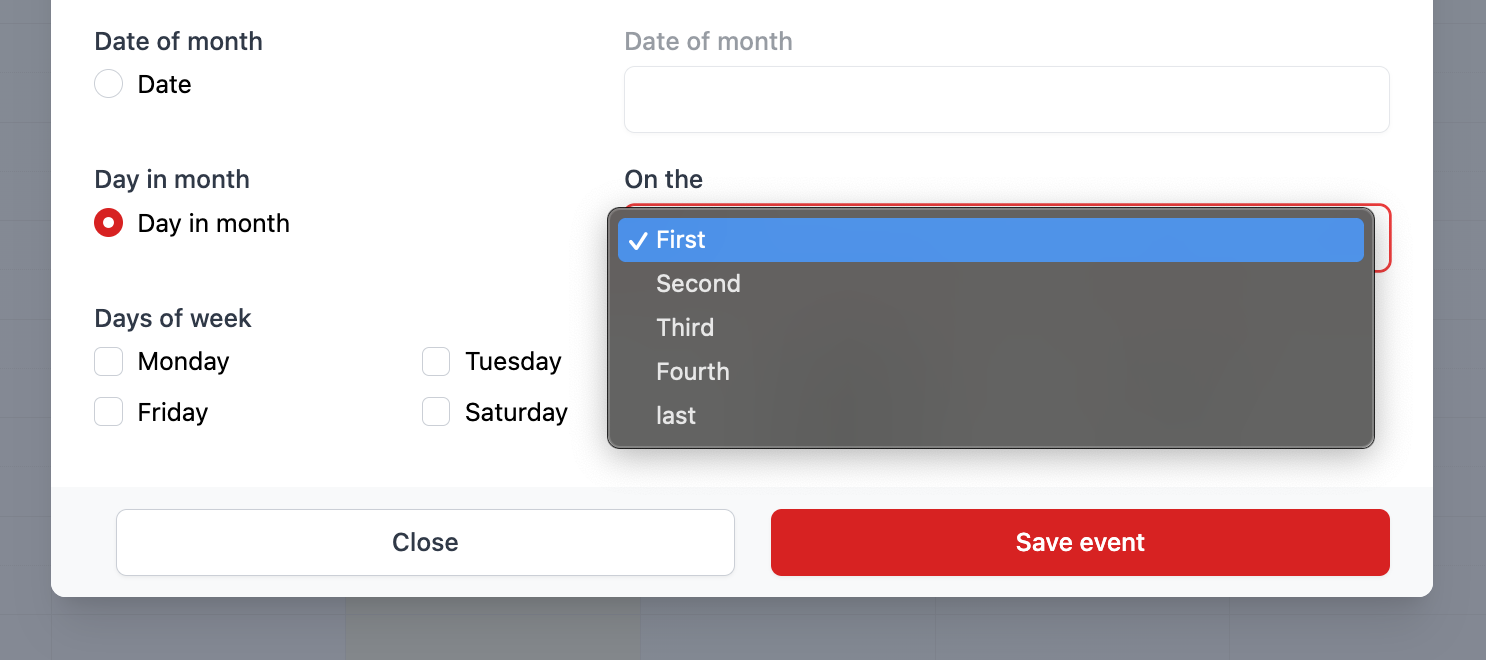
- Here you will be given the option to choose on the First, Second, Third, Fourth or Last day of the month.
- Under Days of week, choose via the checkboxes which day or days you want the schedule to target.
- Click Save event.
Repeat Frequency: Yearly
- In the Repeat interval box enter the number of years you wish the event to occur as explained above.
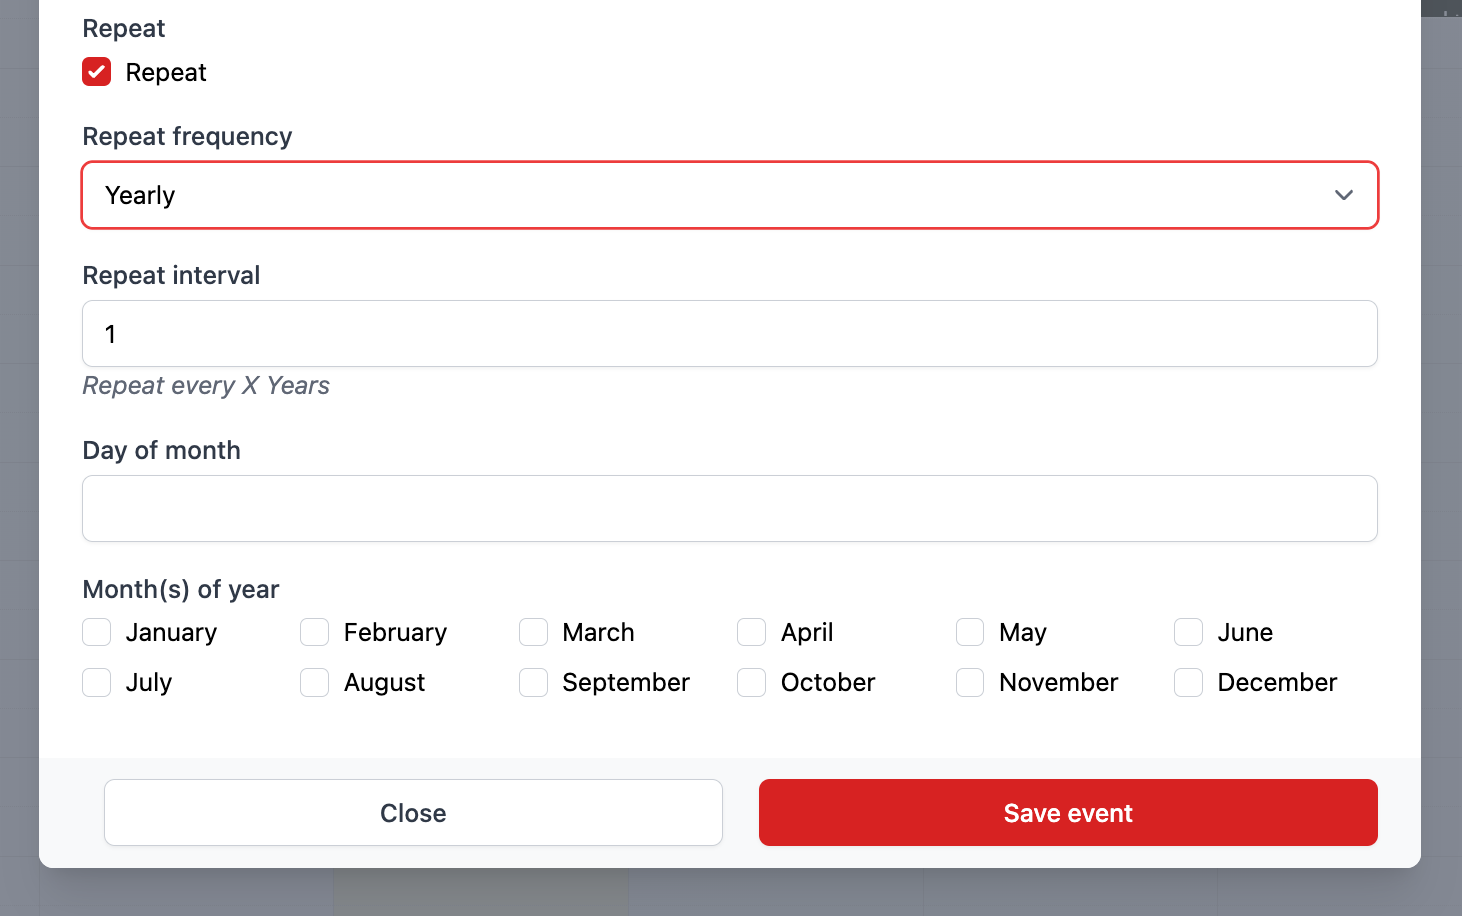
- Choose the Day of month by selecting a date by number.
- Then select the Month(s) of year via the checkboxes of months you want the schedule to target.
- Click Save event.
Disable / Delete Schedule
- To disable or delete a schedule click on the disable or delete button in the main schedule window.
