BrightSign installation
This section will cover all the settings you need to know about the BrightSign Media Player Configuration for OneDisplay.
Preparation
- Unpack the media player.
- Insert the MicroSD card and close the cover.
- Do not connect the player until Verify installation.
Start BrightAuthor Connected
- Click Connect to BSN.Cloud.
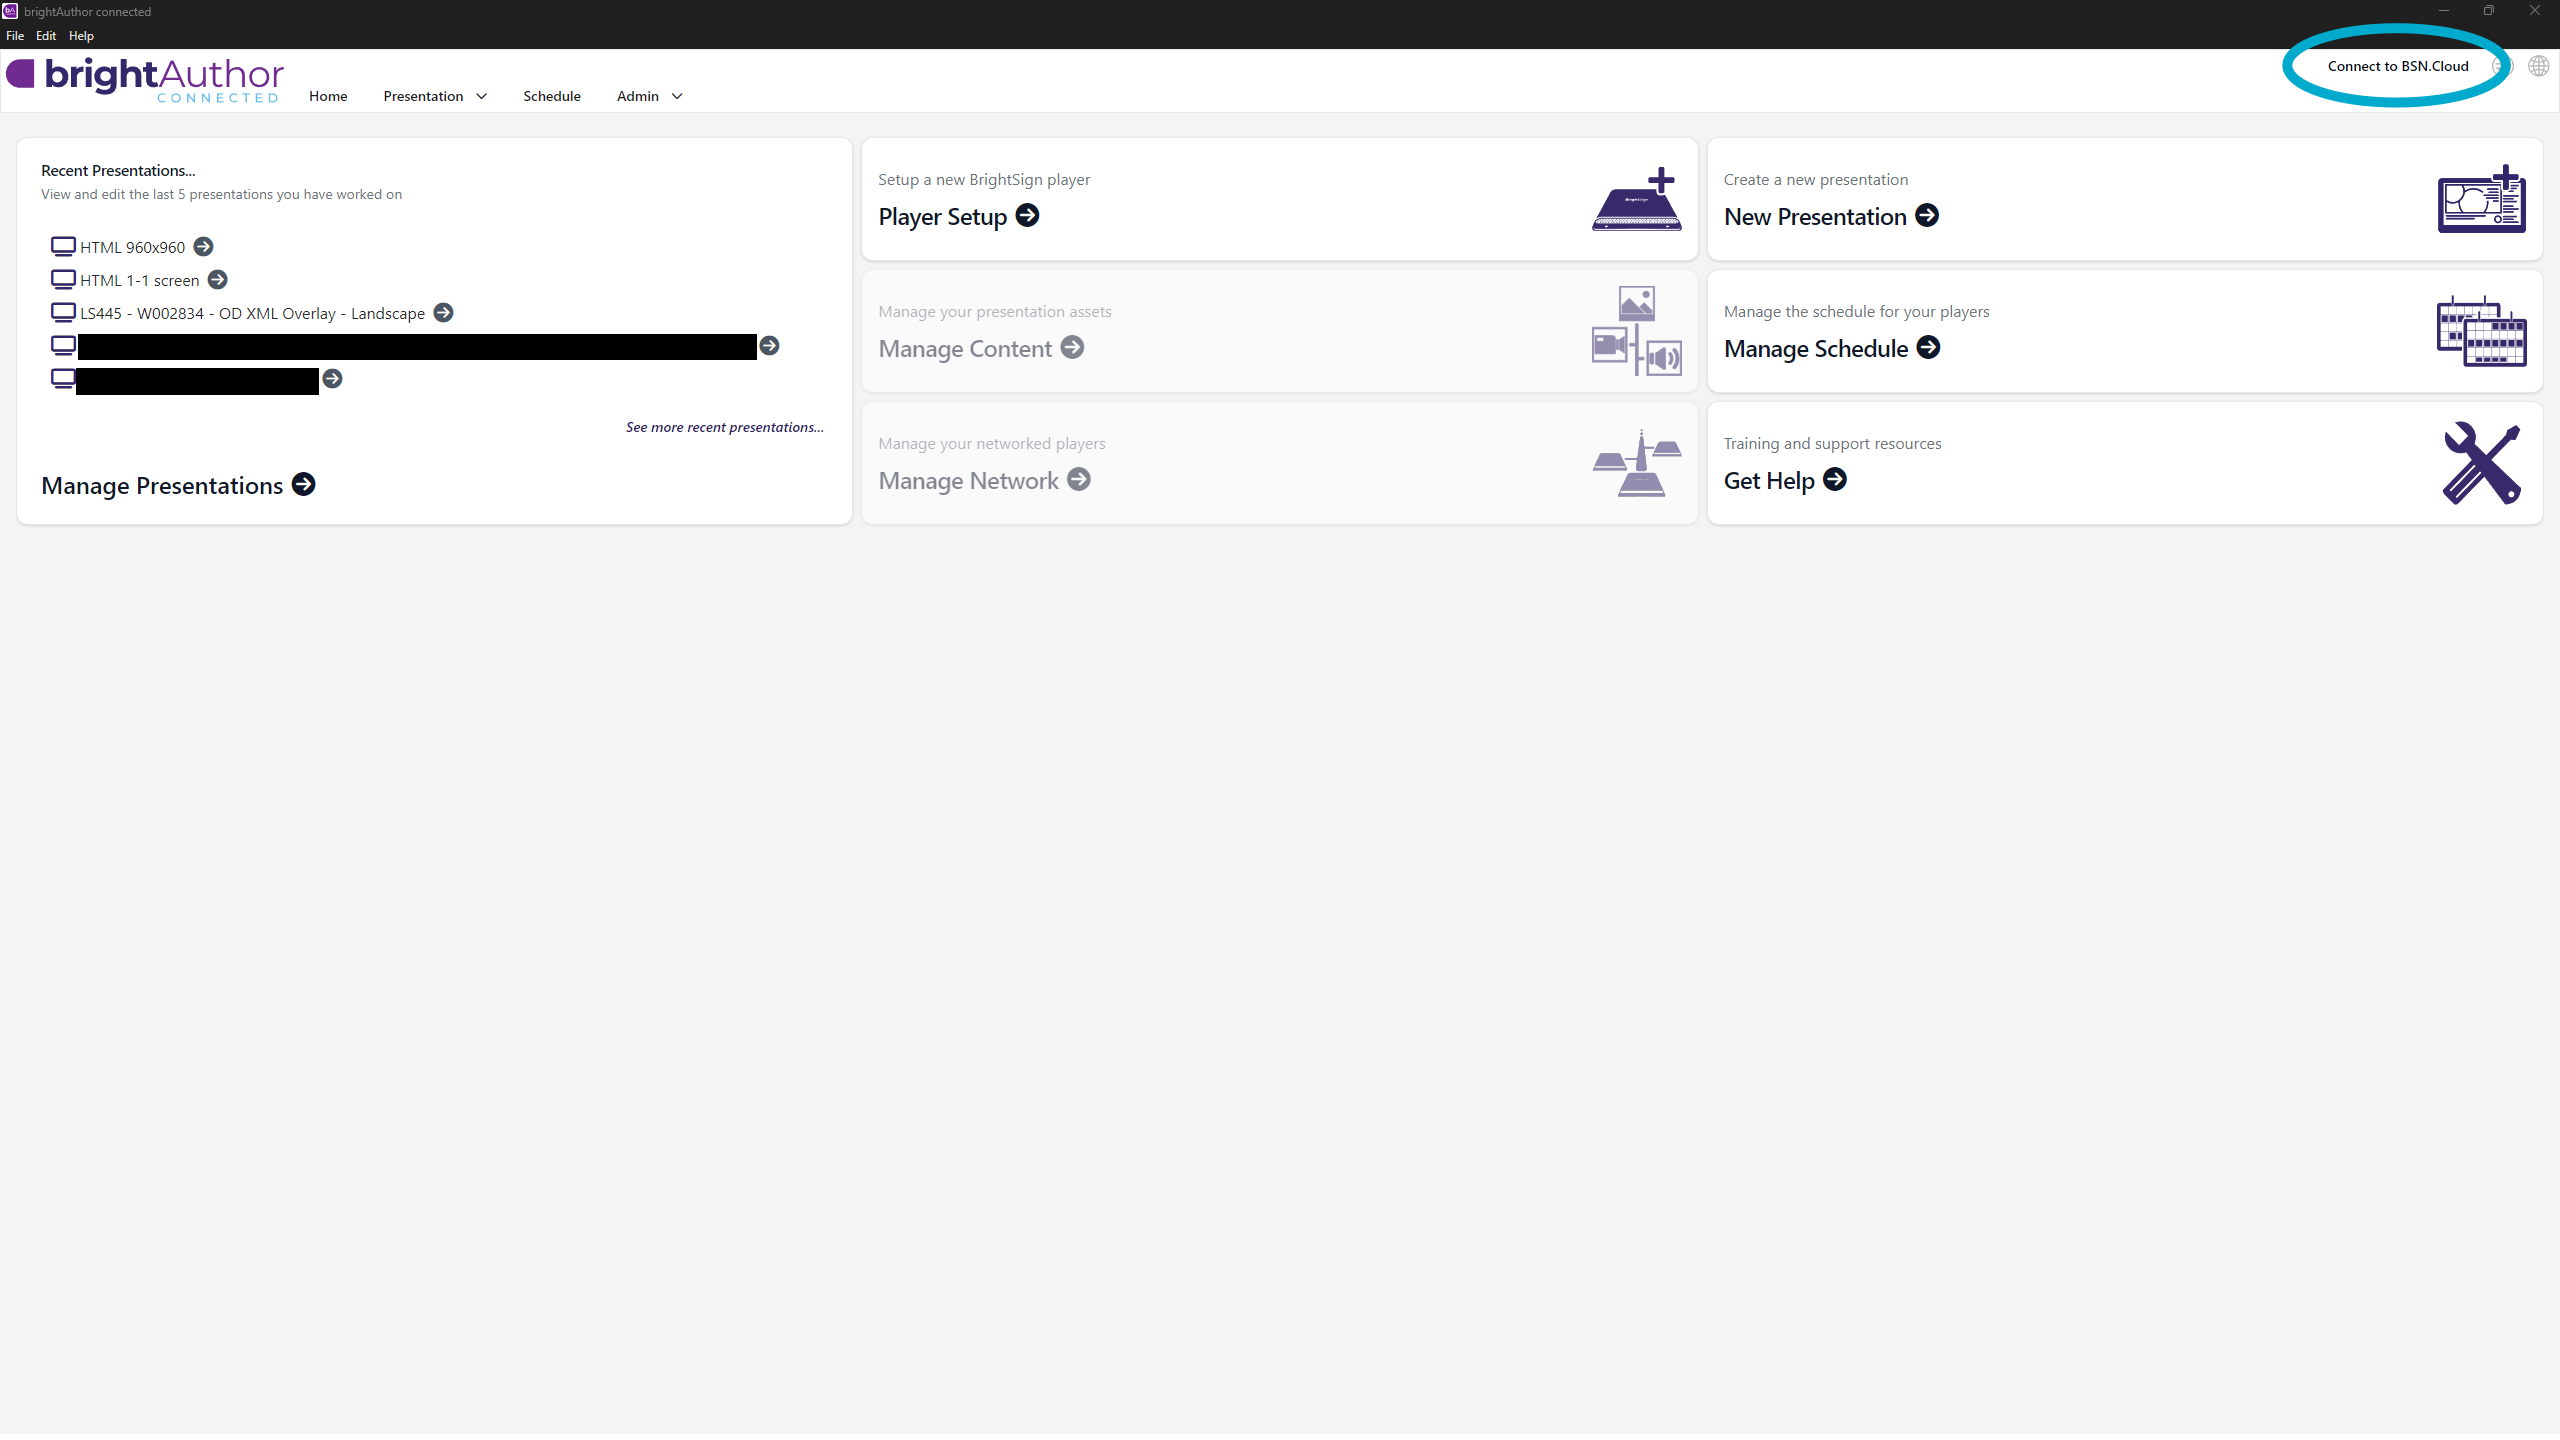
- Log in using your BSN credentials.
- Select the network that you are going to use.
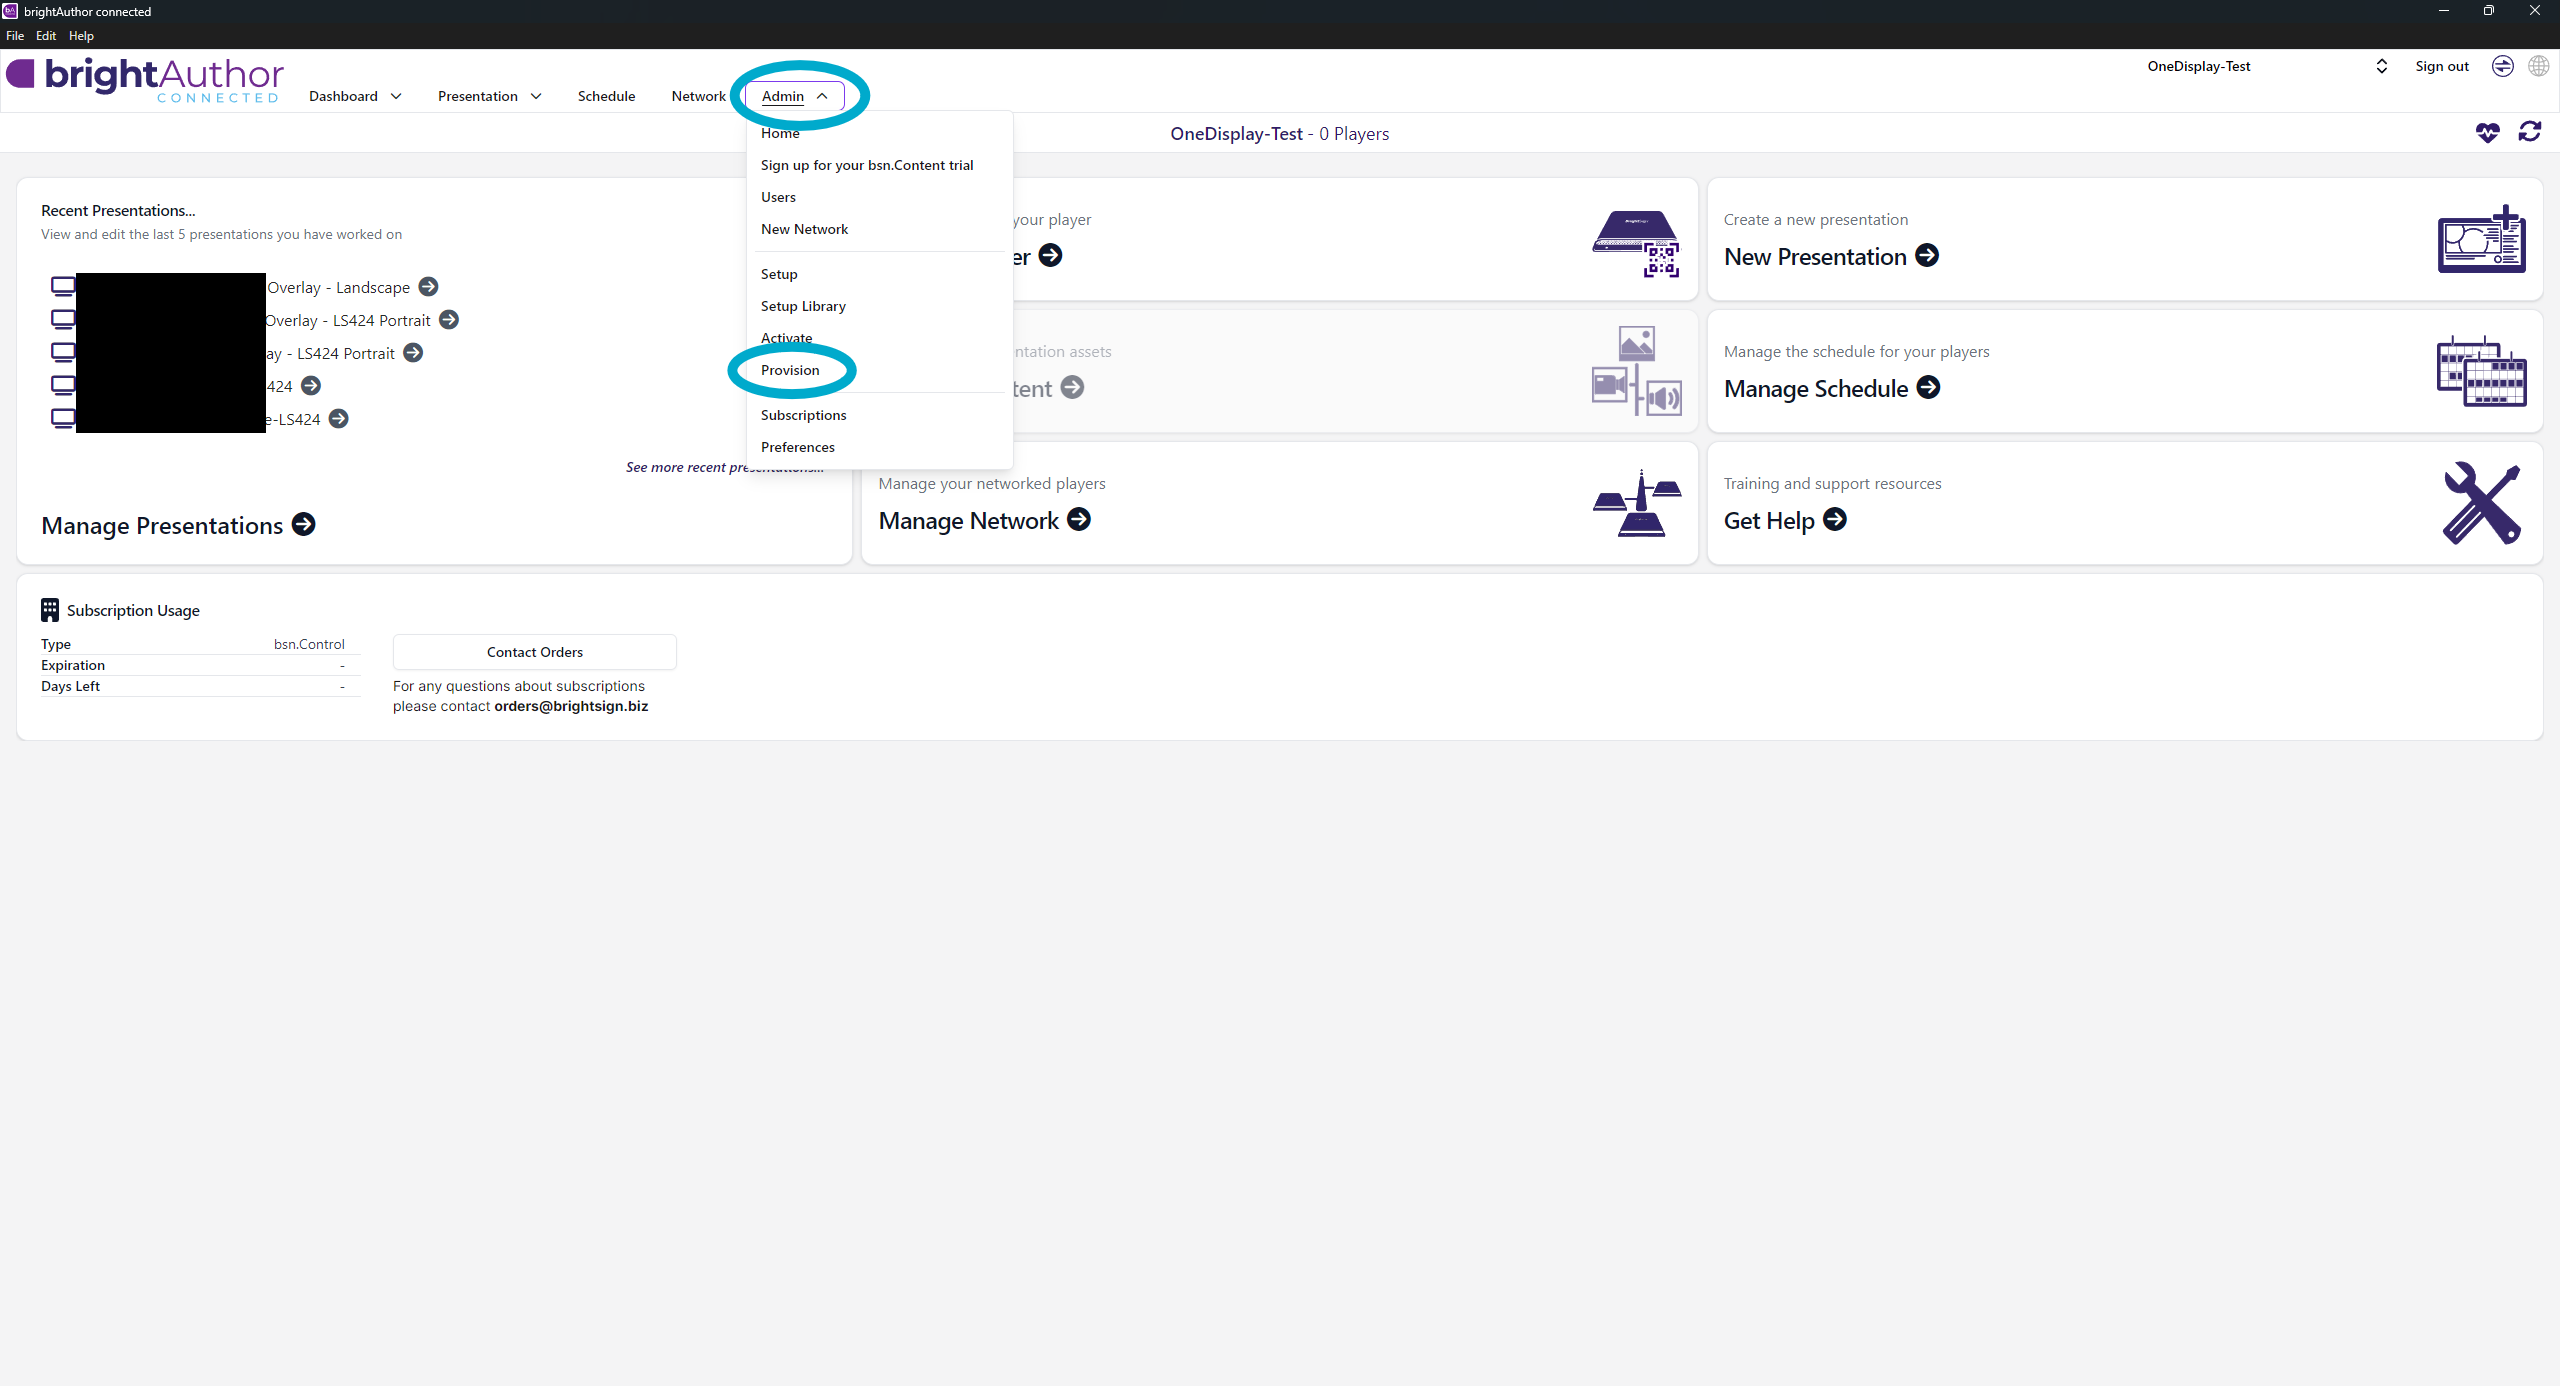
Add Player in Provision
- Click the arrow next to Admin and select Provision.
- Click + Add Player. Fill in the popup:
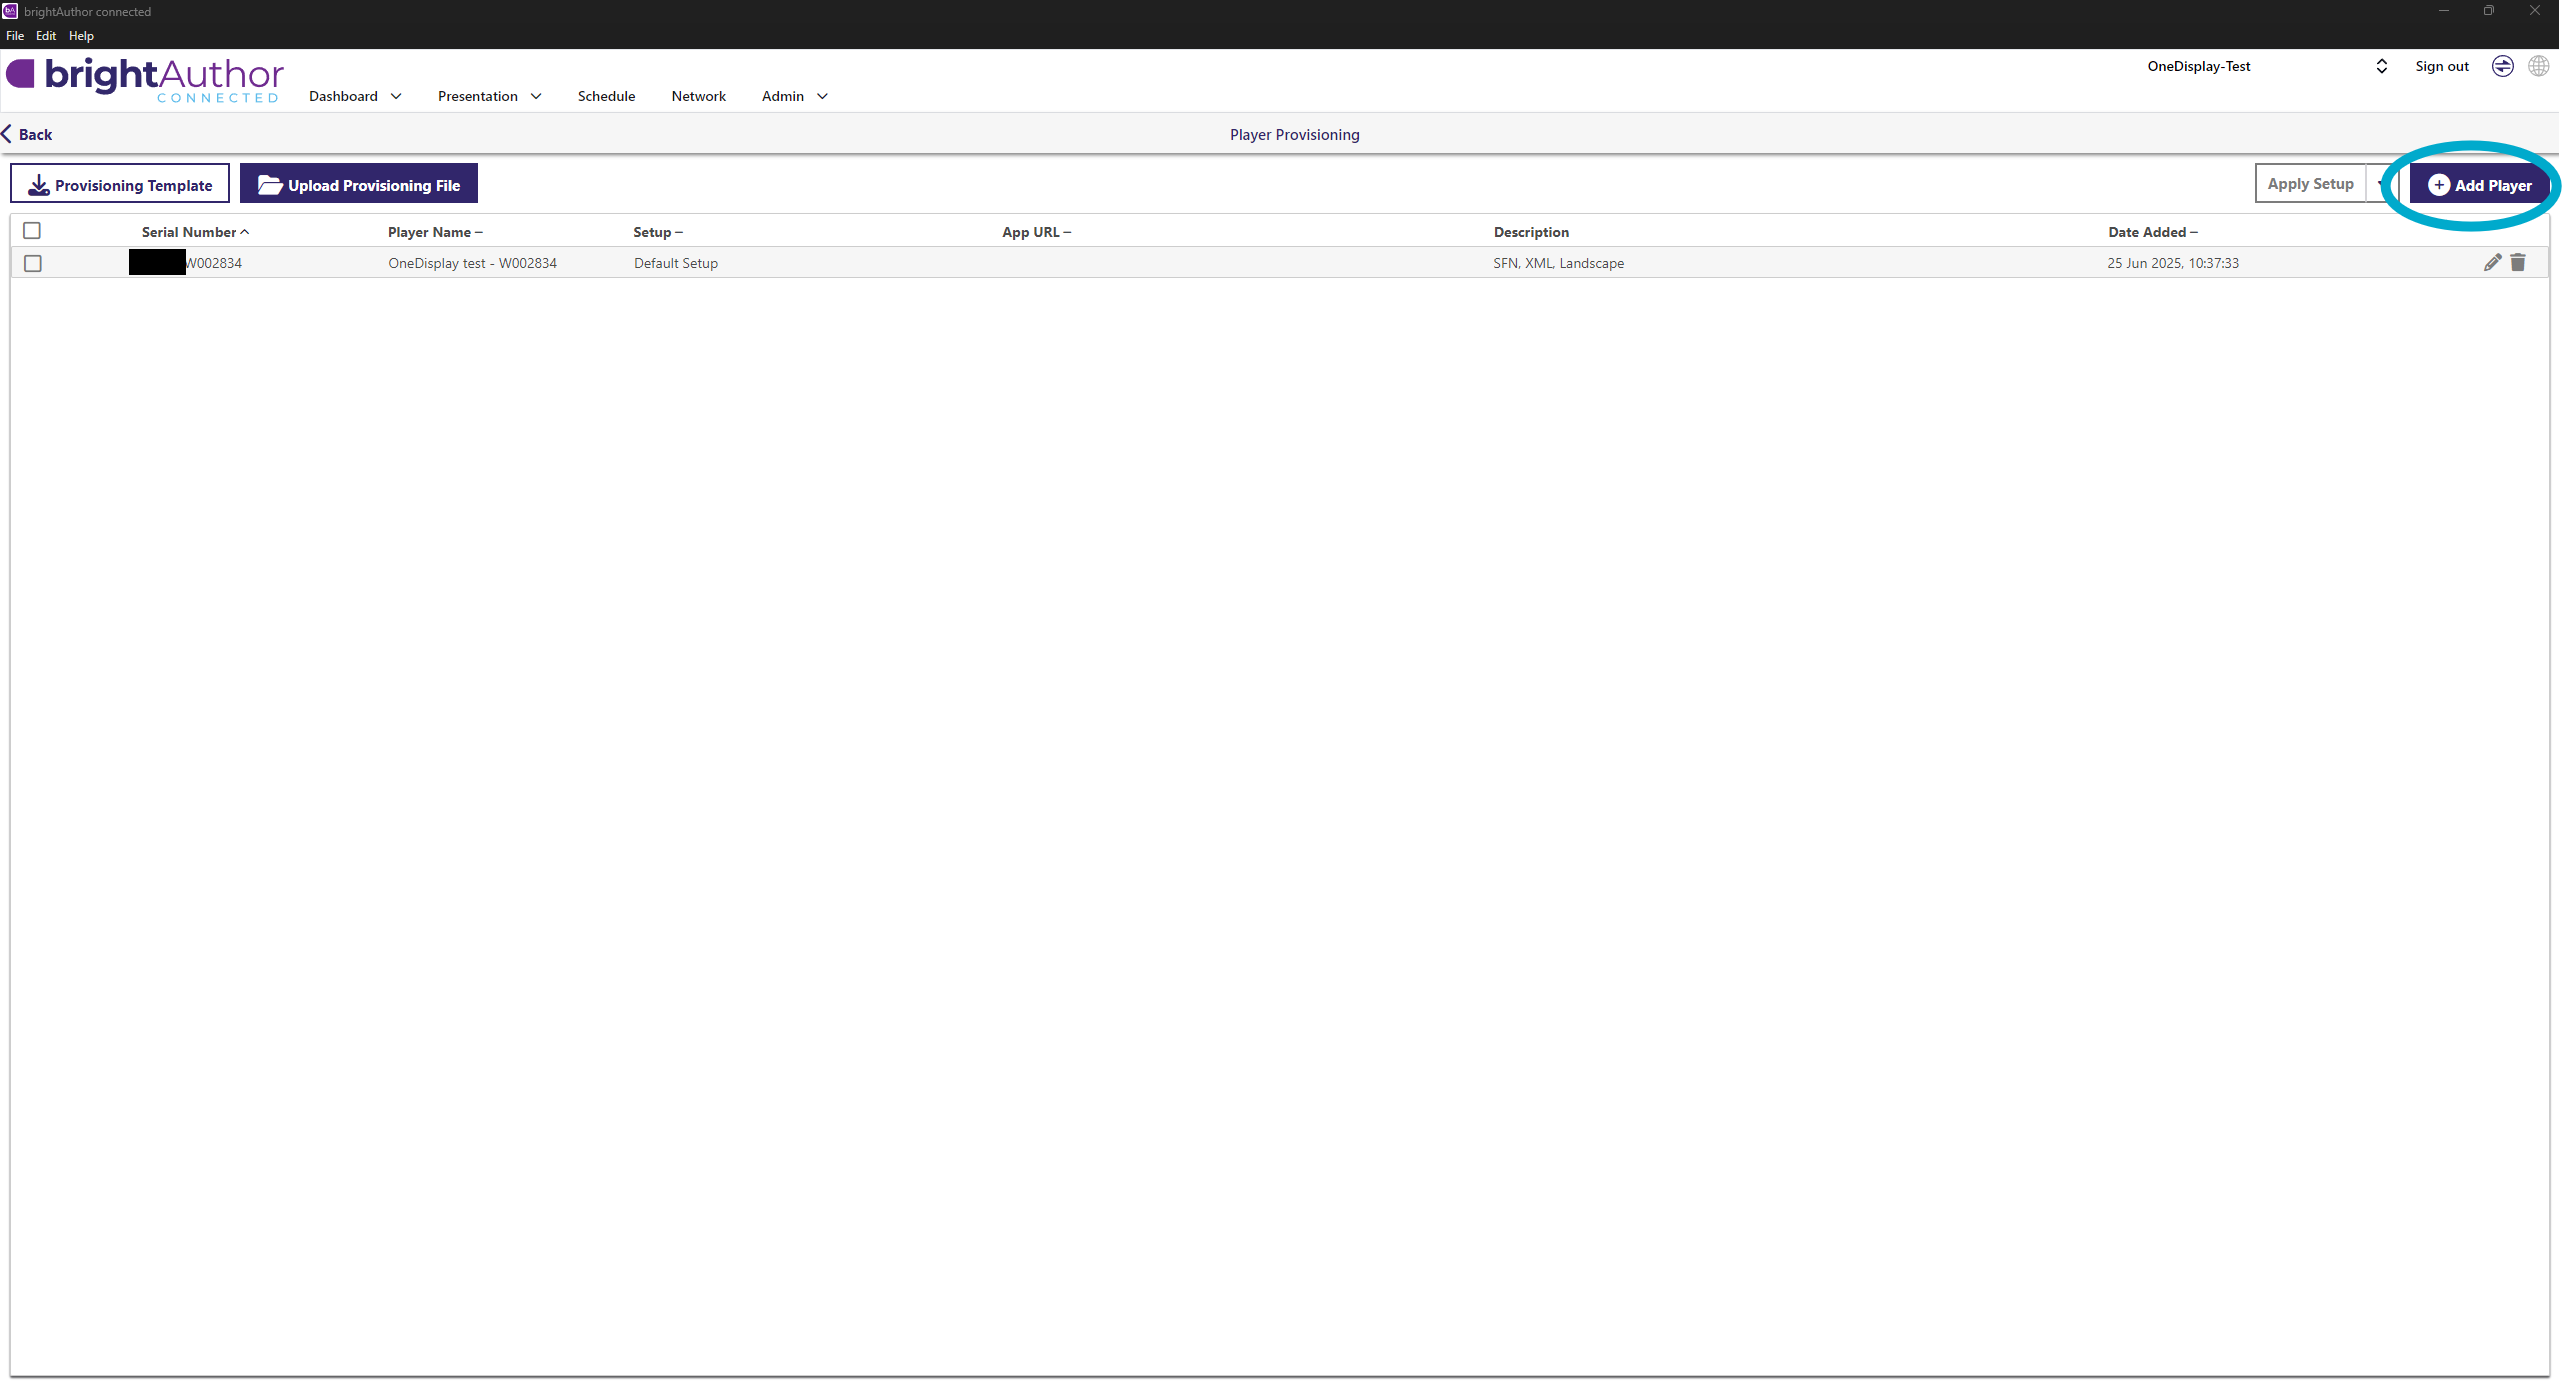

- Player Serial Number: full serial number
- Player Name: Chain – City – last 7 characters of serial number
- Example:
Kungsgatan – W002834 - Note: last 7 characters of the serial number identify the player
- Example:
- Player Description: SFN, XML, rotation
- Use Portrait for vertical and Landscape for horizontal screens
👉 Tip: Copy the Player Name text, it will be used in the next step.
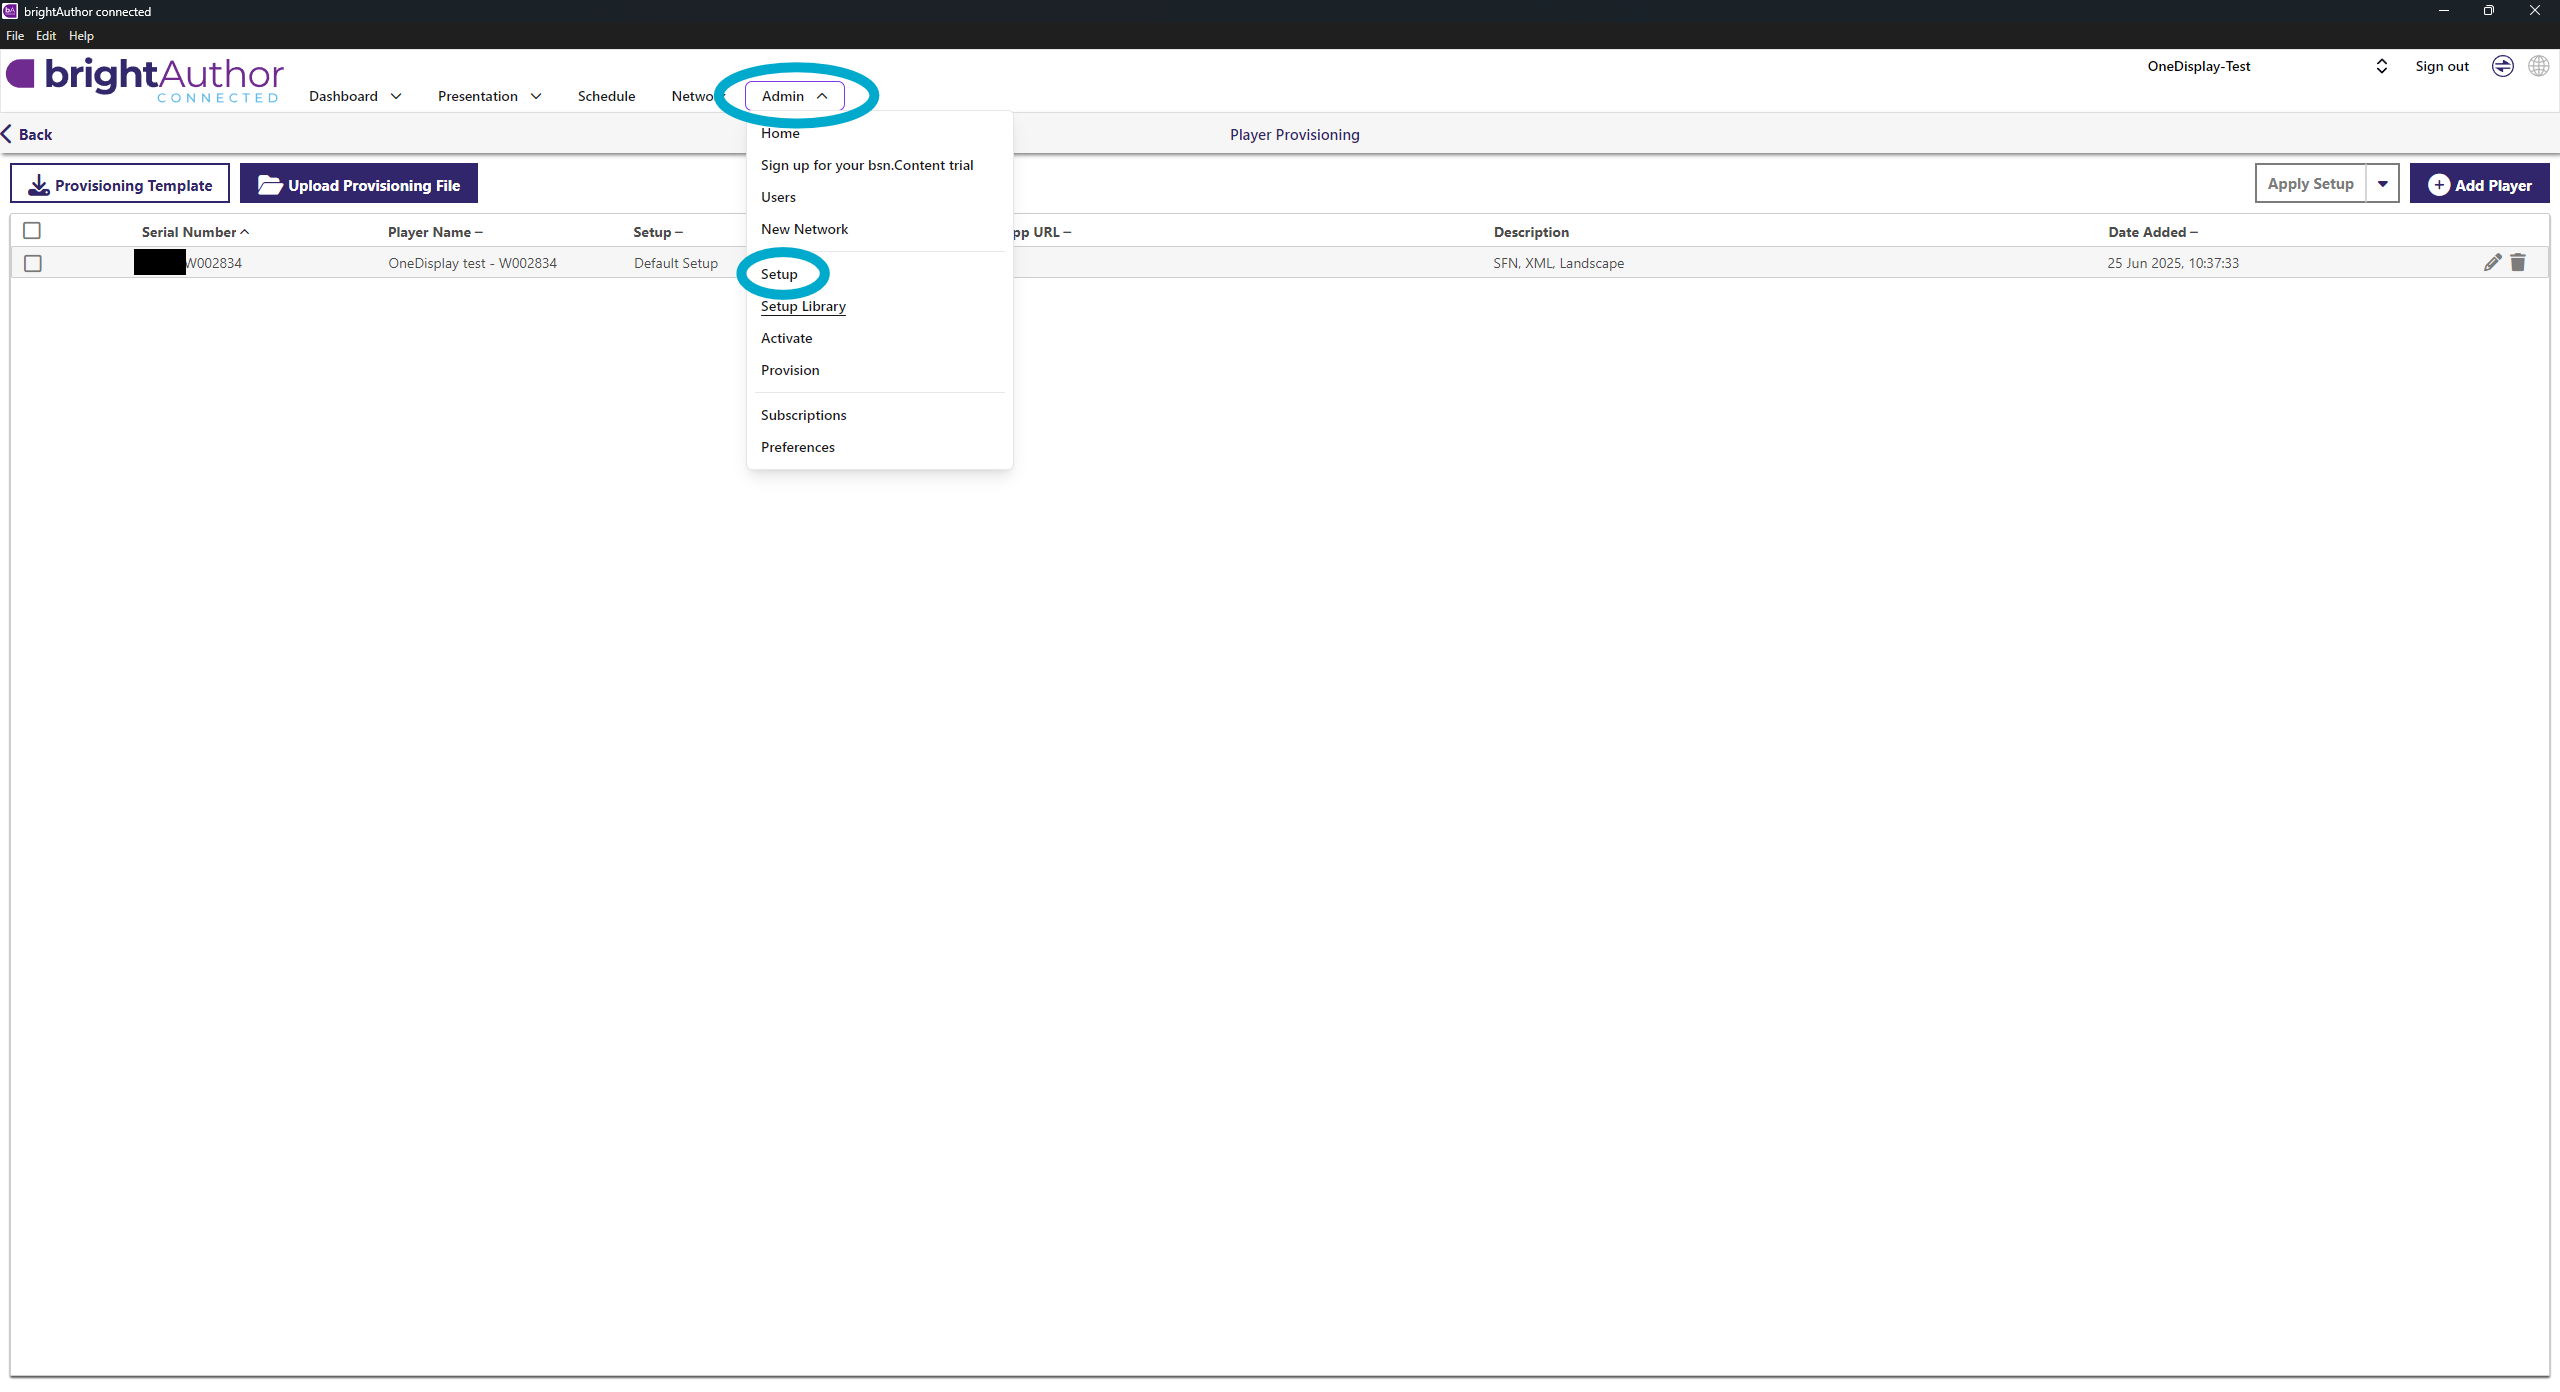
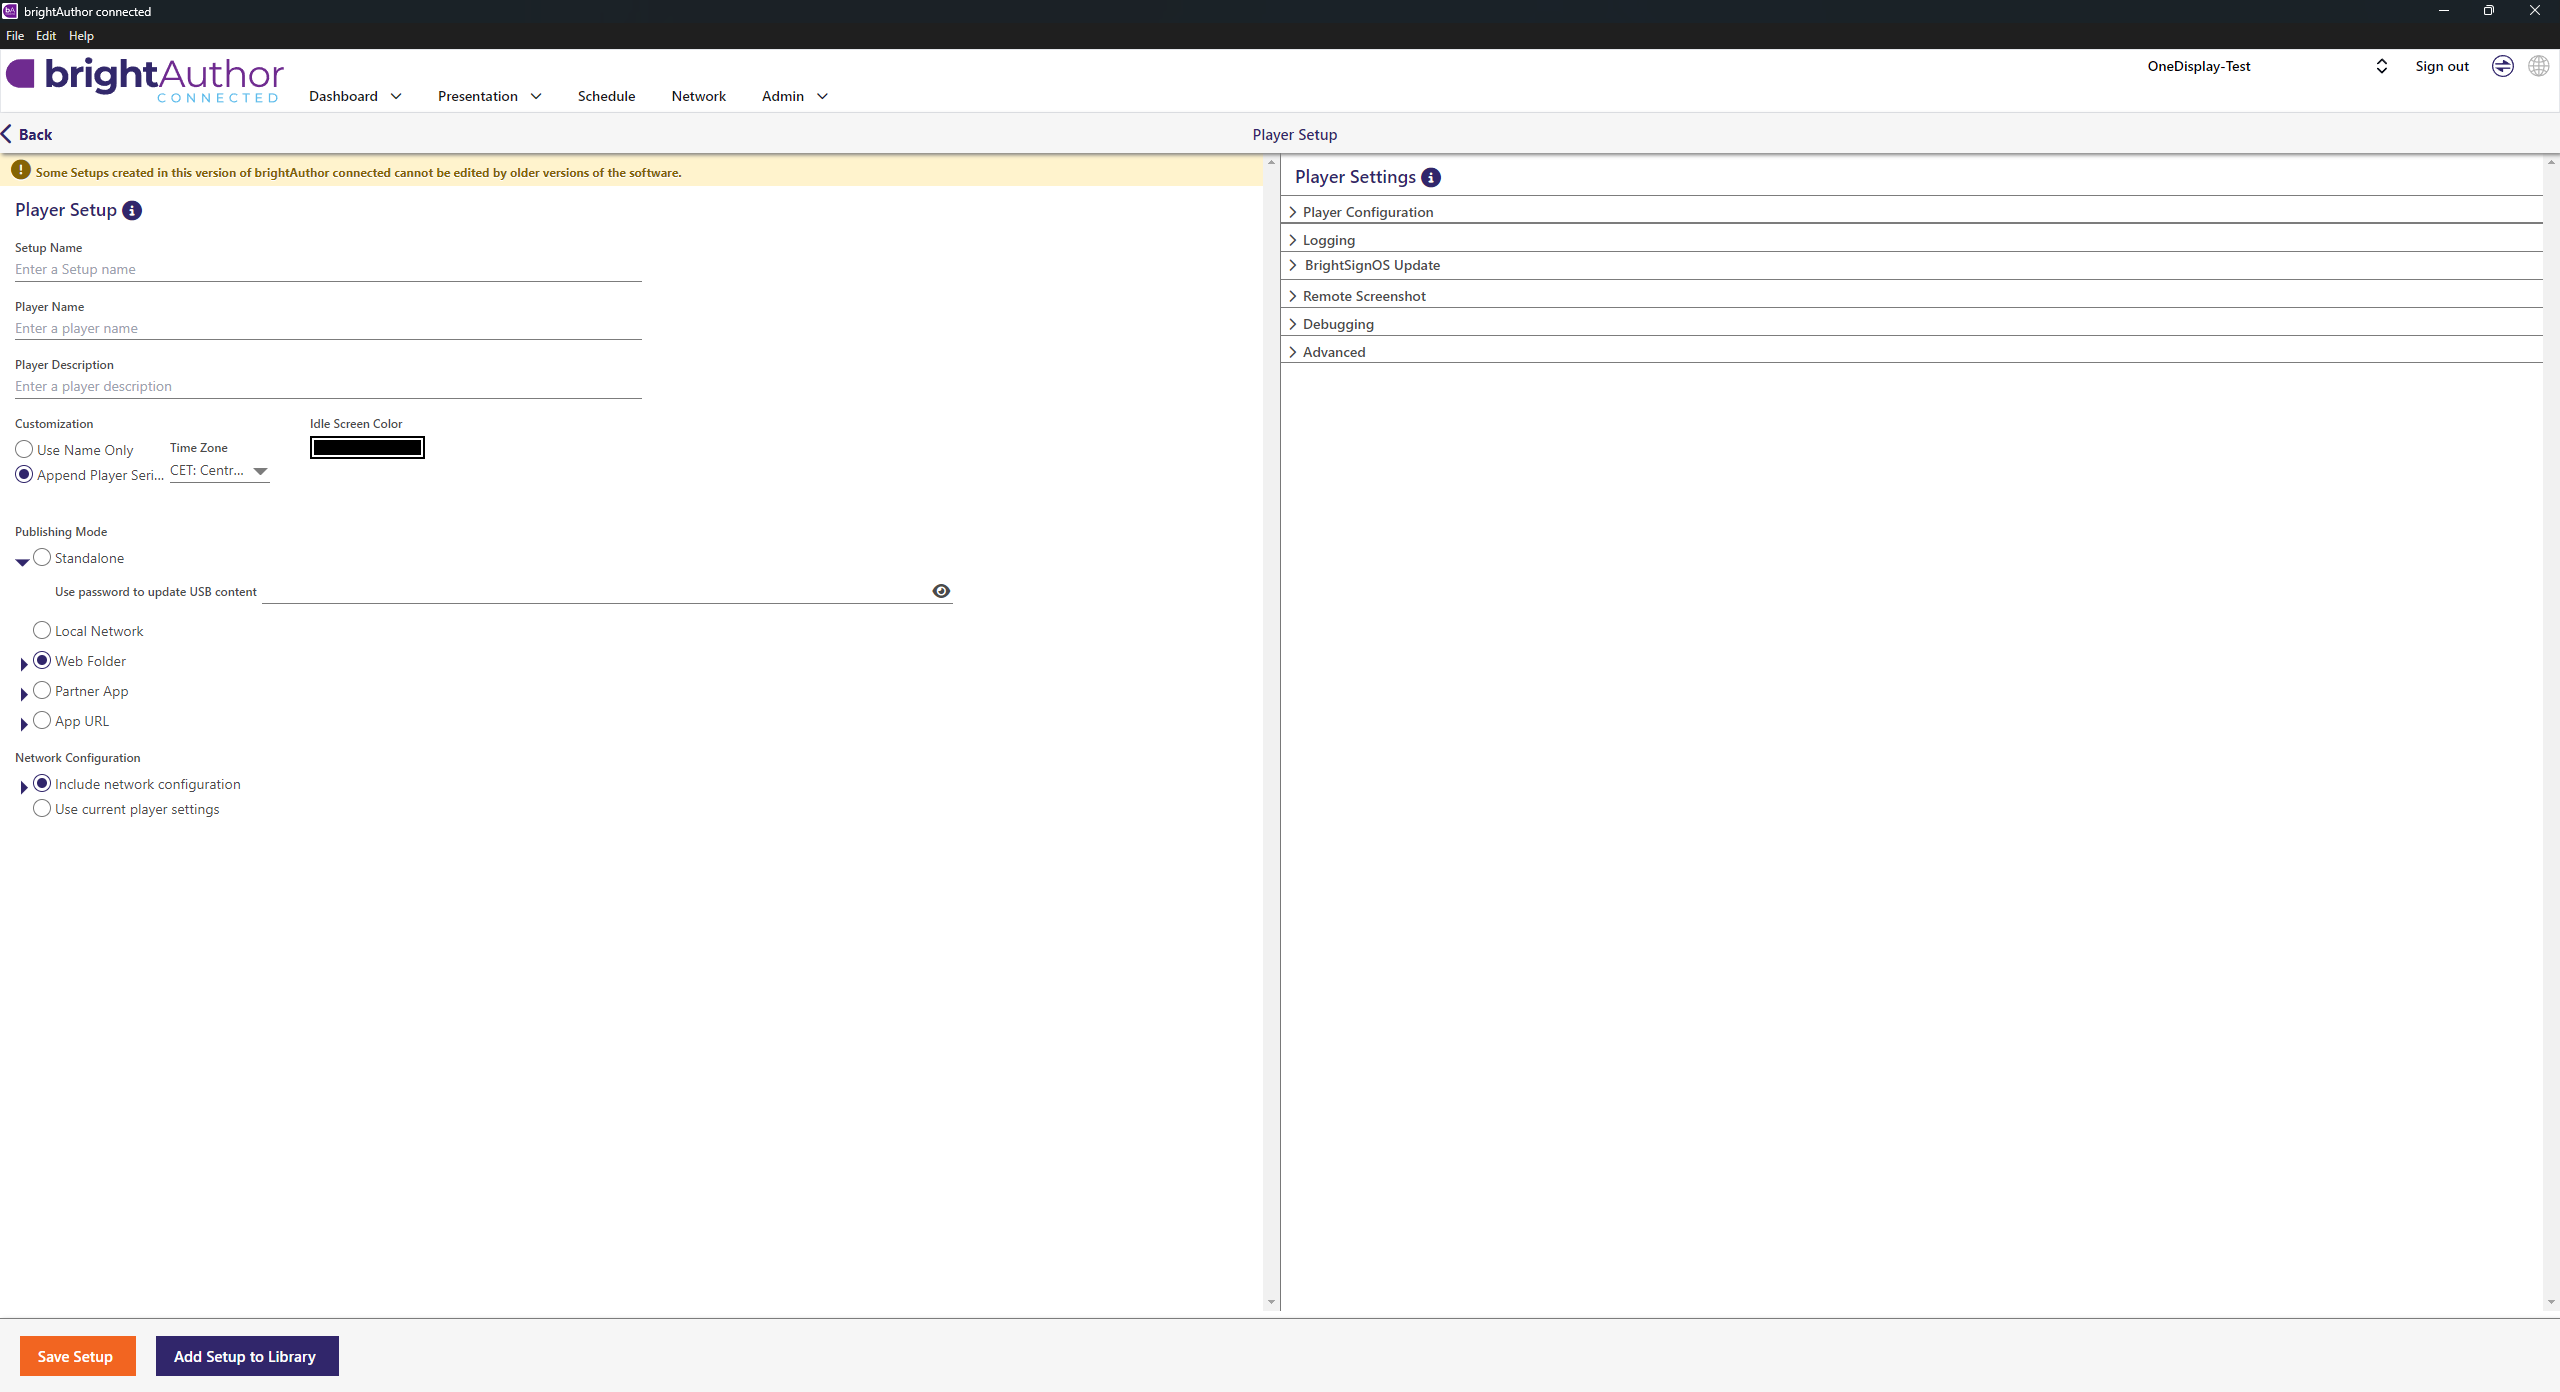
Create Setup
- Click arrow next to Admin → Setup
- Fill in:
- Setup Name: same as Player Name from previous step
- Player Name: same as above
- Player Description: same as Step 3
- Click Web Folder and change the URL for Web Folder:
- Modify the ending after
/your-ftp-storage-path/and add the player identifier
- Modify the ending after
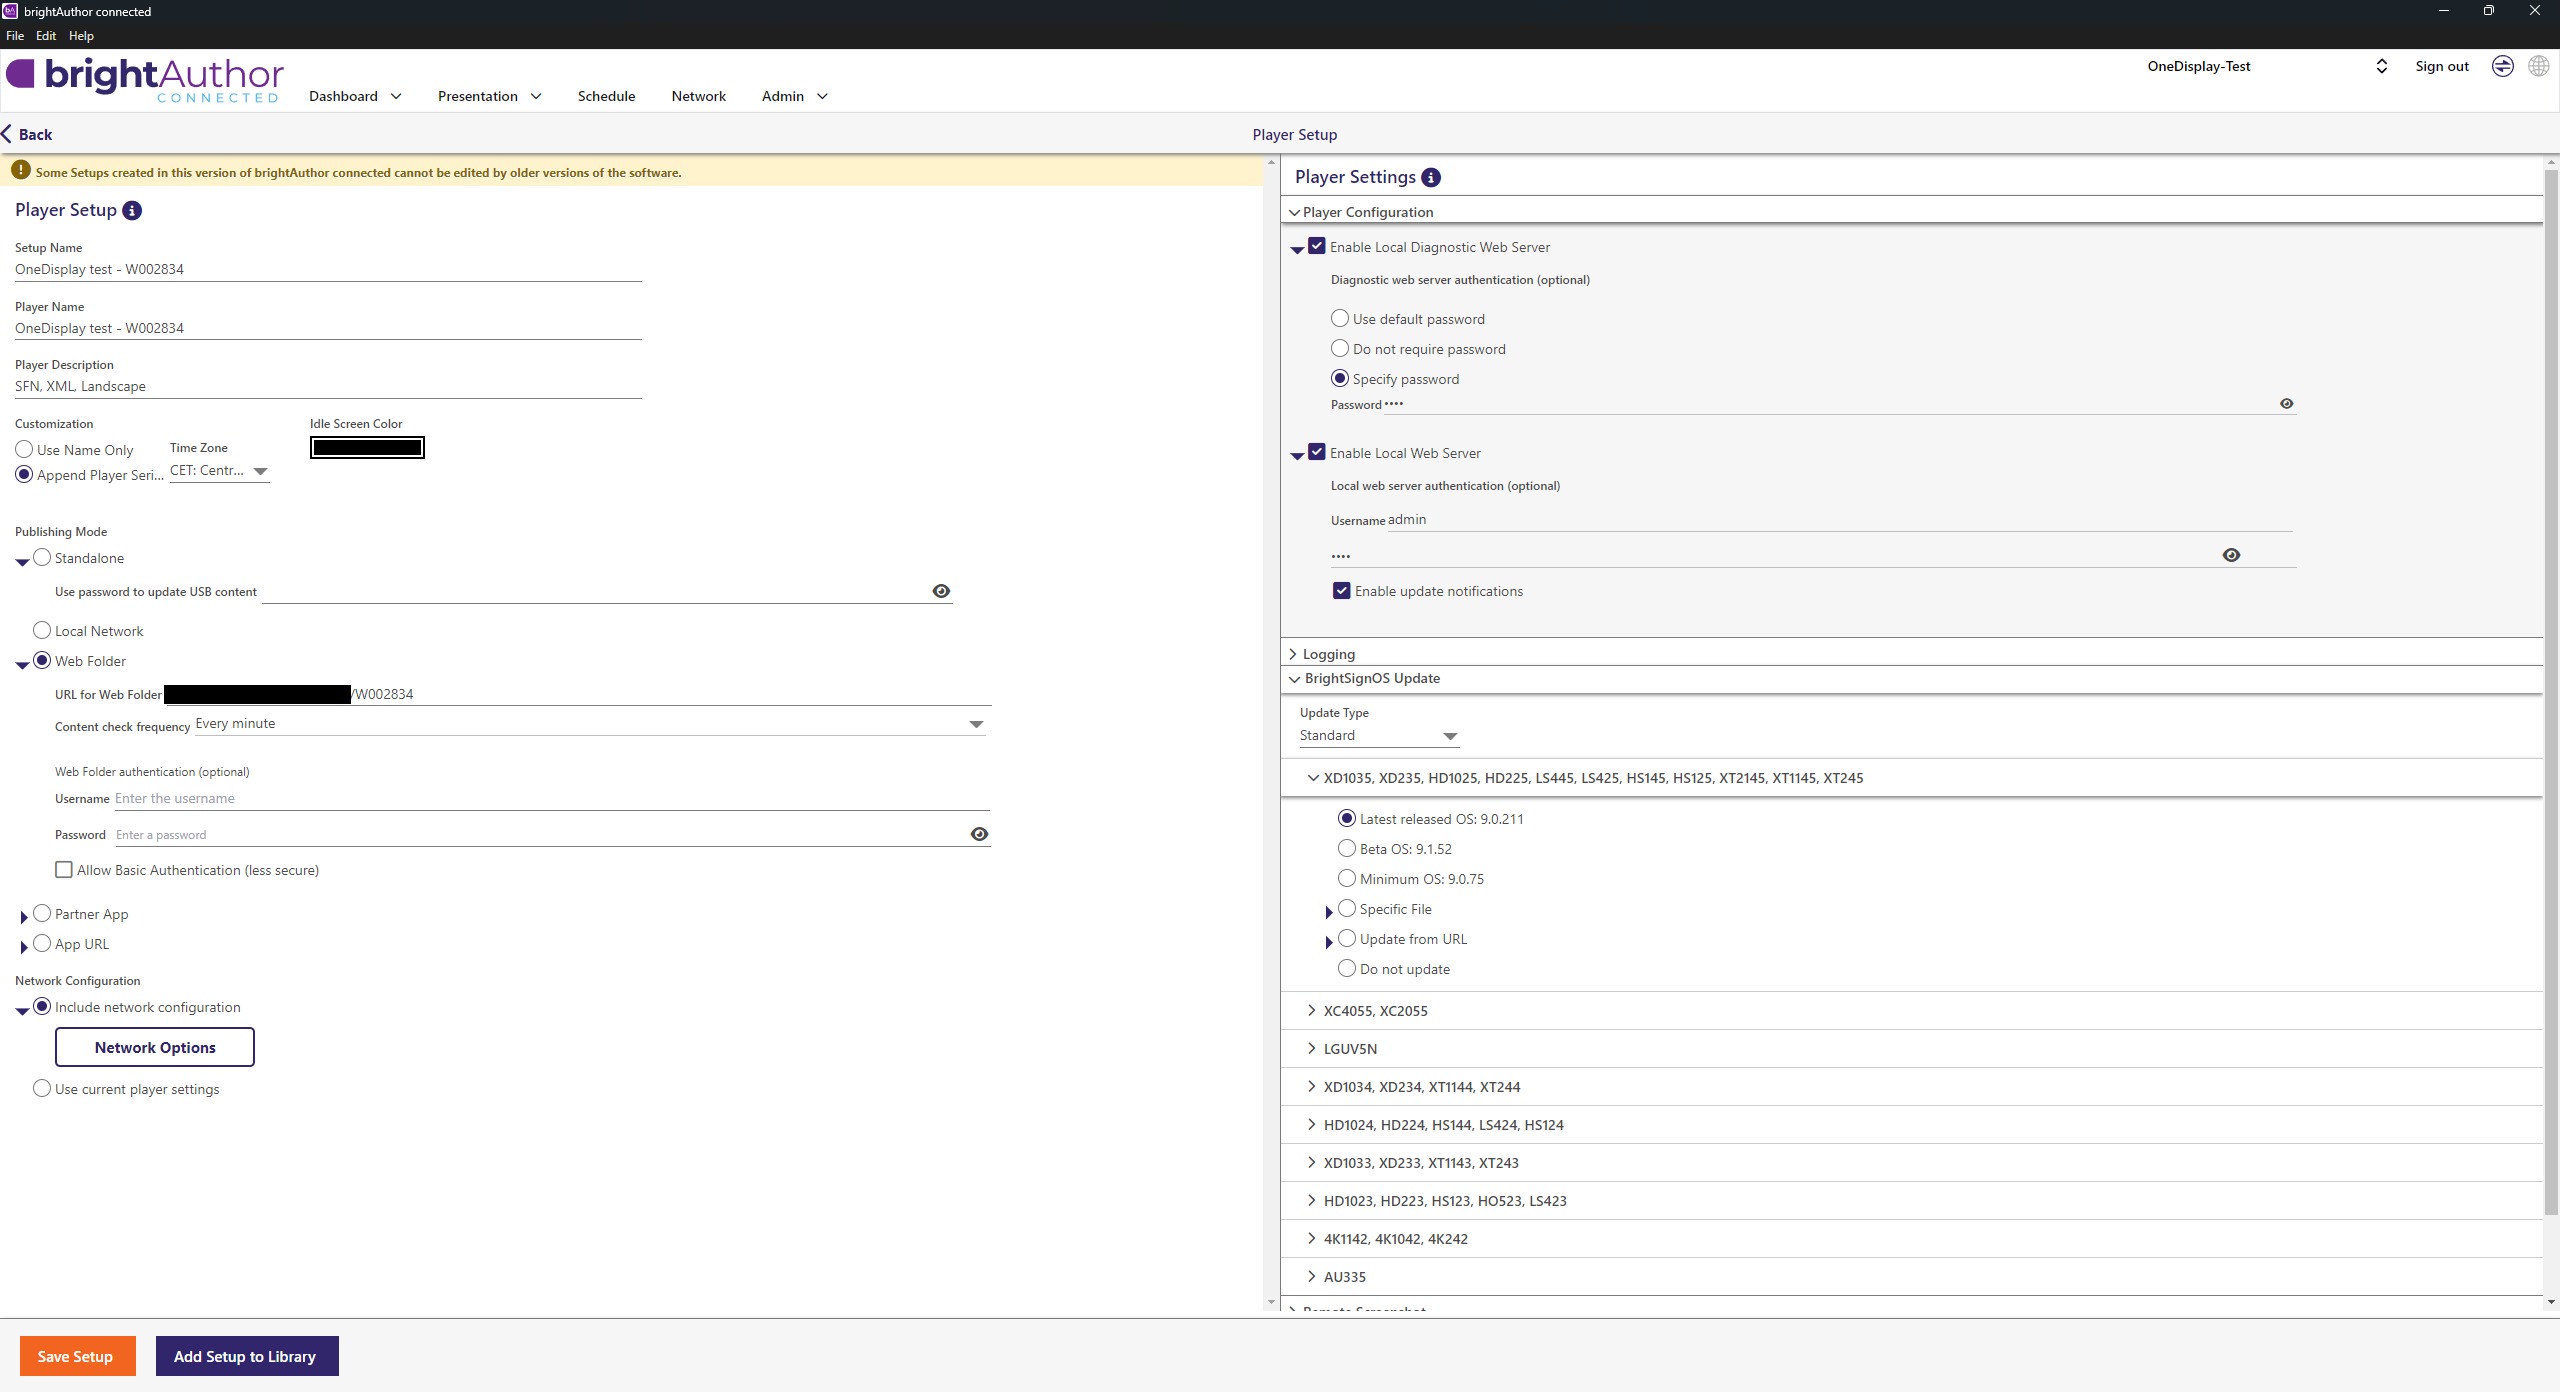
- Verify:
- Content check frequency = Every Minute
- Under Player Configuration:
- Enable Local Diagnostic Web Server
- Set password:
Your password
- Set password:
- Enable Local Web Server
- Username:
admin - Password:
Your password
- Username:
- Enable Local Diagnostic Web Server
- Under BrightSignOS Update:
- Select the player
- Choose Latest released version
Extra – Configure WiFi (if required)
WiFi must be configured during setup creation:
- Expand Include Network Configuration
- Go to Network Options → Wireless
- Enable Wireless Networking
- Enter WiFi SSID and password
⚠️ Password cannot be changed later – new setup required if changed.
Save Setup
- Click Update Setup in Library
- Return to Provision
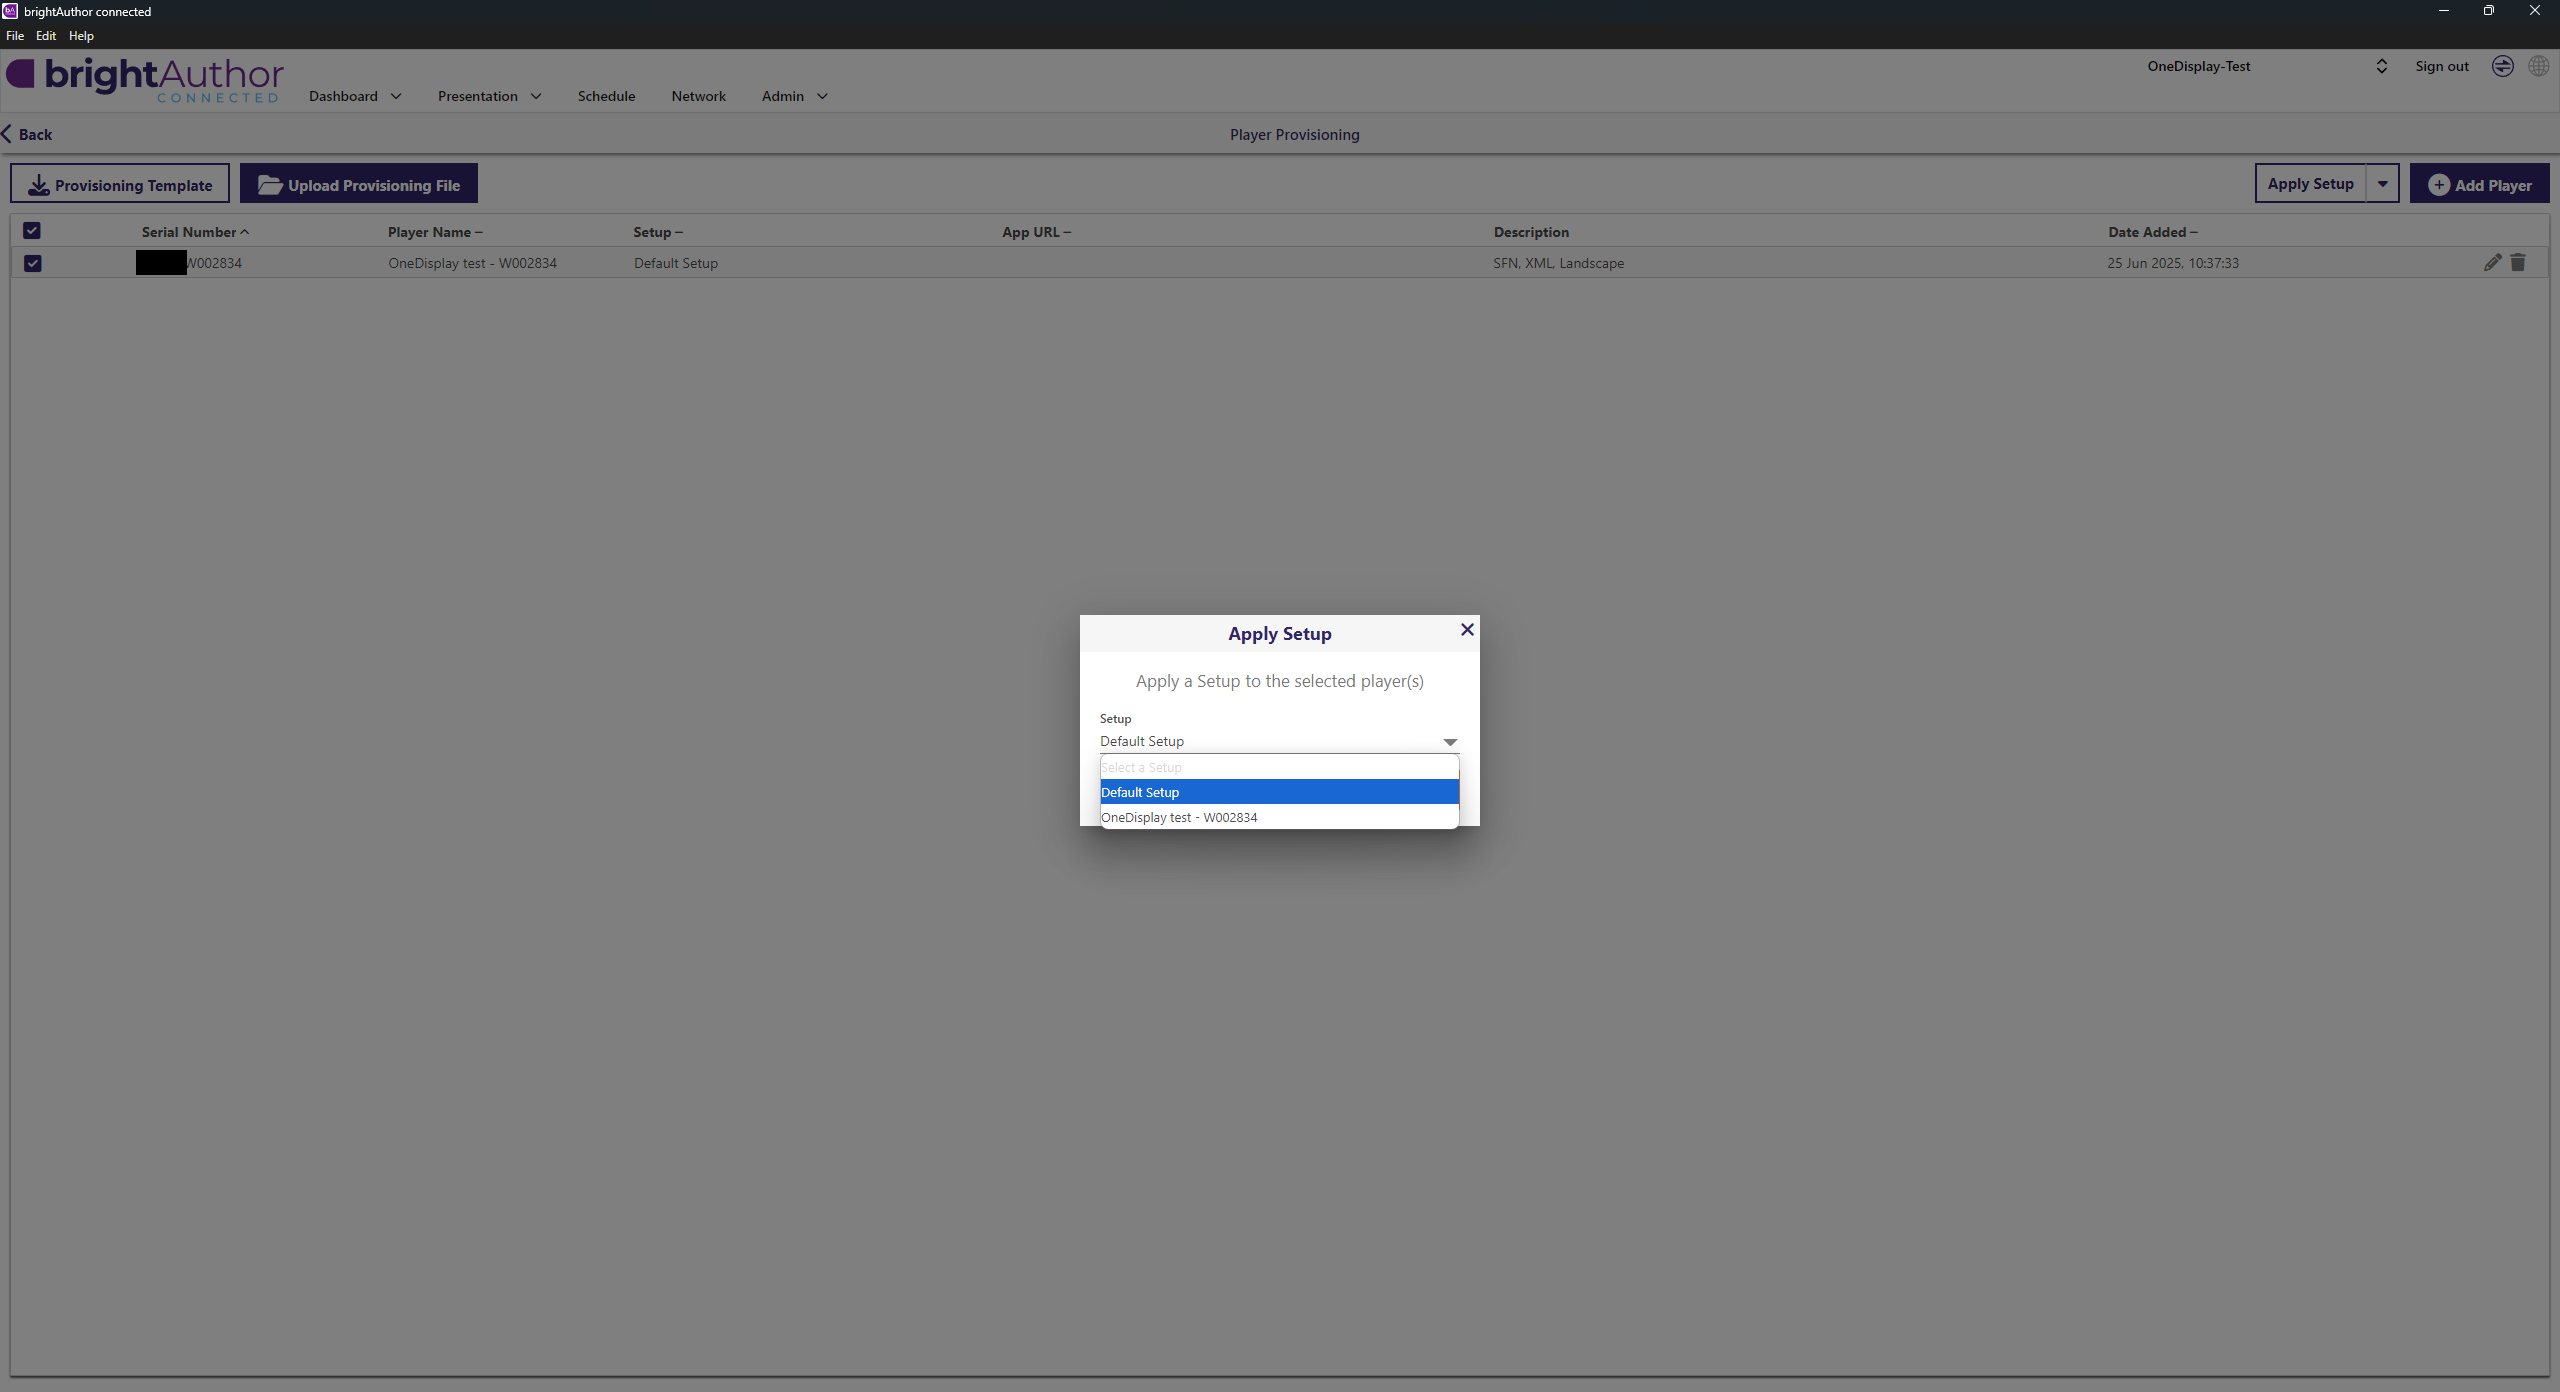
Apply Setup
- Select the player in the list
- Click Apply Setup
- In popup: choose the setup just created and click Apply Setup
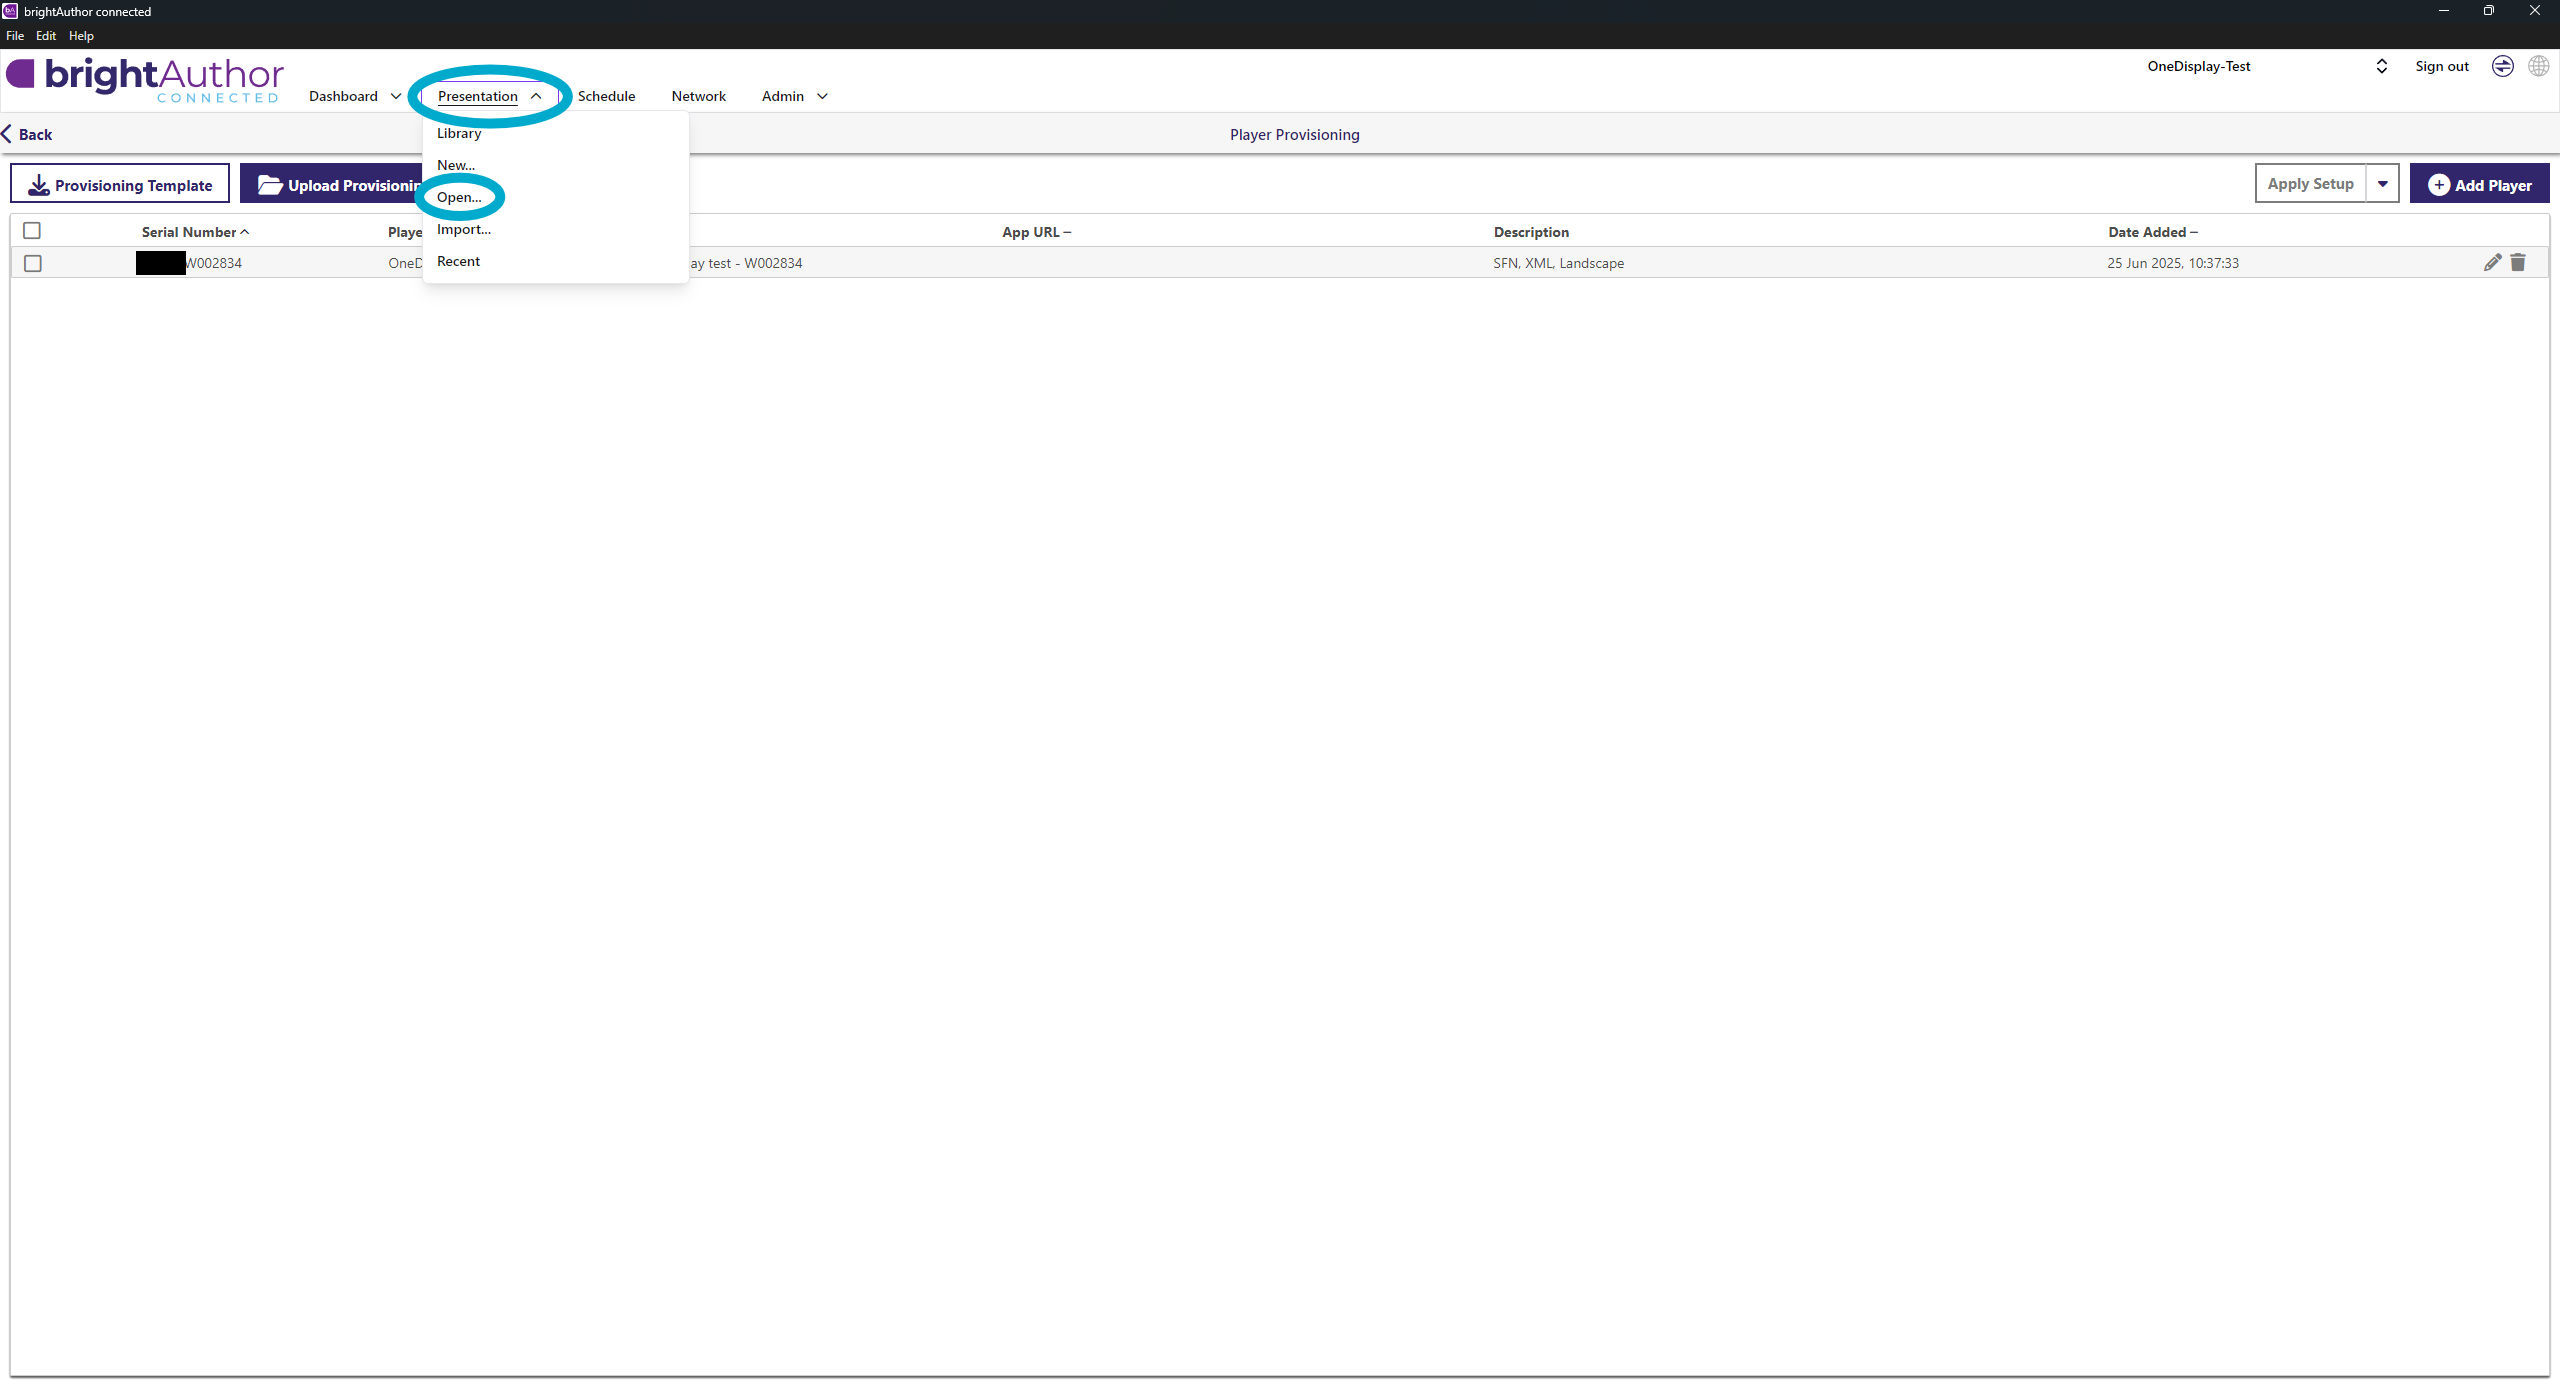
Select Presentation
- Click Presentation → Open
- Navigate to:
/path/to/your/brightsign/templates - Select template according to player model and rotation
Save Presentation with New Name
- Click the arrow next to the Save icon → place the presentation where you normally store them:
/path/to/your/brightsign/presentations/
(Create new folder if customer is new) - Our naming convention:
LS445 - identifier - OD XML Overlay - Landscape.bpfx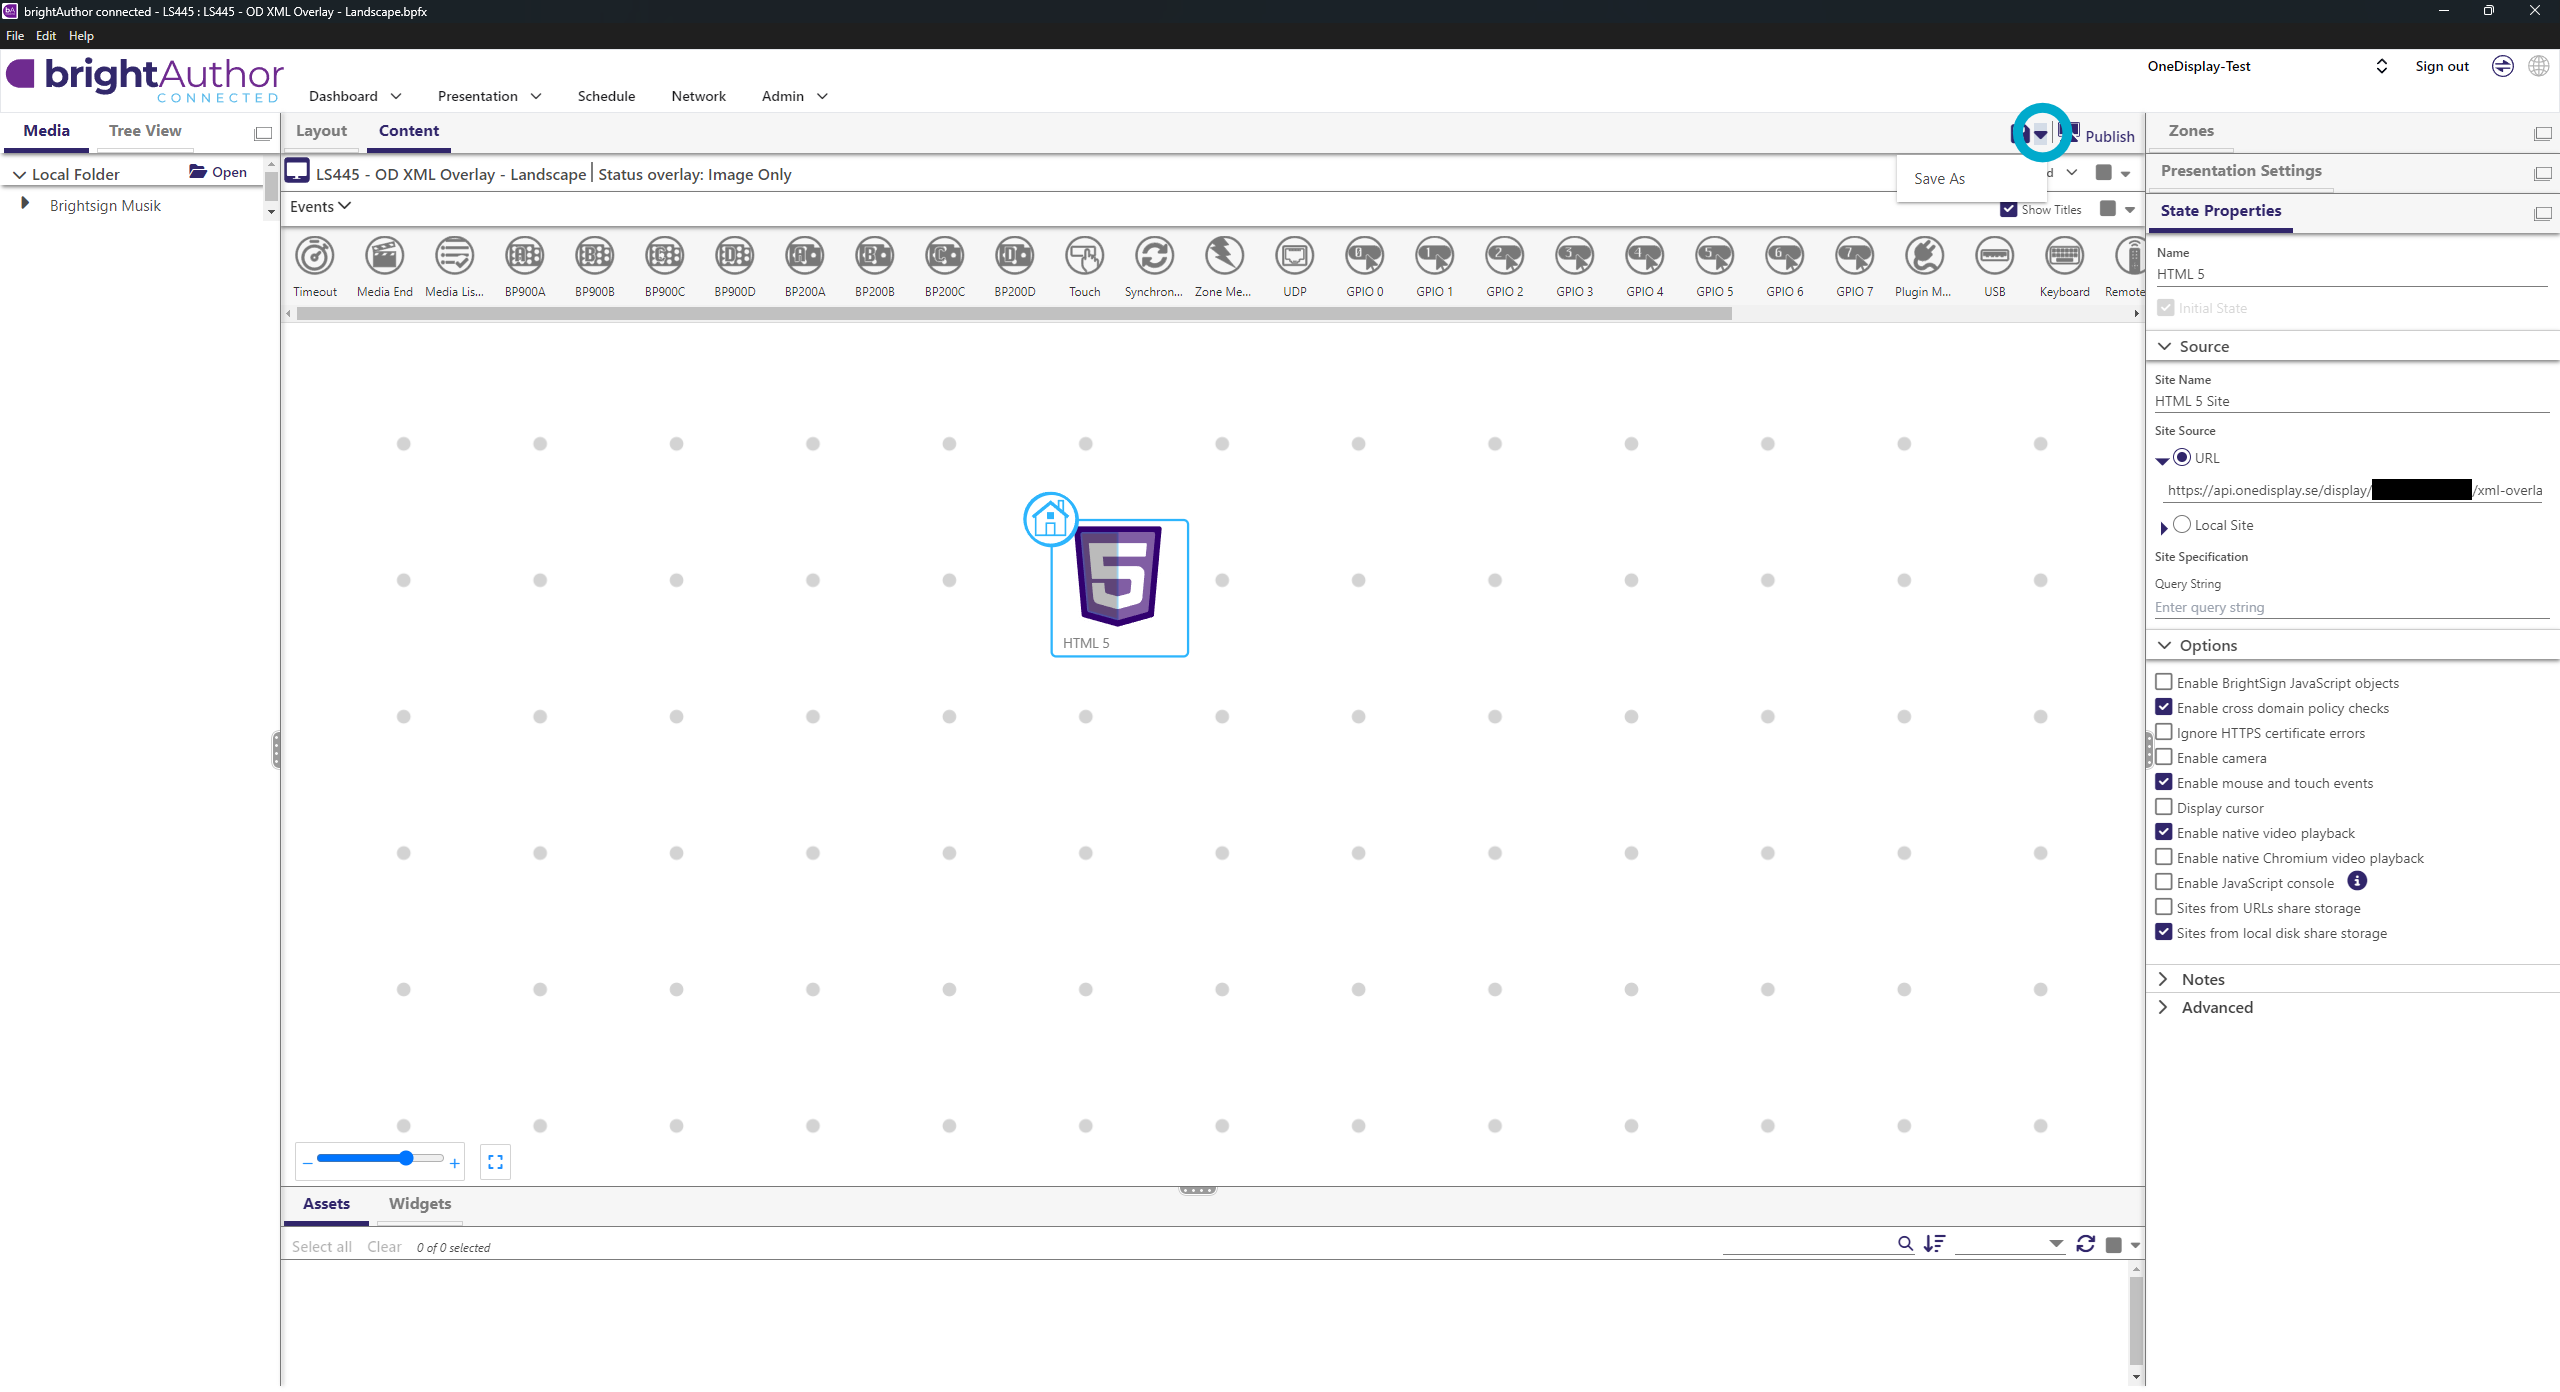
- Warning about Playback/Livefeed may appear → click Continue
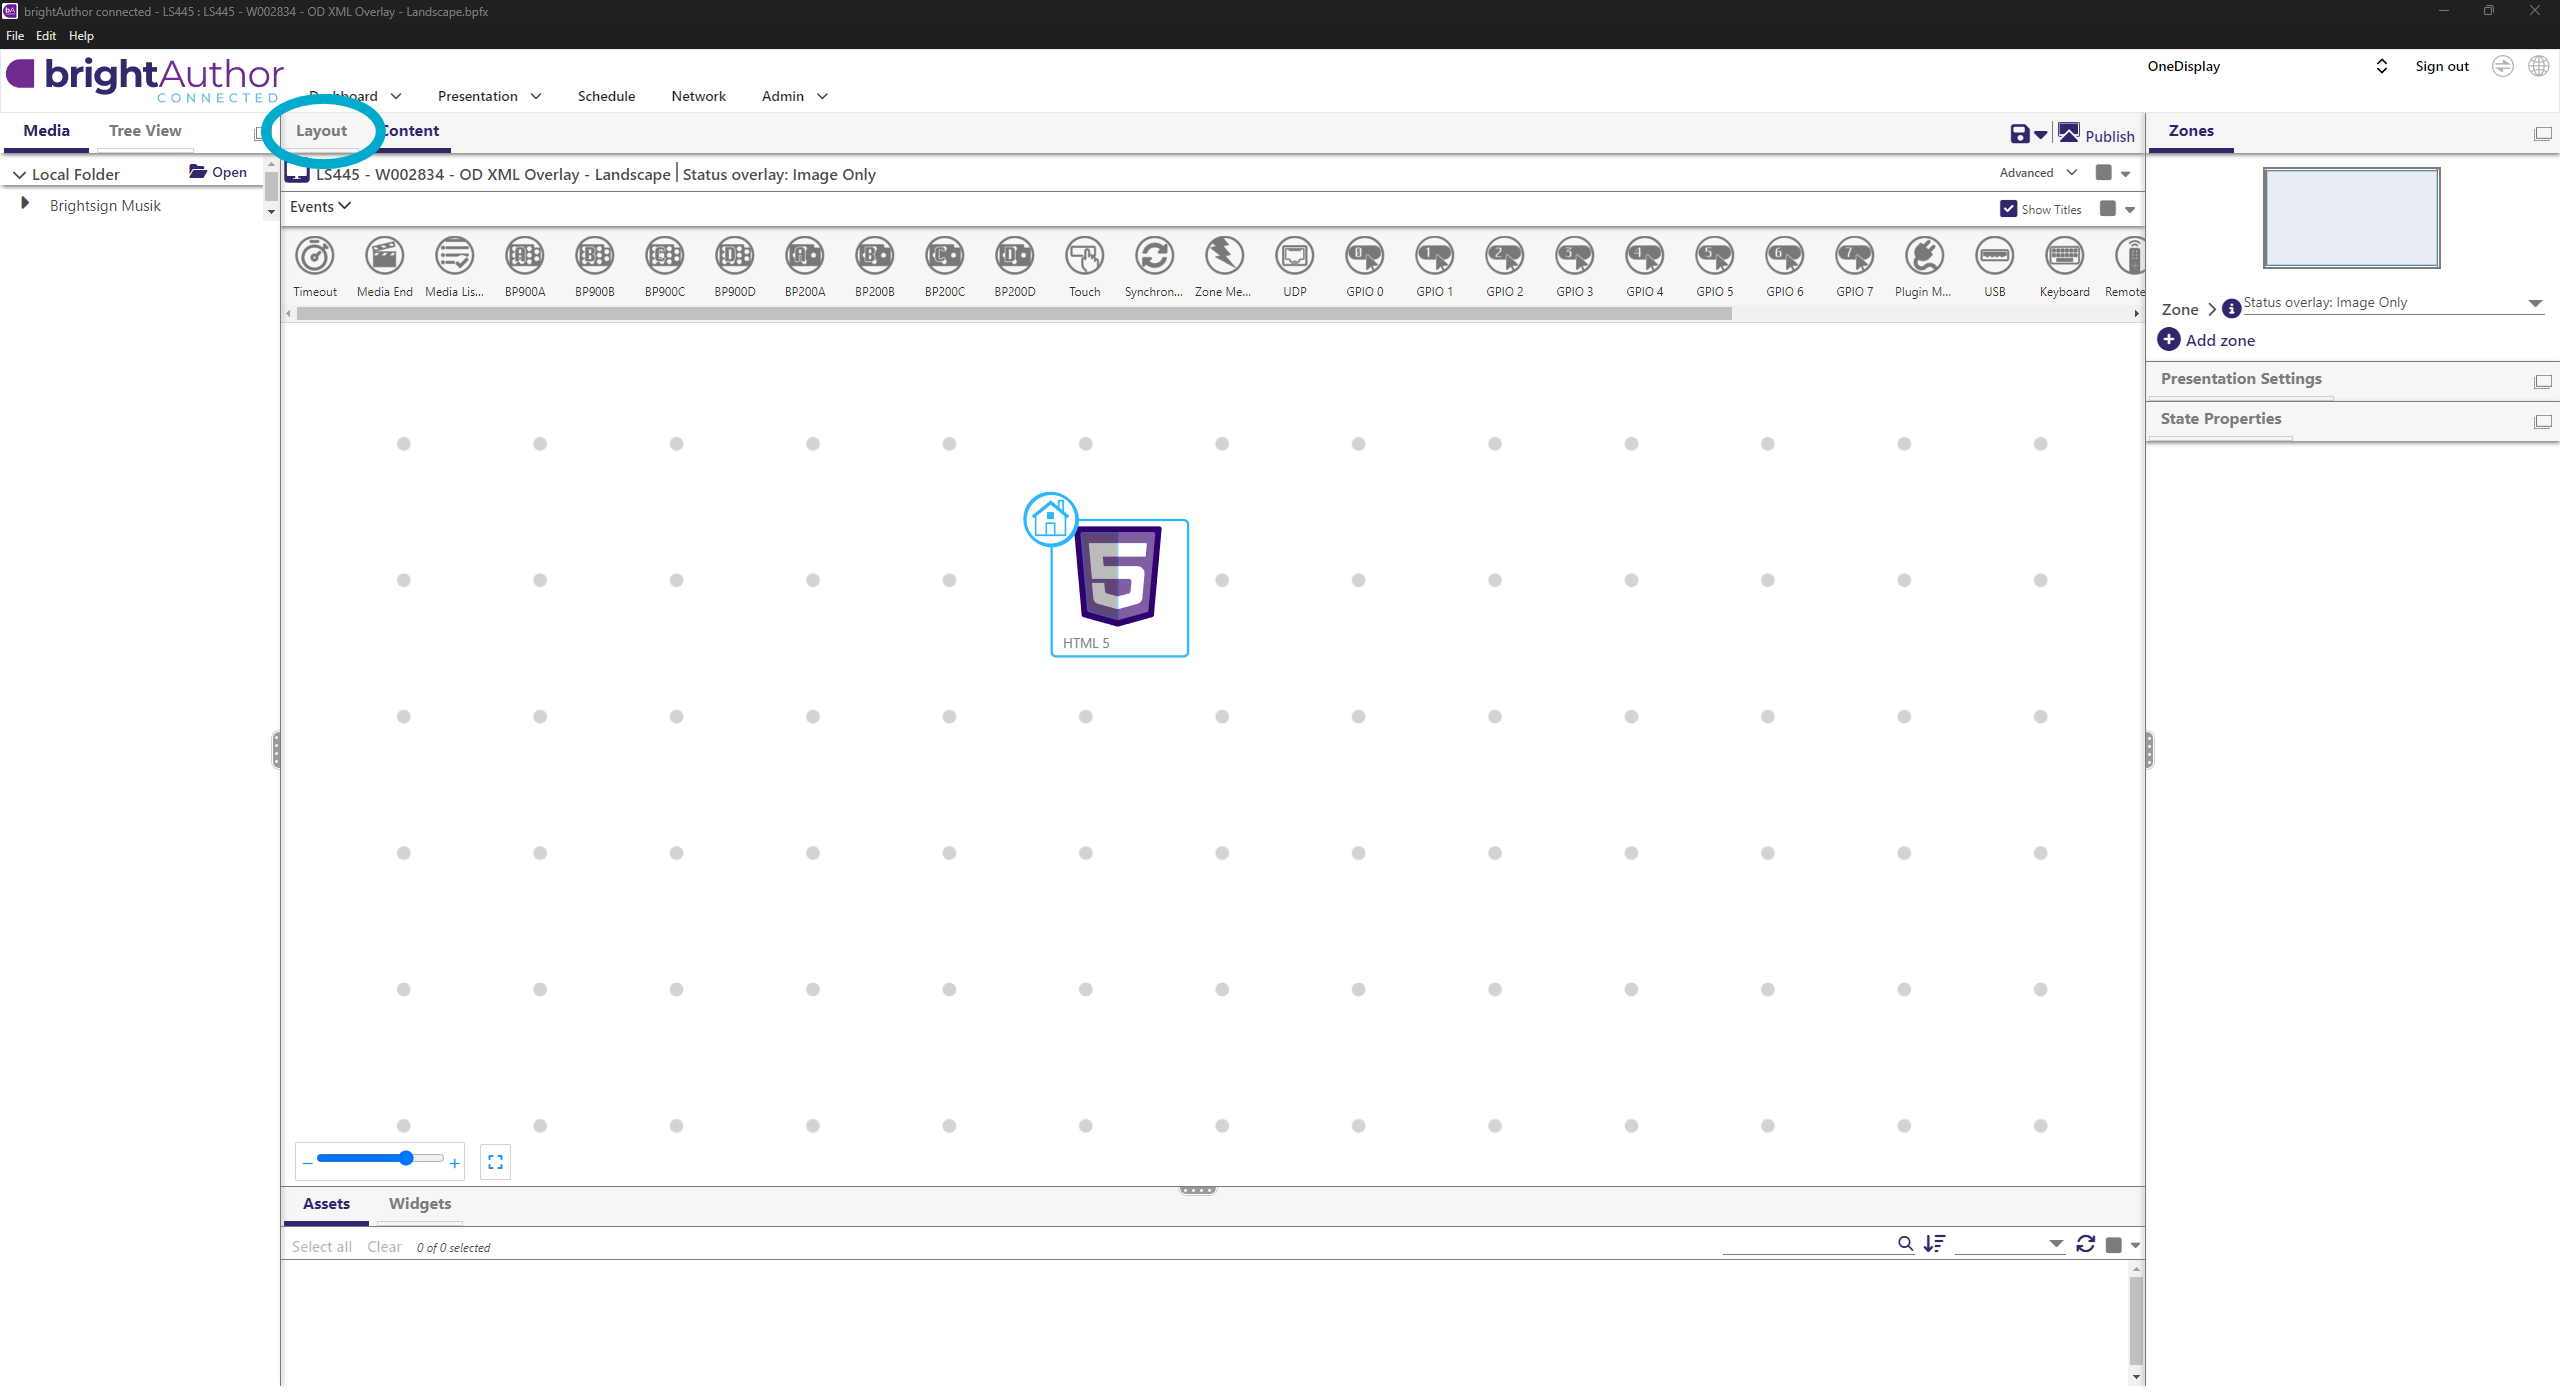
BrightAuthor: Insert XML Links from OneDisplay
- If you have not already added a screen in OneDisplay, do so now: 👉 Add screens
- In Zones, switch to Status Overlay: Image Only
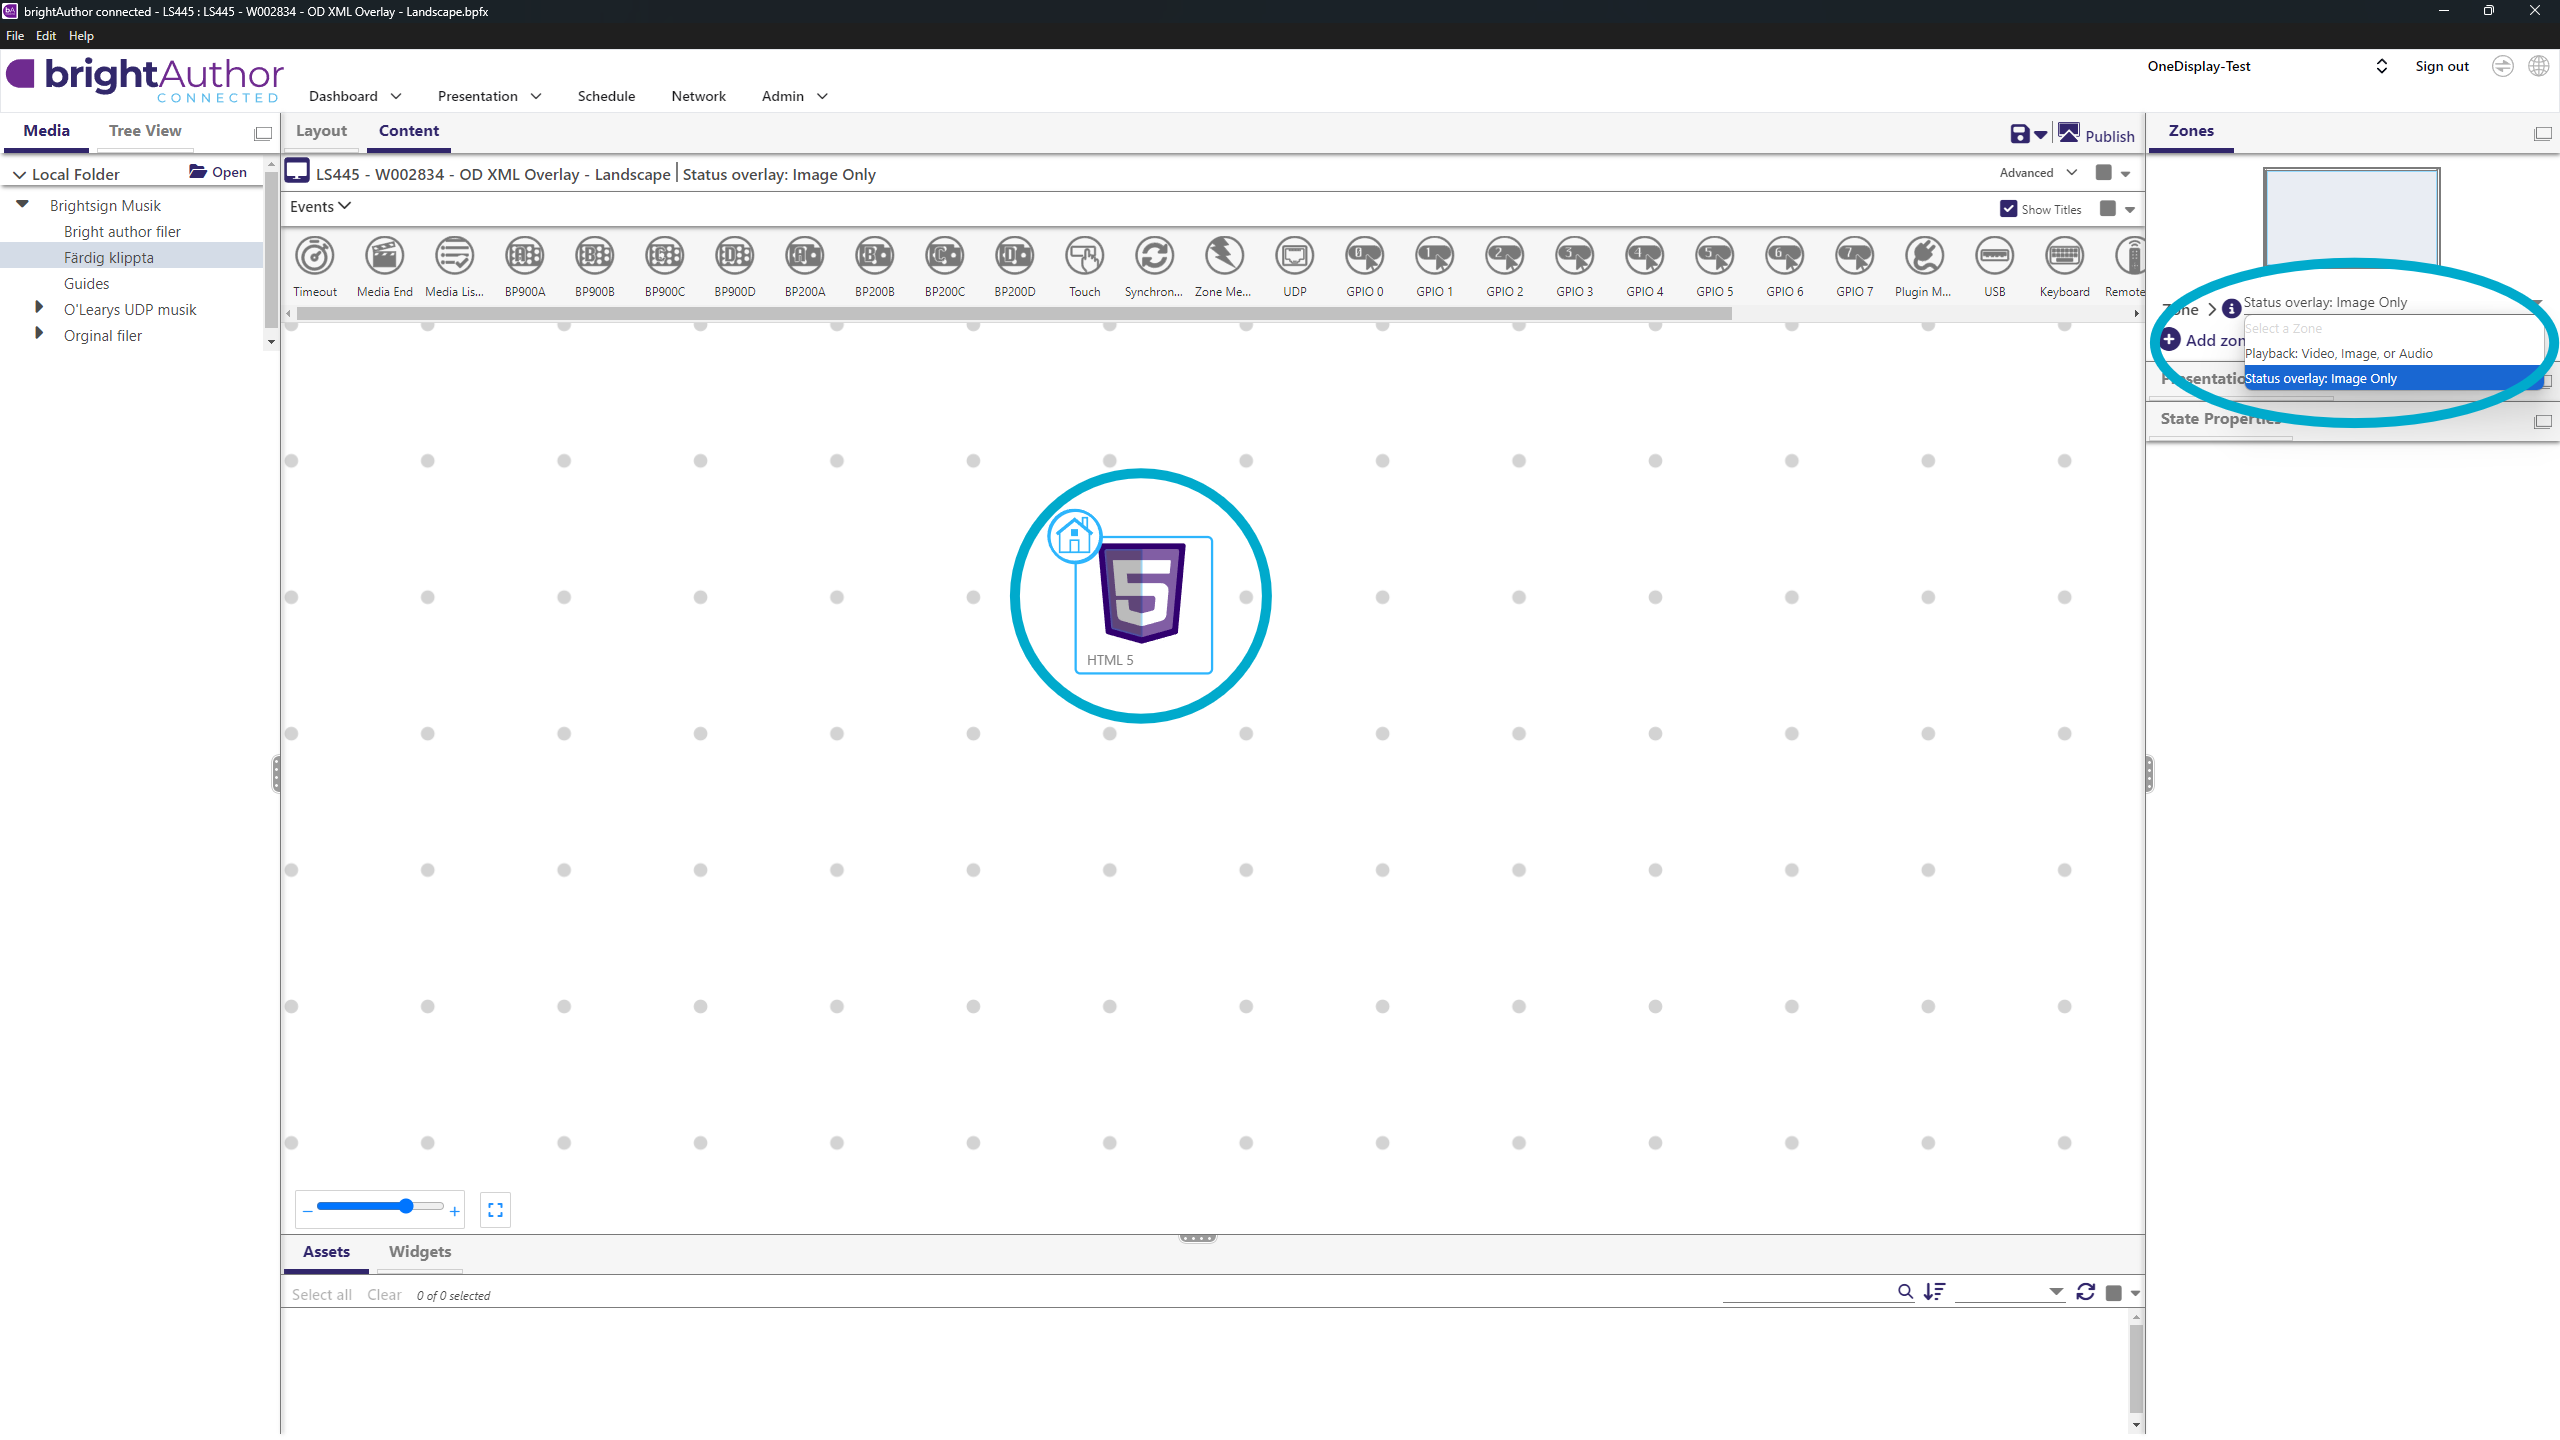
- Select HTML5 object
- In State Properties, paste XML Overlay link from OneDisplay (starts with
https://api.onedisplay.se/...)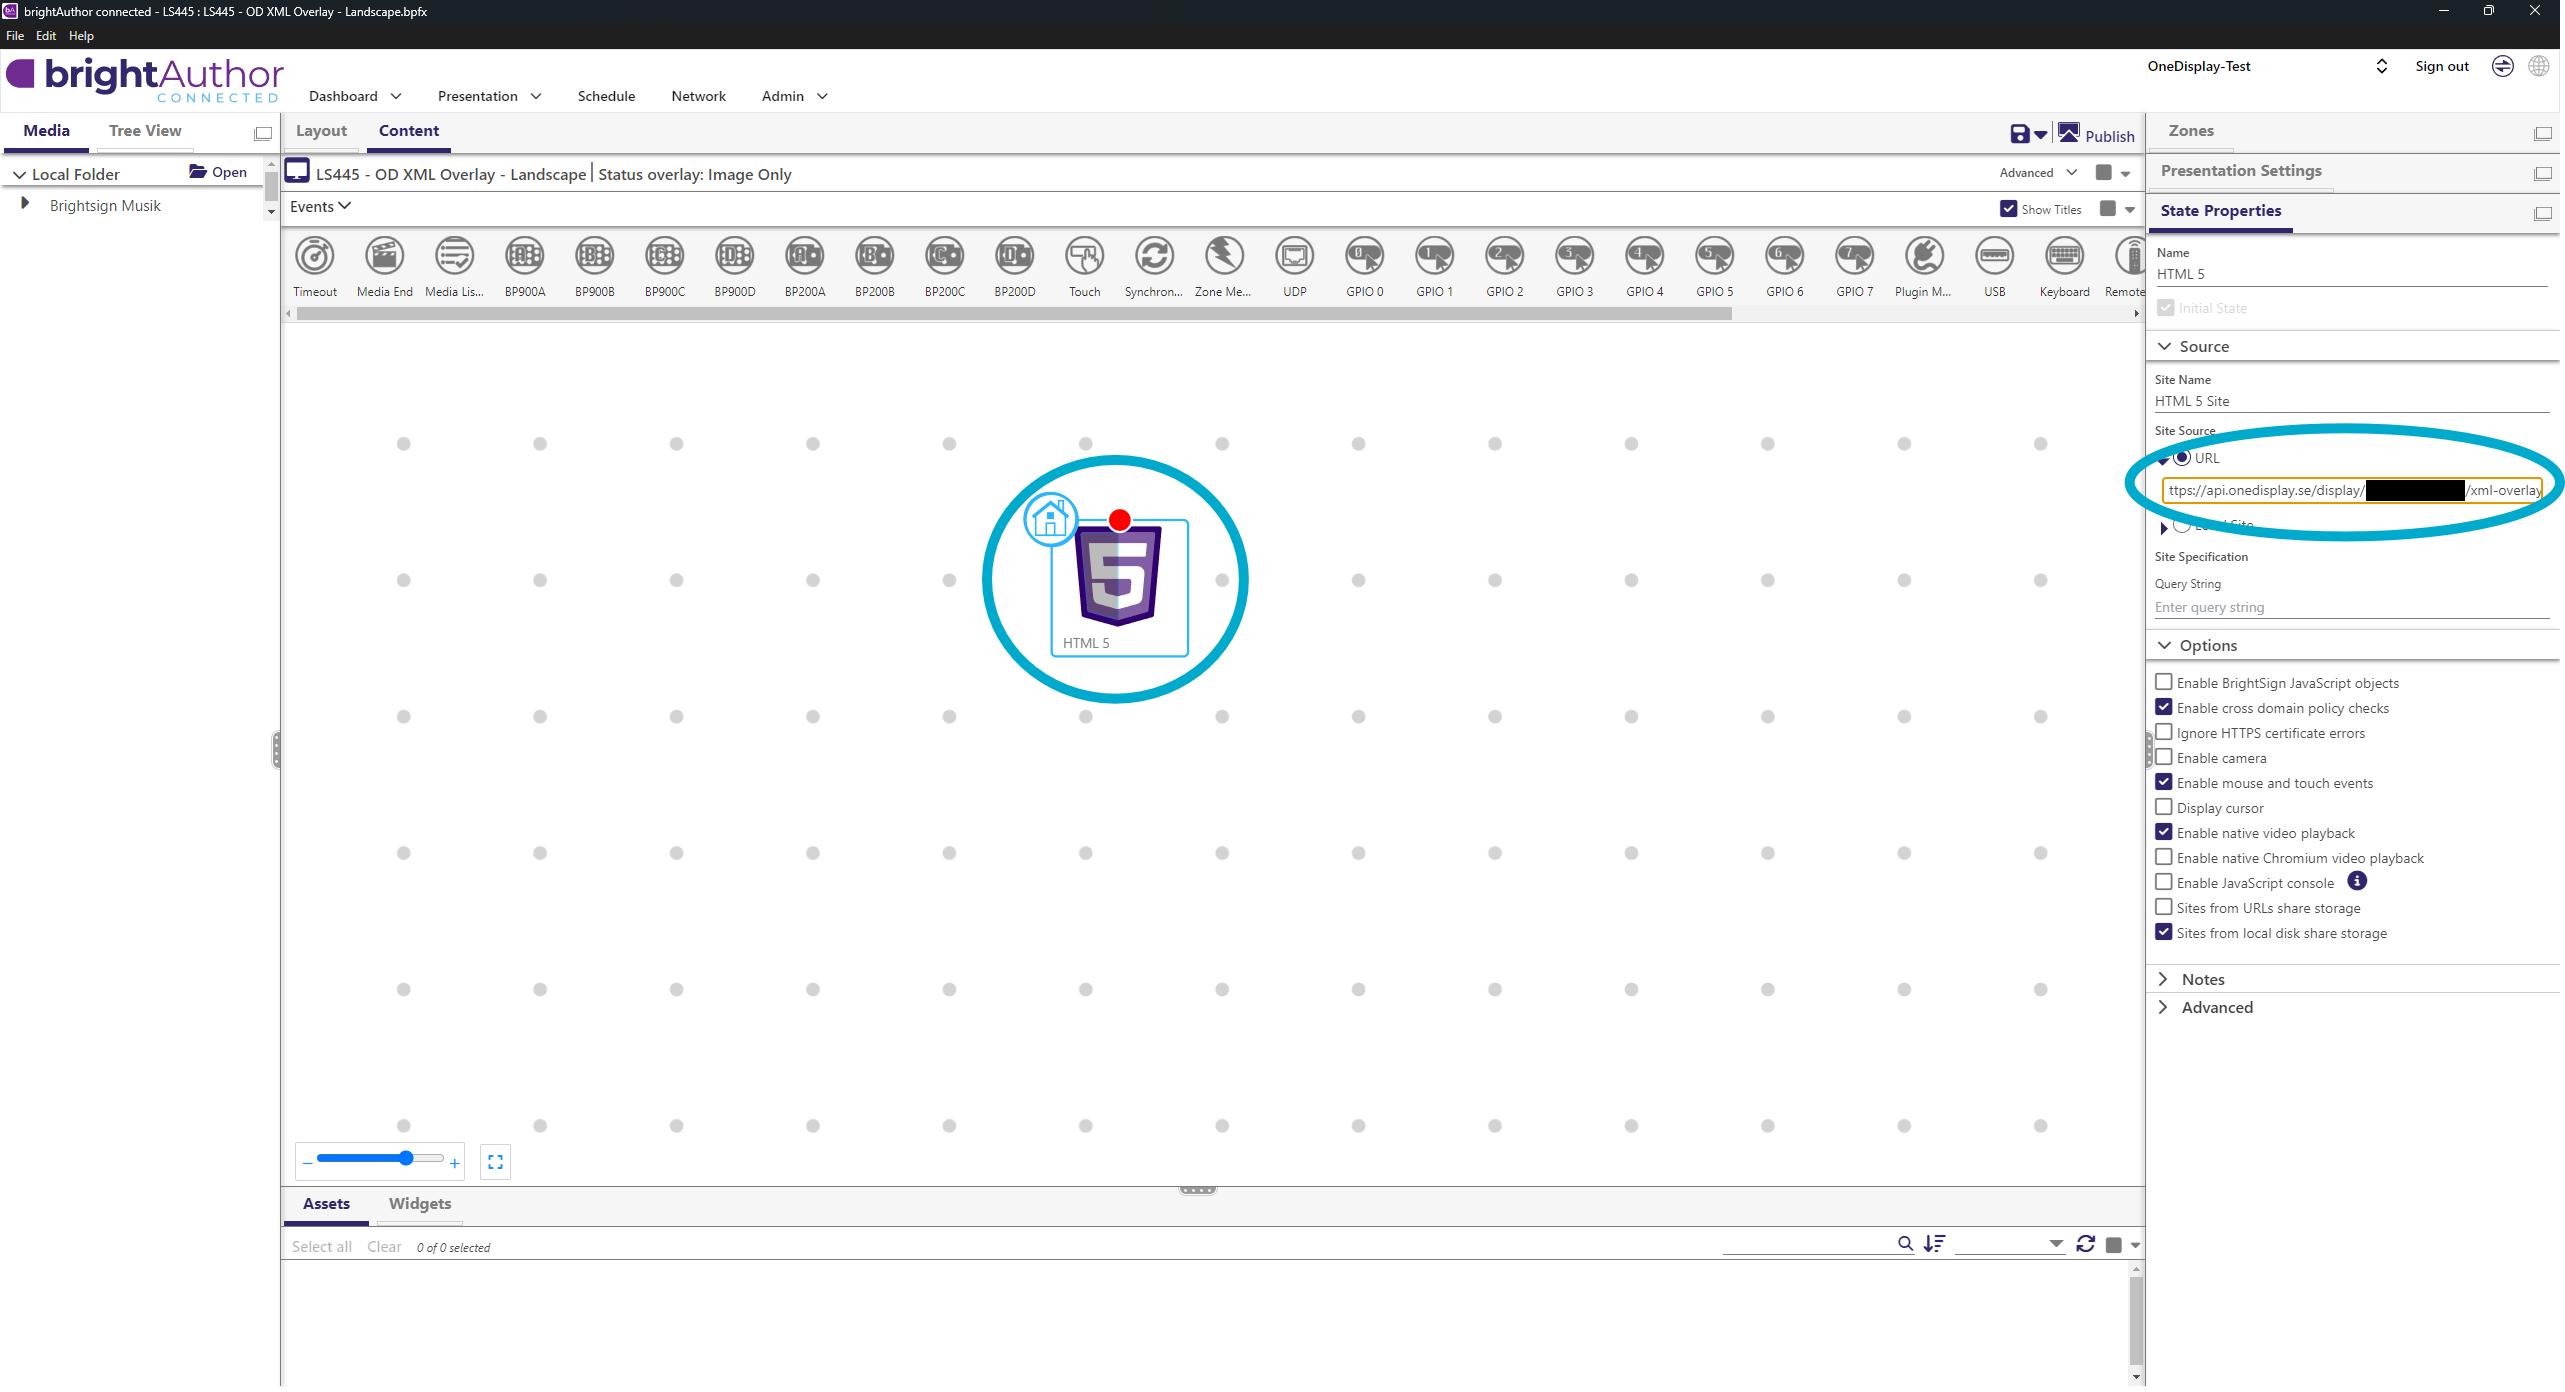
- In State Properties, paste XML Overlay link from OneDisplay (starts with
- In Zones, switch to Playback: Video, Image or Audio
- Select Live Feed object
- Paste second XML link from OneDisplay (starts with
https://cdn.onedisplay.se/...)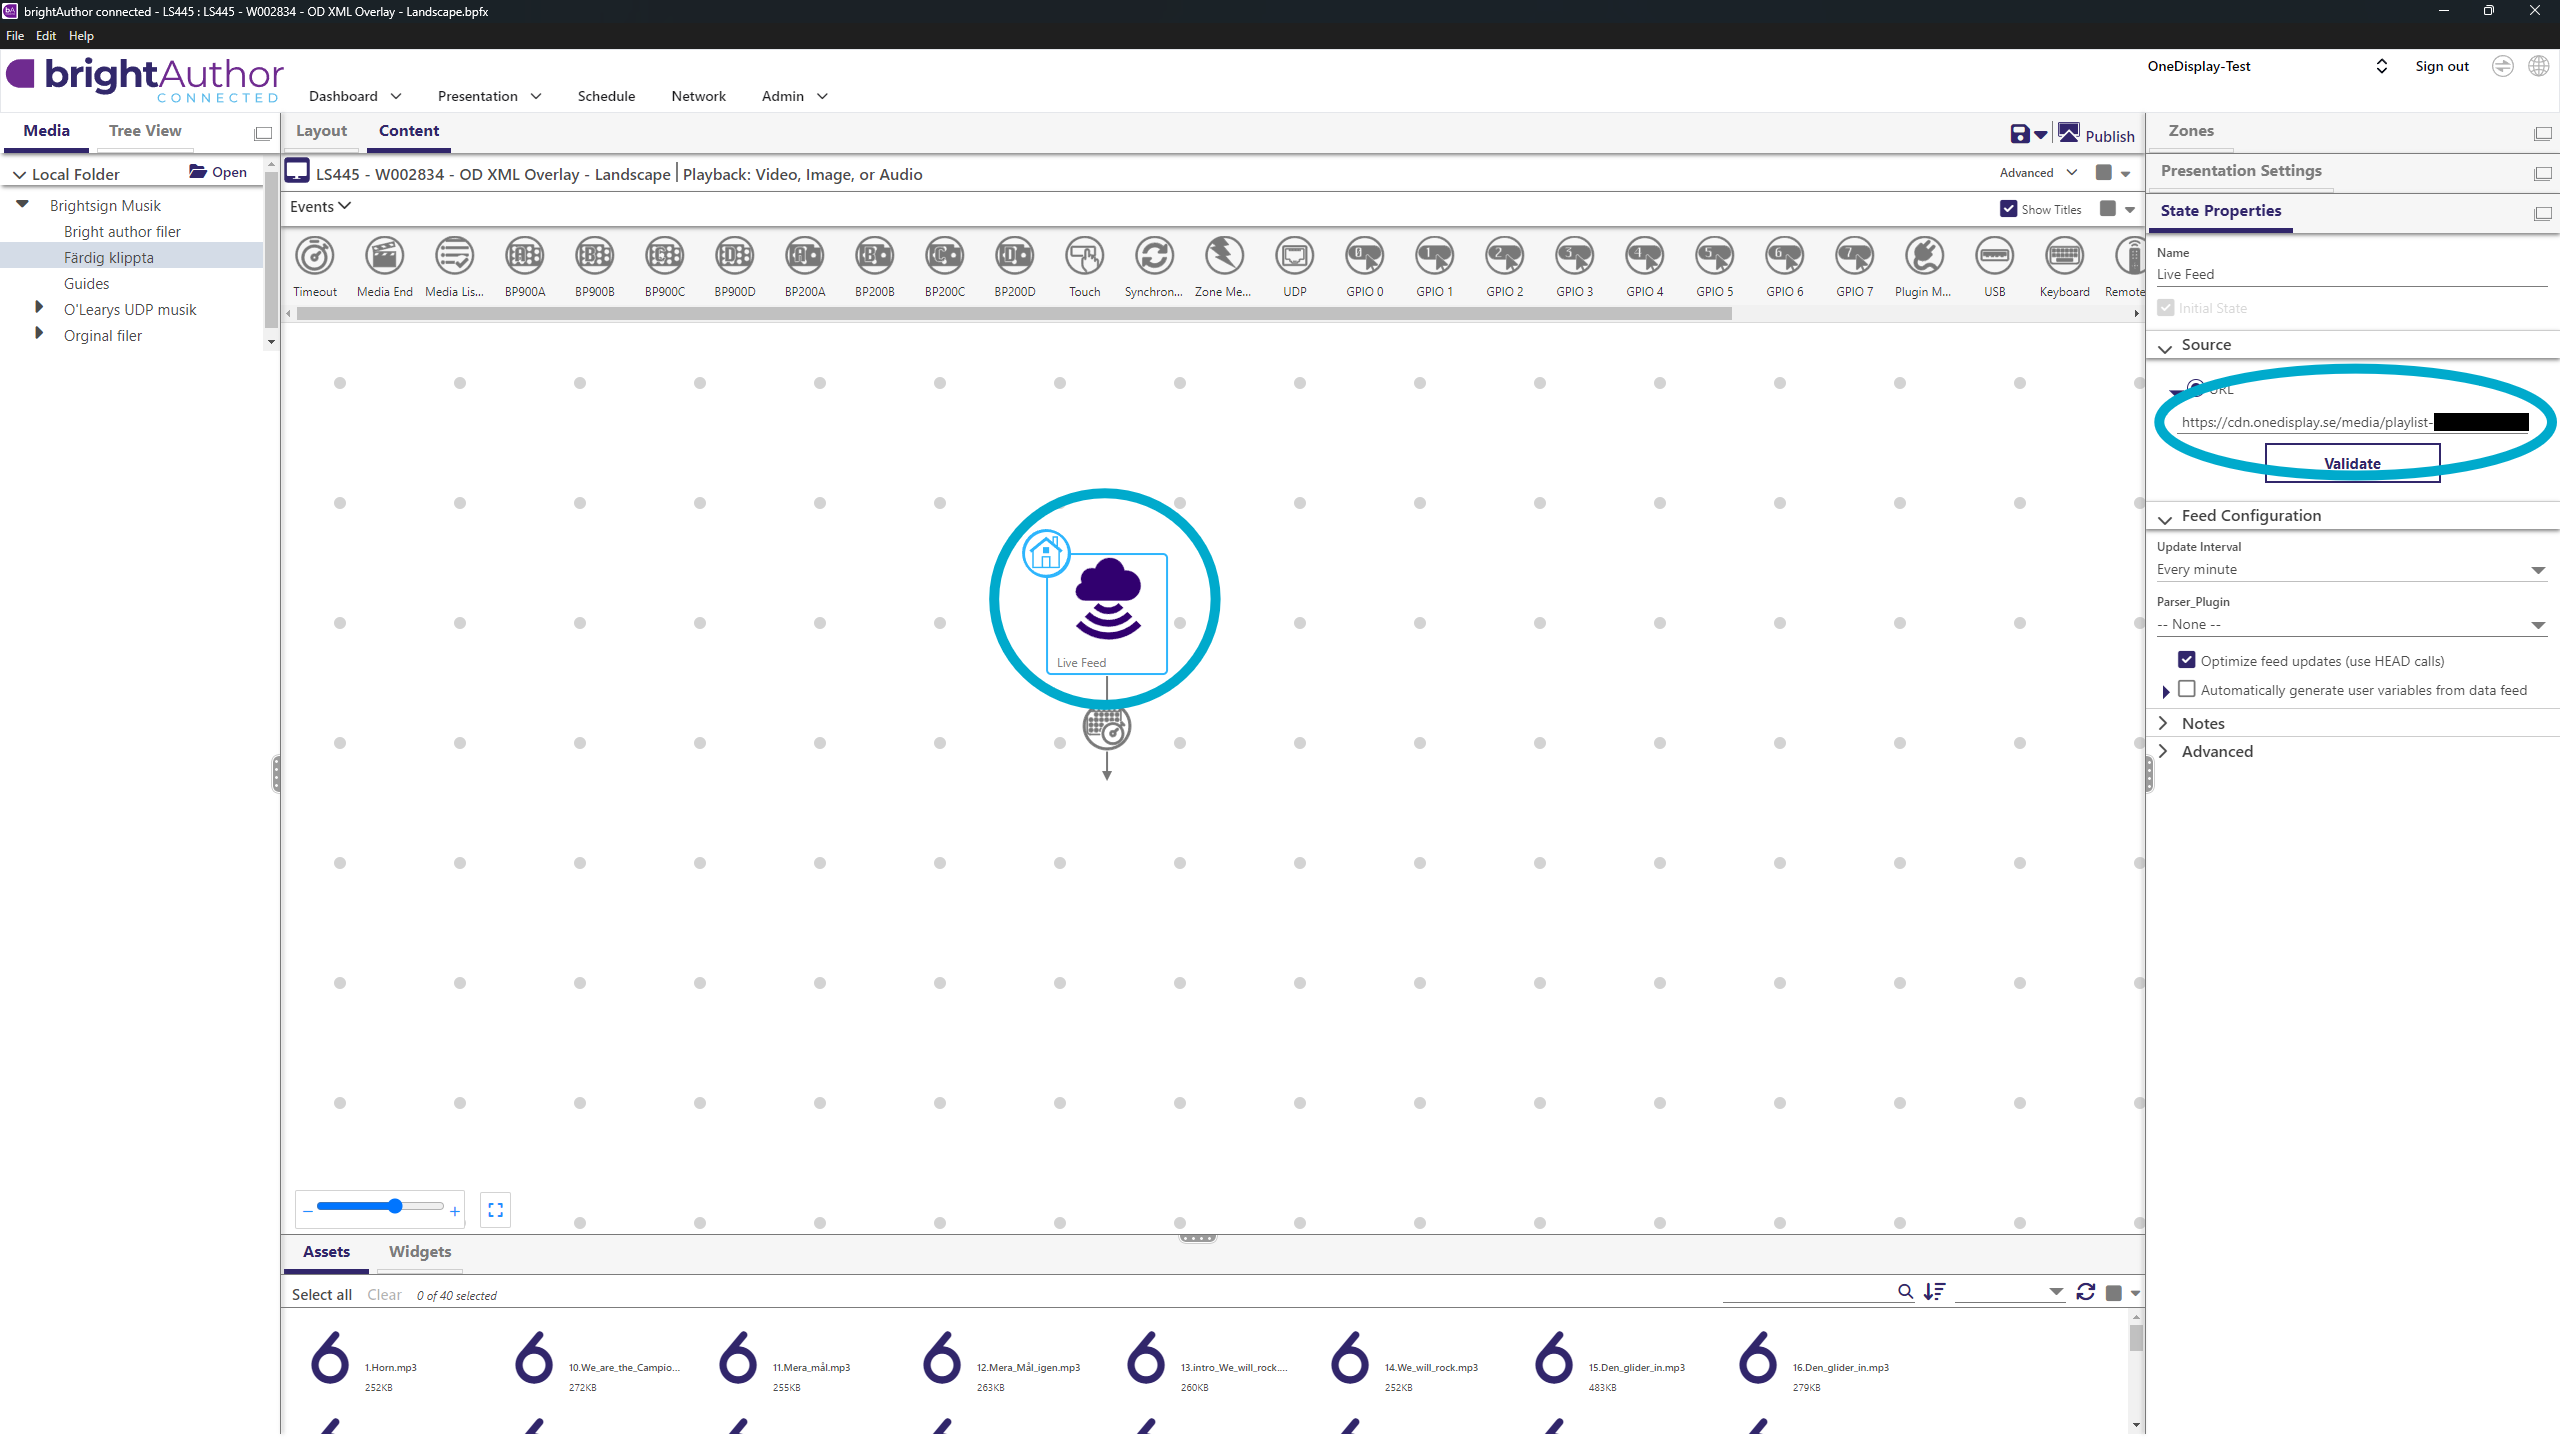
- Under Feed configuration, set update interval = Every Minute
- (Optional) Scheduled event Daily Timeout 05:00
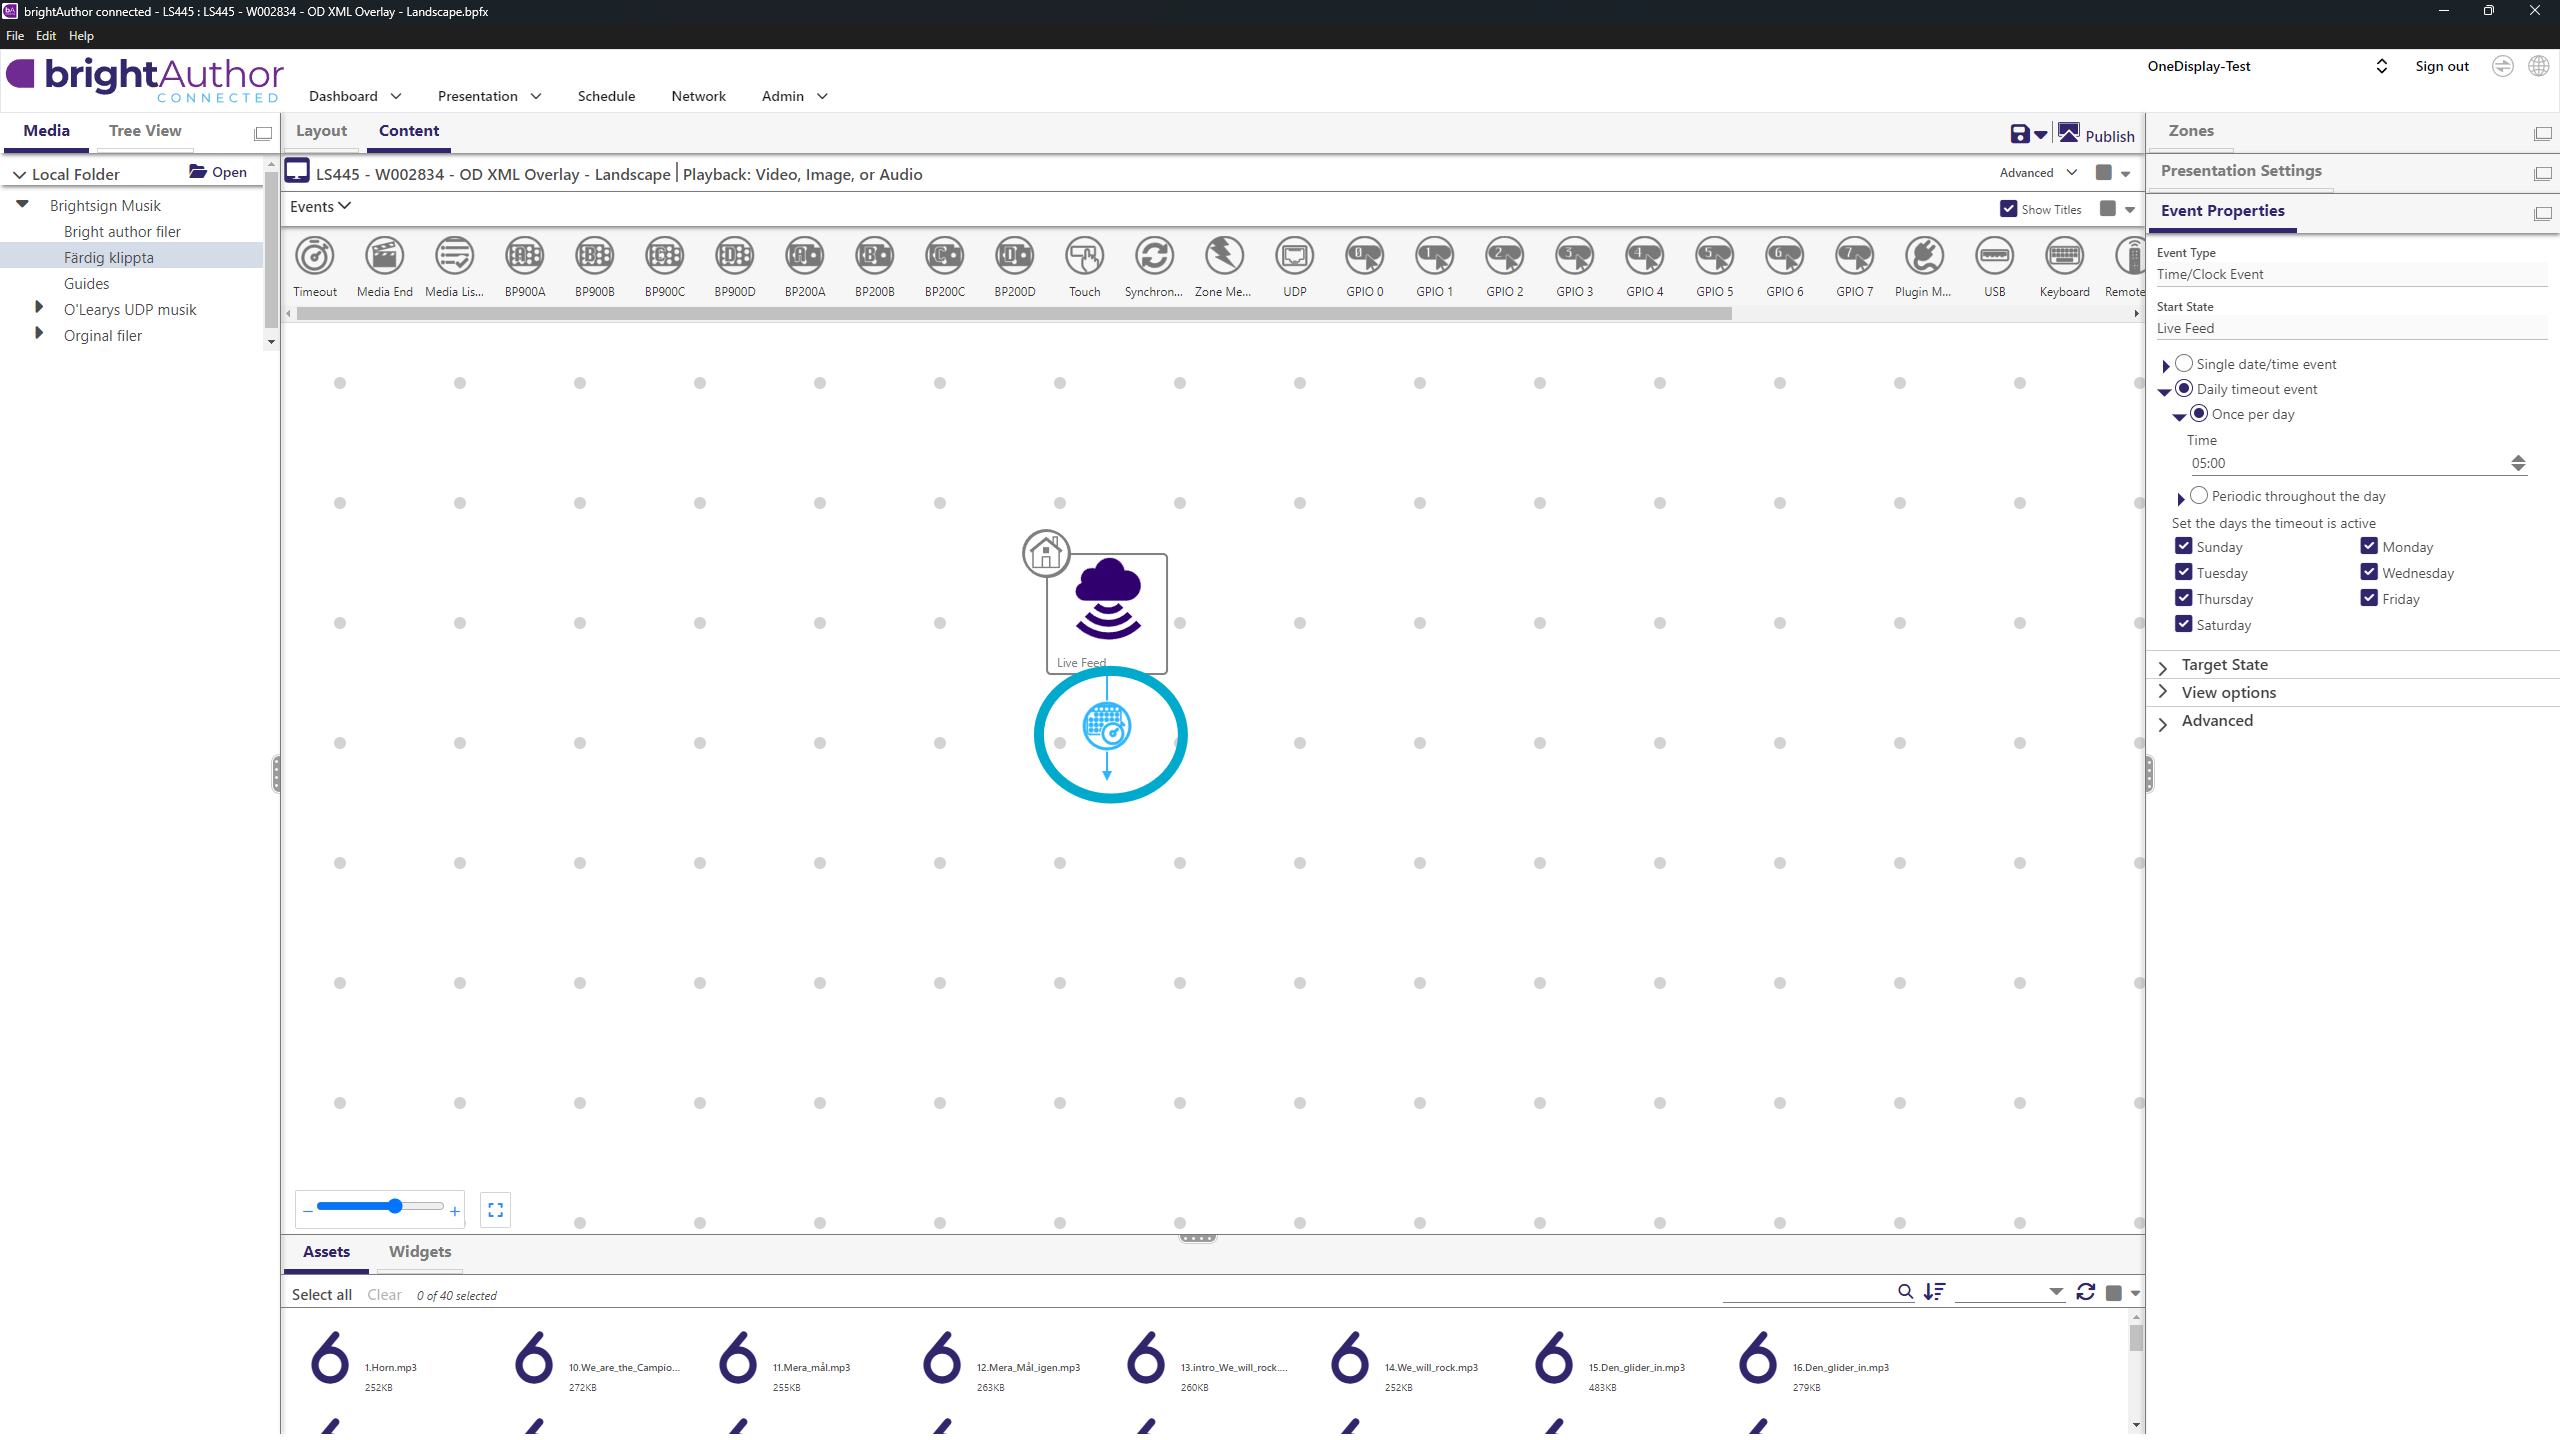
- Click Publish
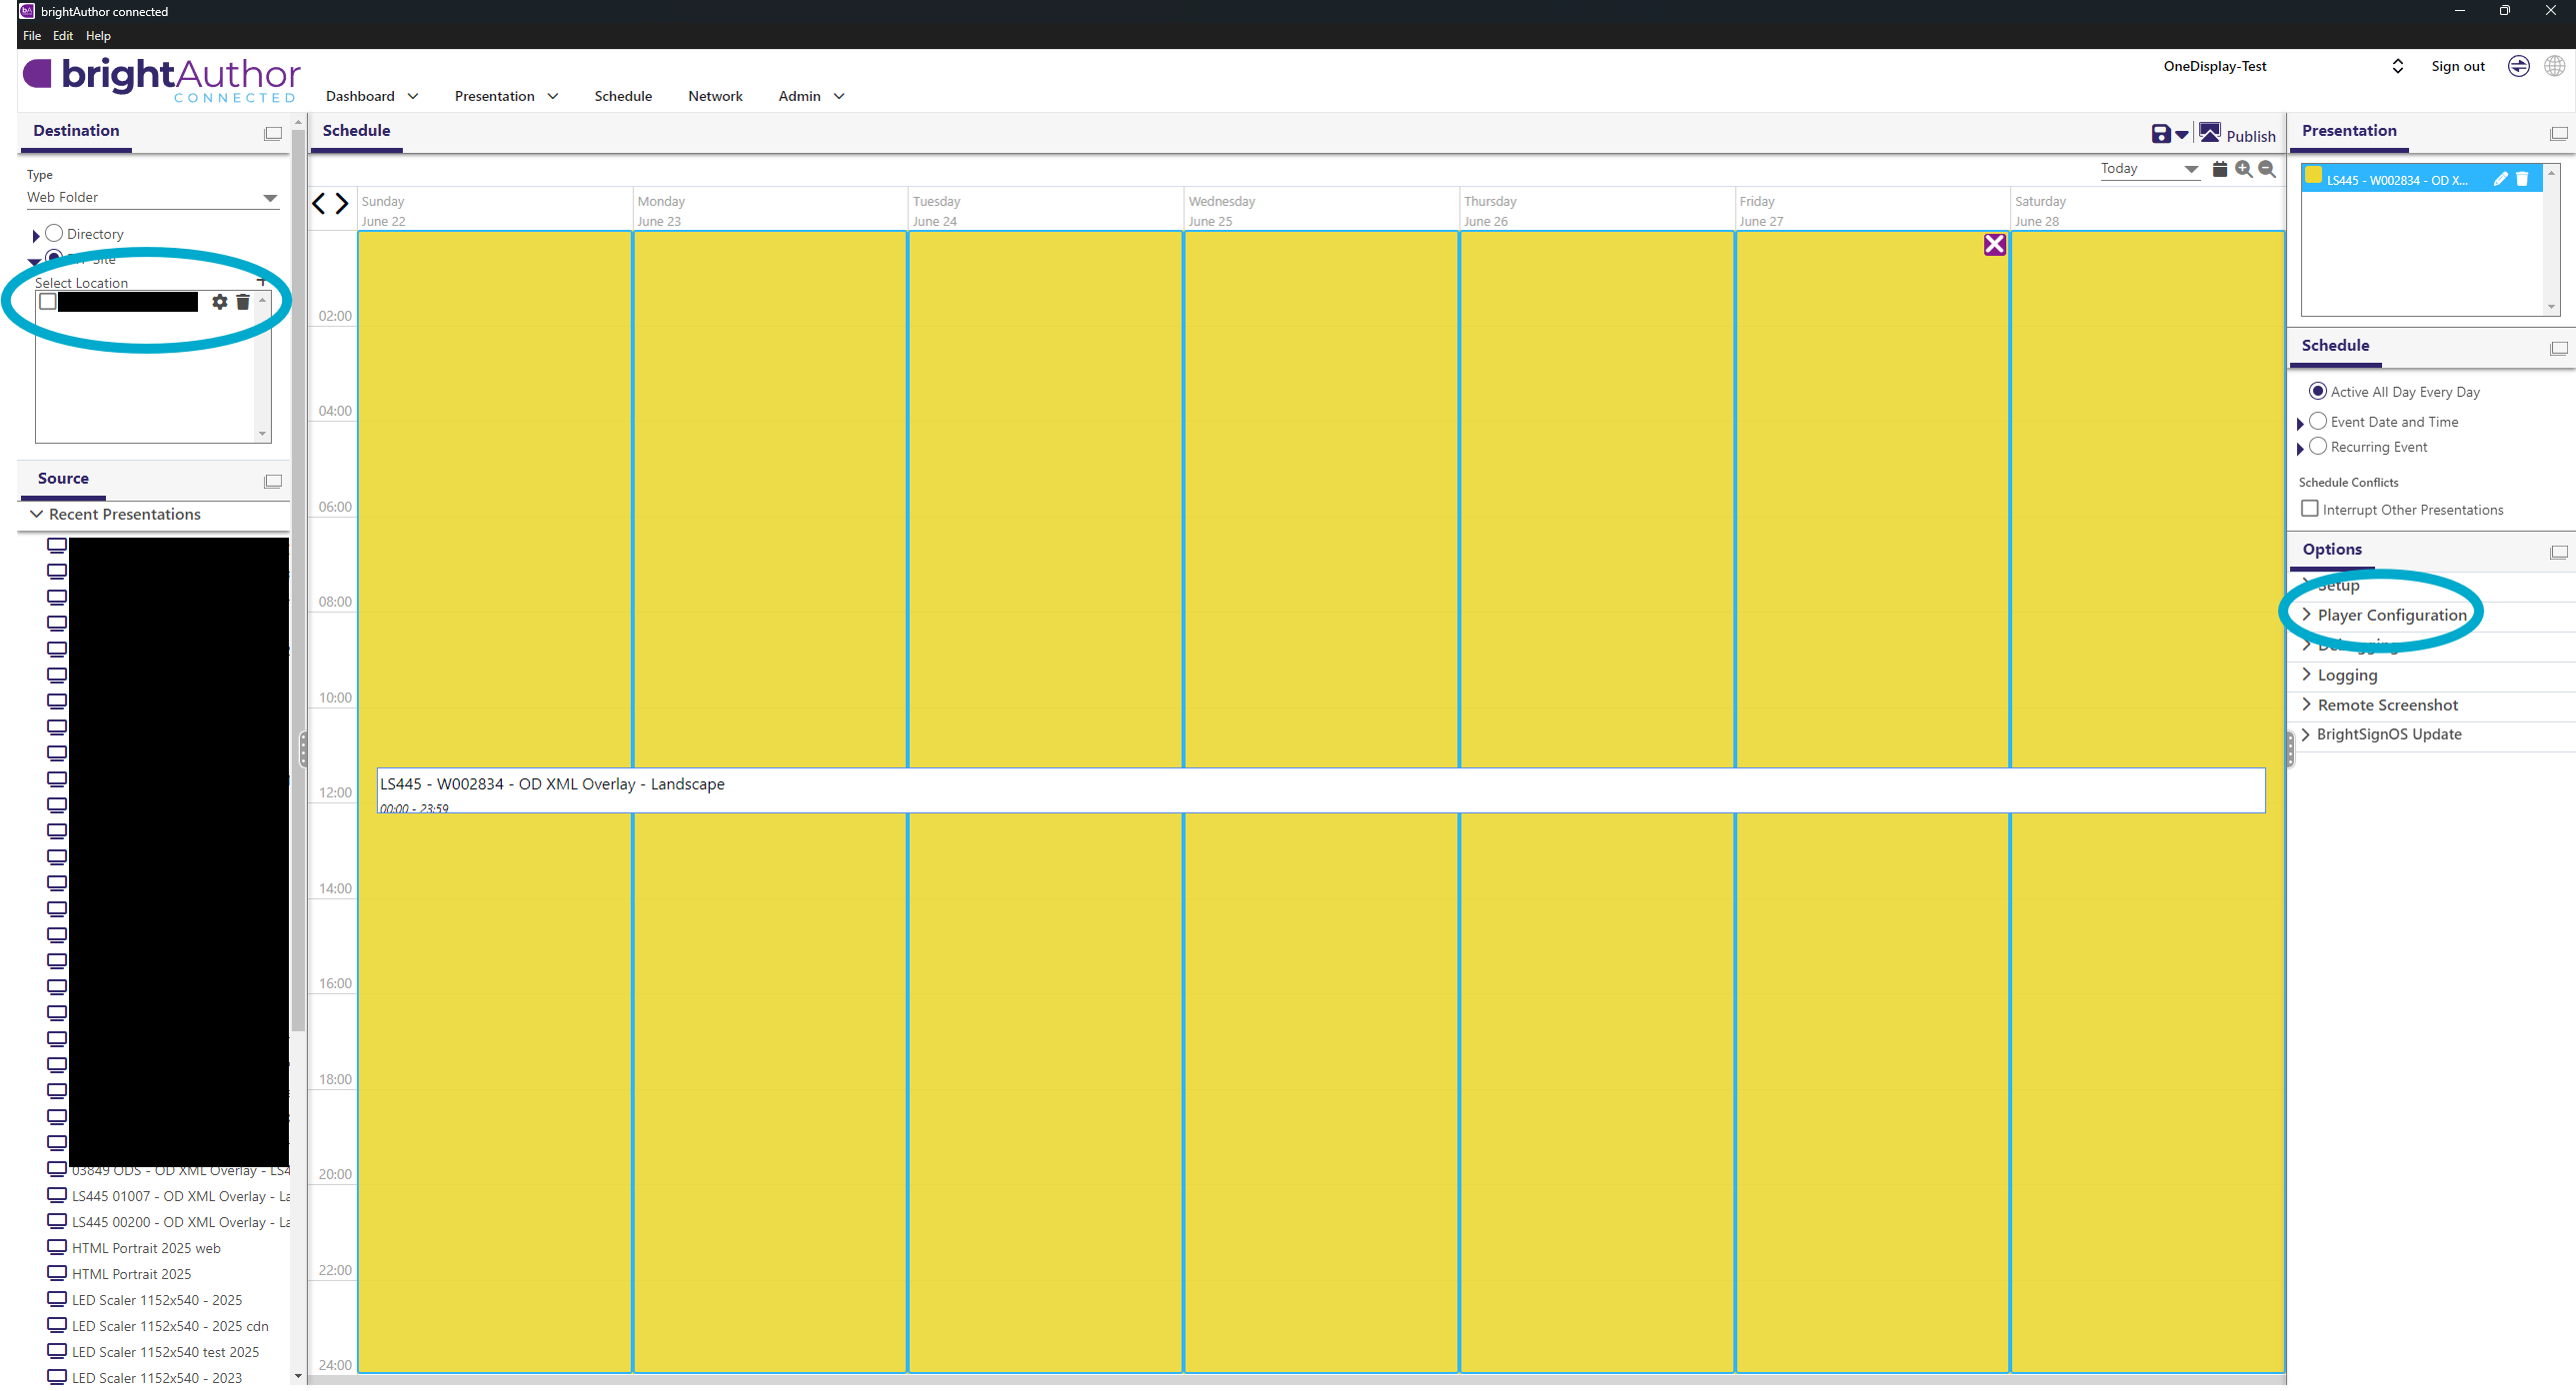
Publish Presentation
- Change Destination Type to Web Folder
- Under Options → Player Configuration, verify address
- Under Web Folder, check FTP Site
➡ See Add FTP location for creating FTP Location - Click ⚙️ gear → adjust Remote Path:
- After
/your-ftp-storage-path/from Create setup, add last 7 characters of serial number - Verify Remote Path matches Player Configuration and identifier matches Presentation name
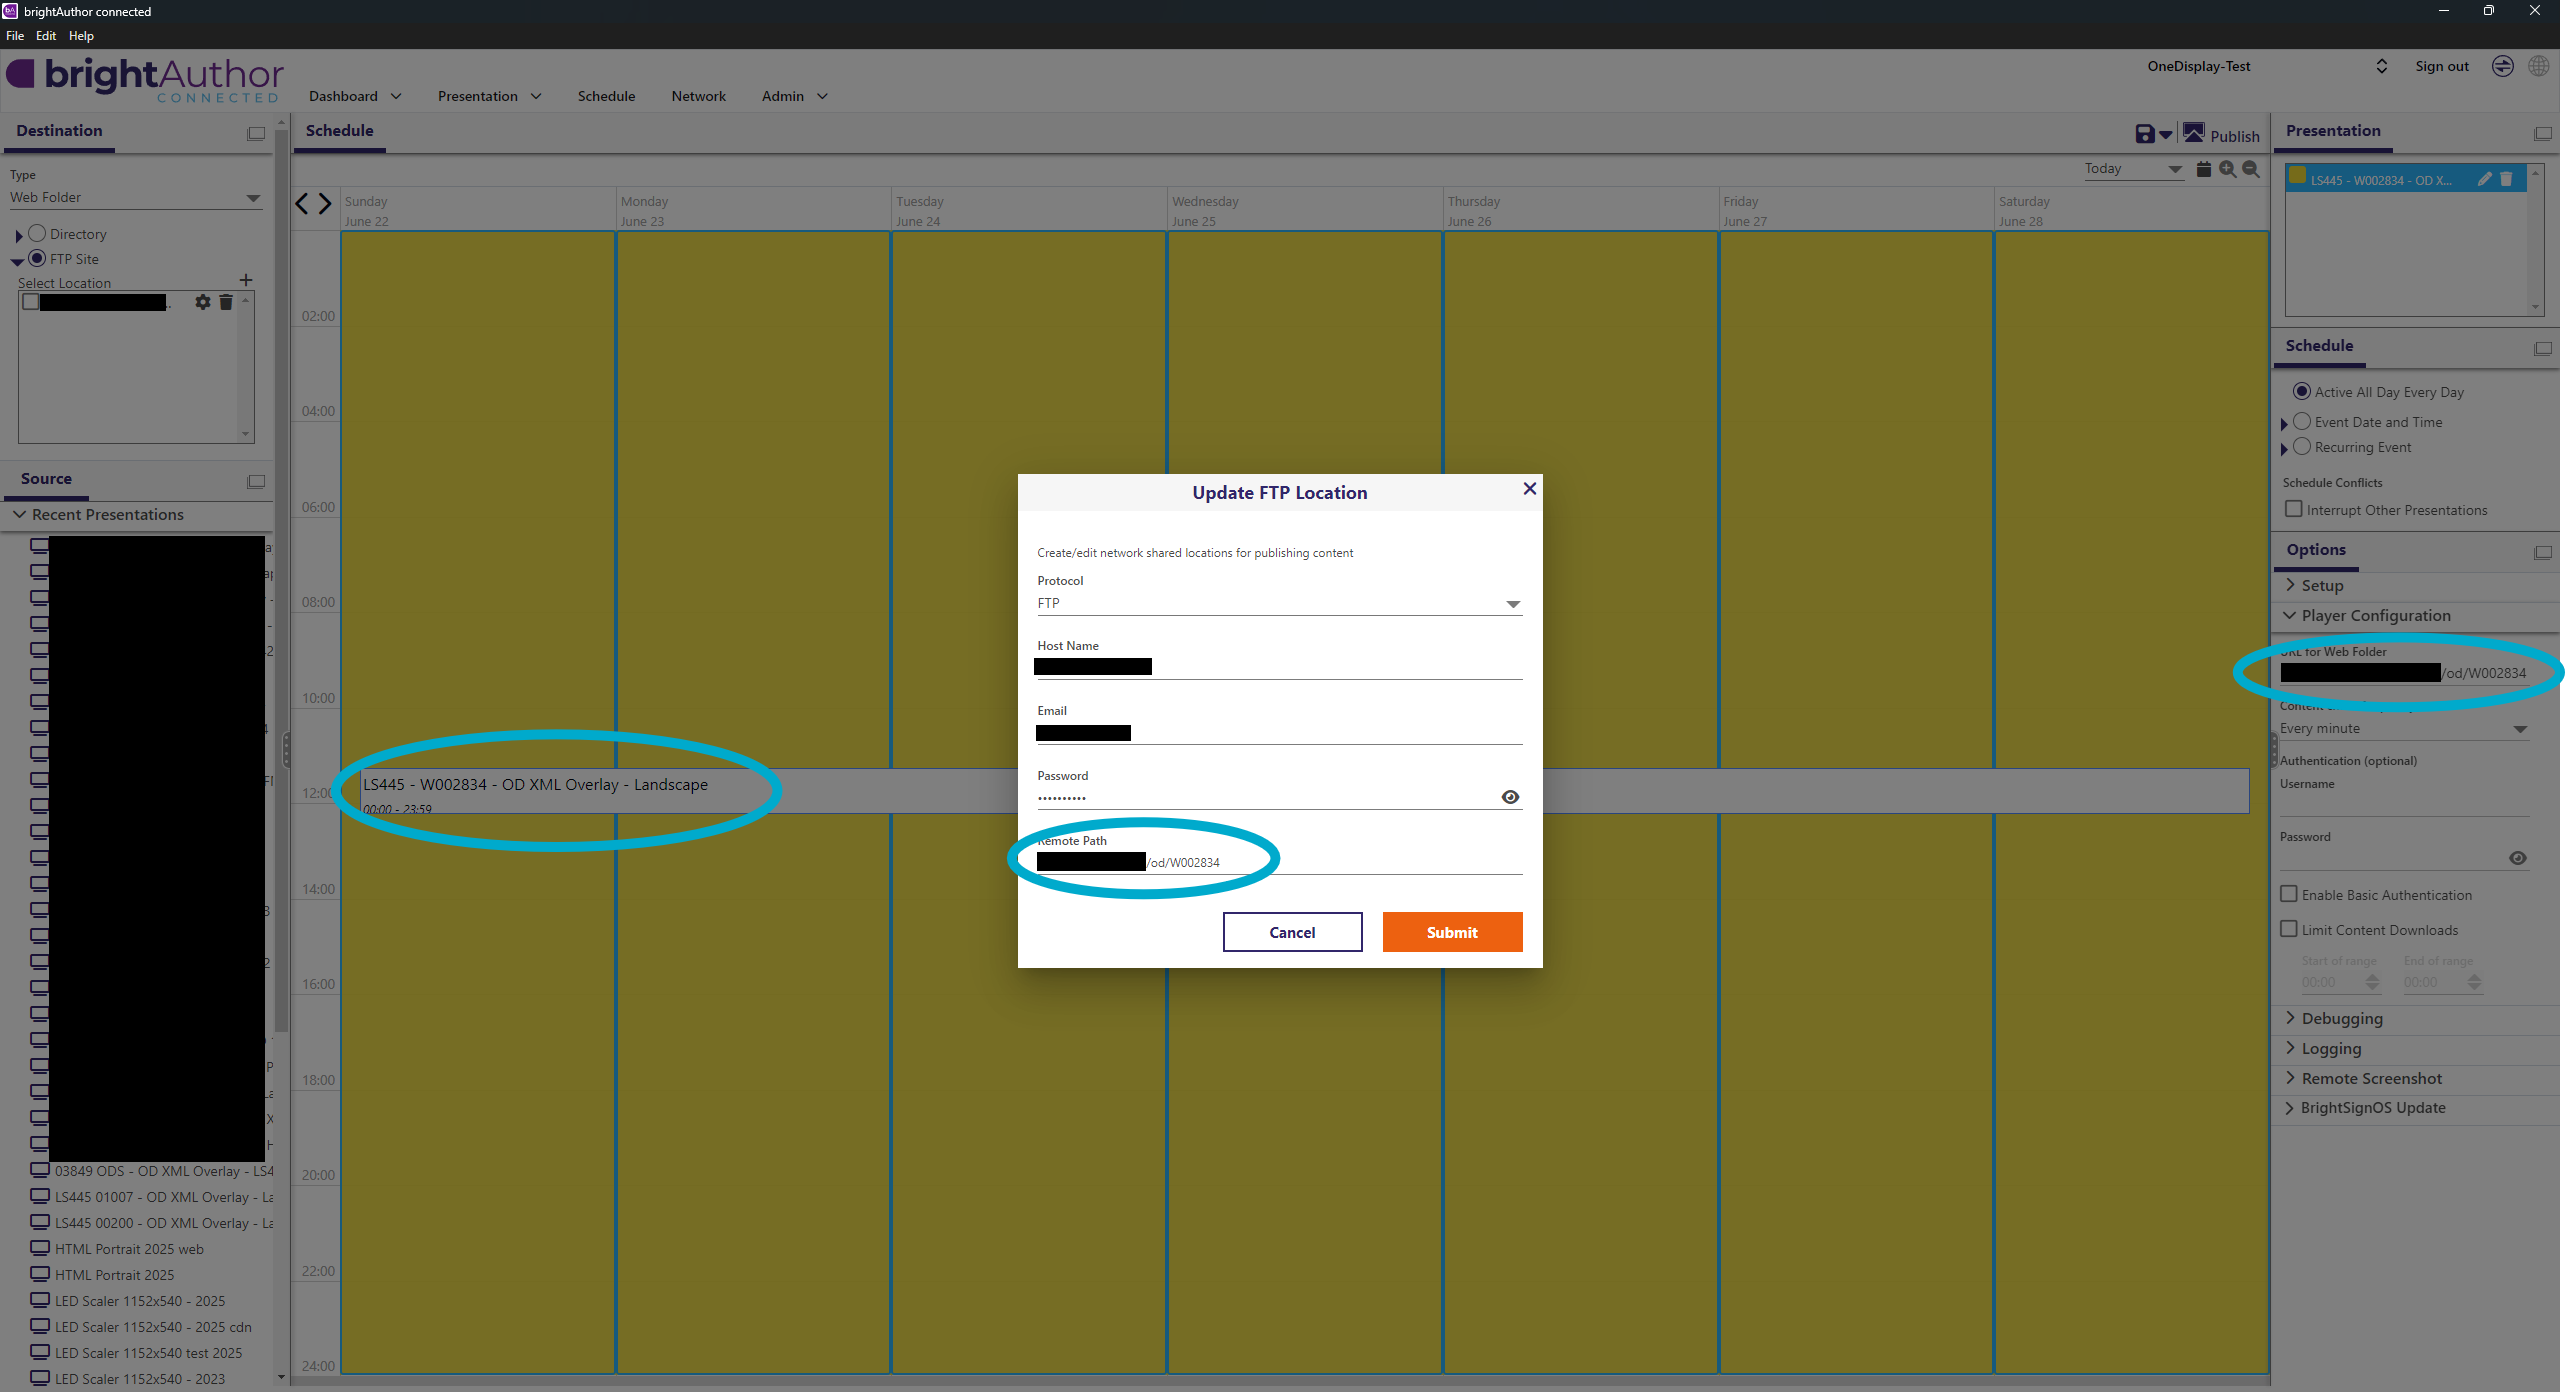
- After
- Click Publish
Add FTP Location
Click + at Select Location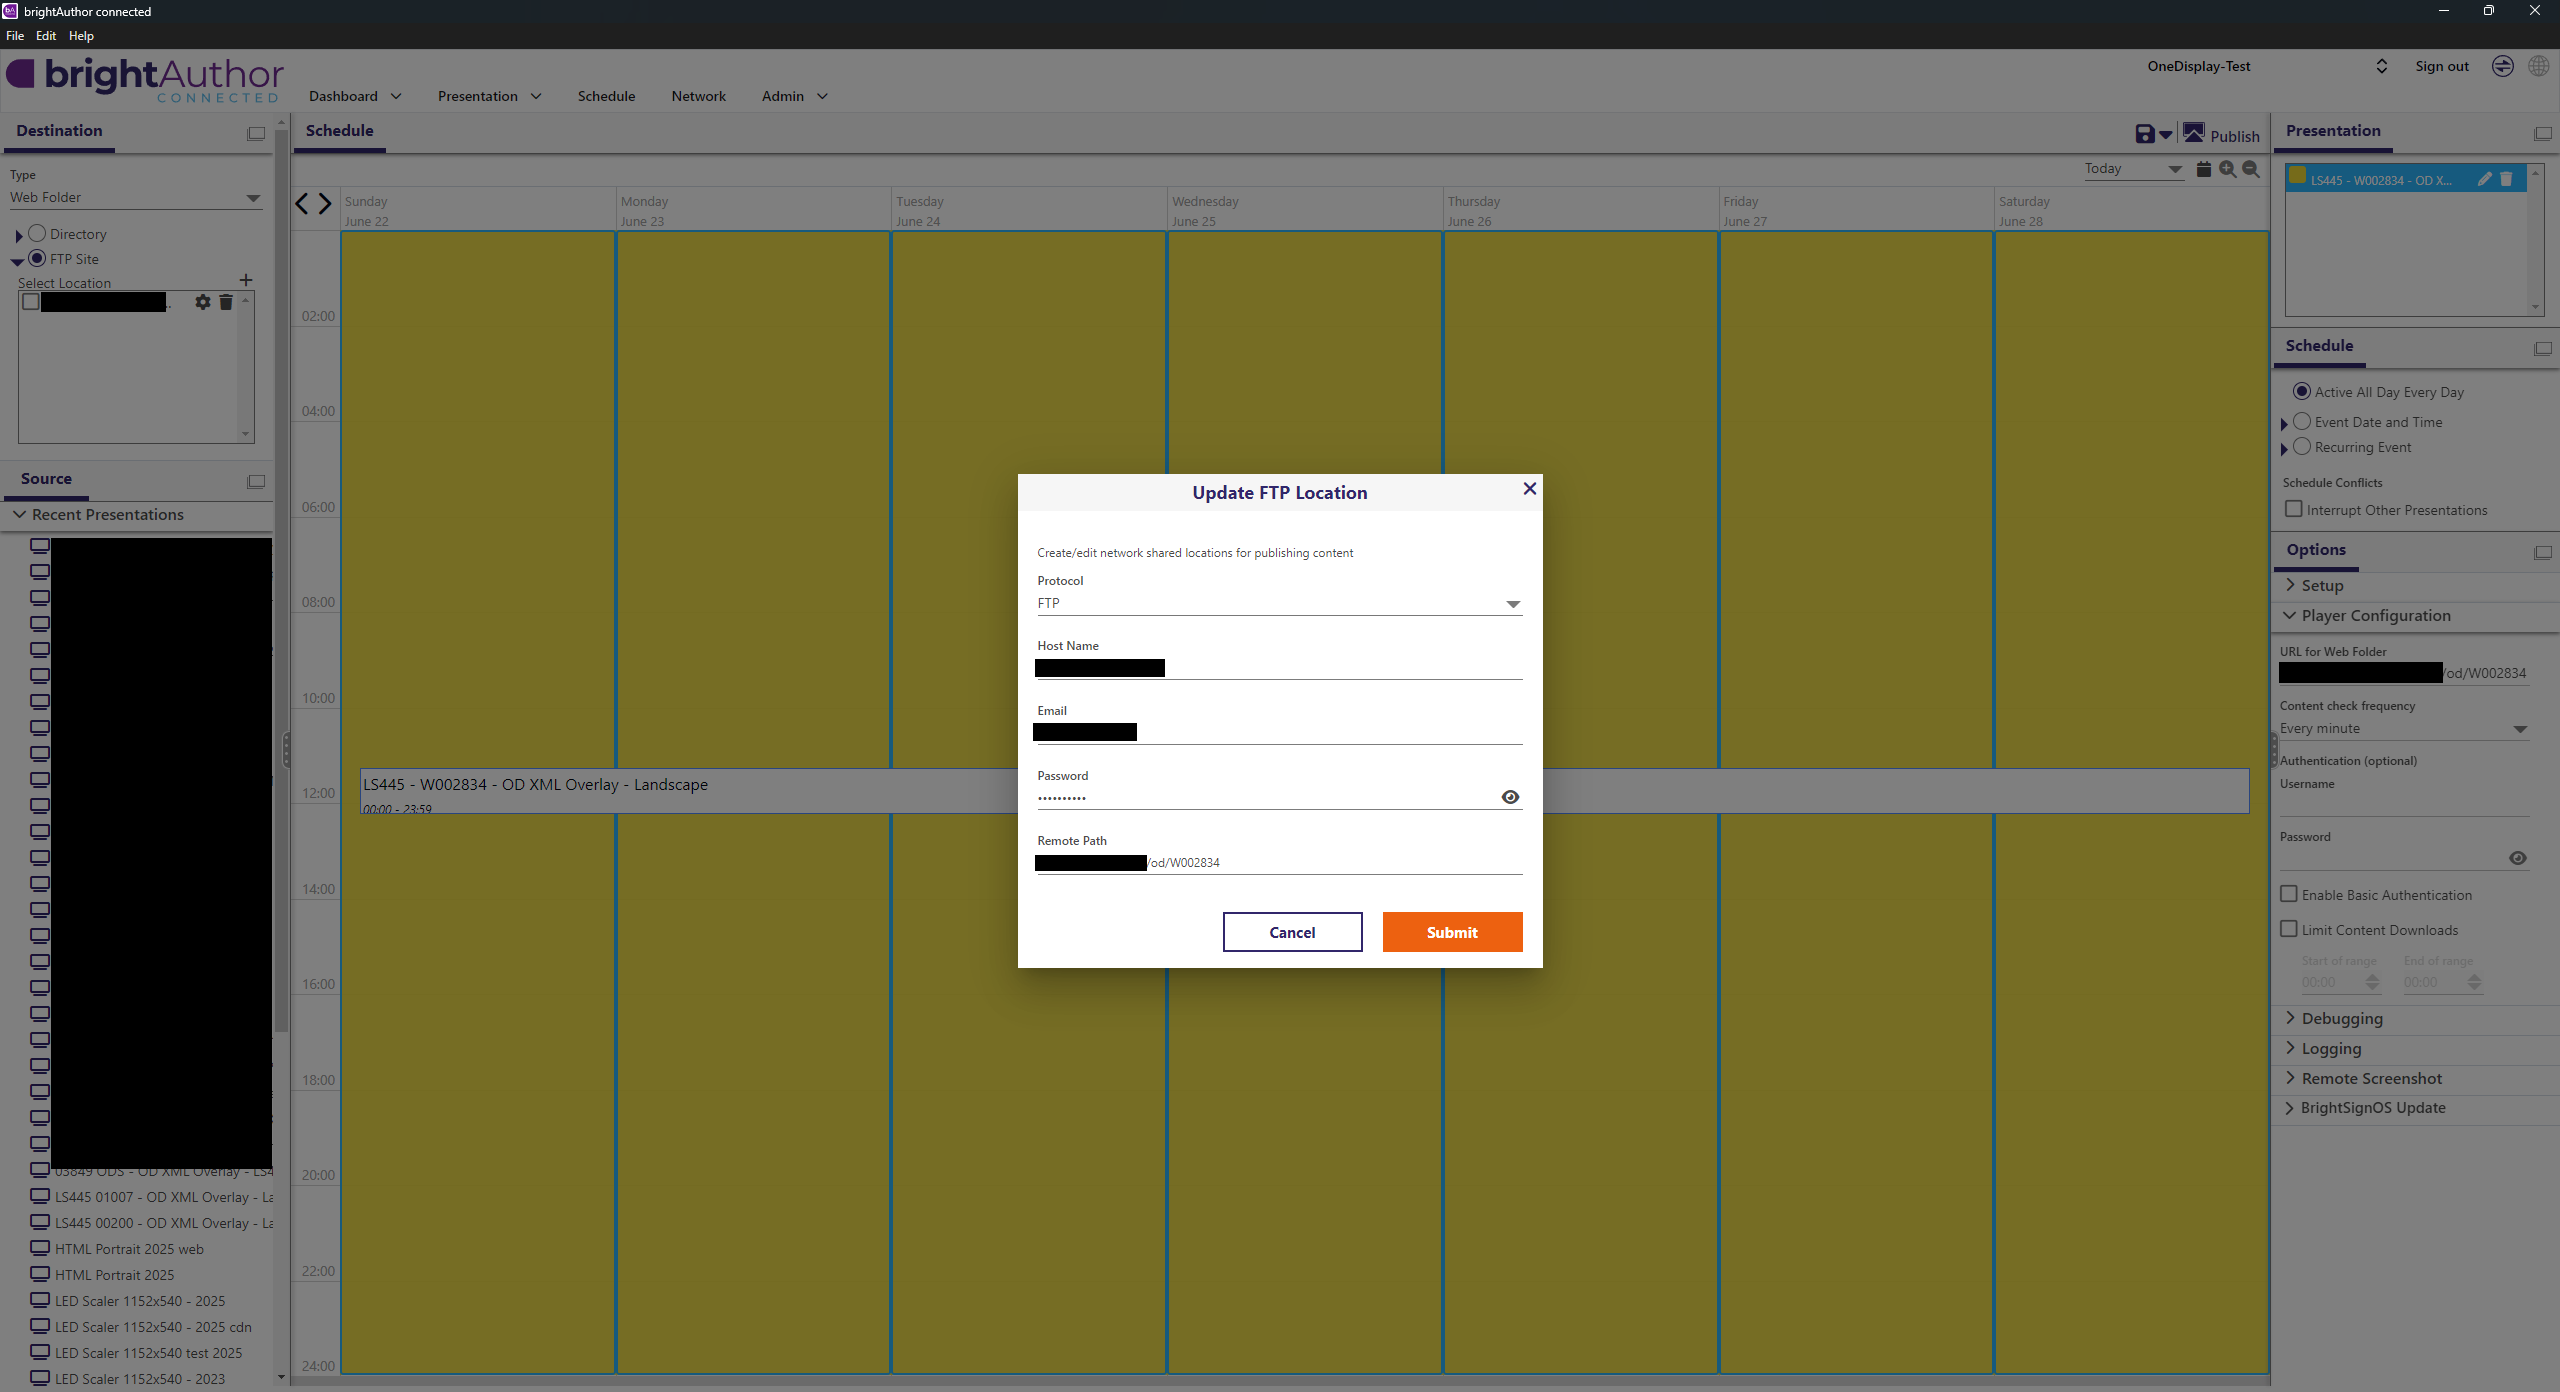
Fill in:
- Protocol: FTP
- Host Name:
your.ftphost.com - Email:
username - Password:
password - Remote Path:
/your-ftp-storage-path/serial number - Click Submit
Verify Installation
- Connect player to:
- Power
- Network (Ethernet or WiFi)
- HDMI to screen
- Check correct content is displayed
Special Configurations
LED Screen – Custom Resolution
- Complete all steps from the standard installation
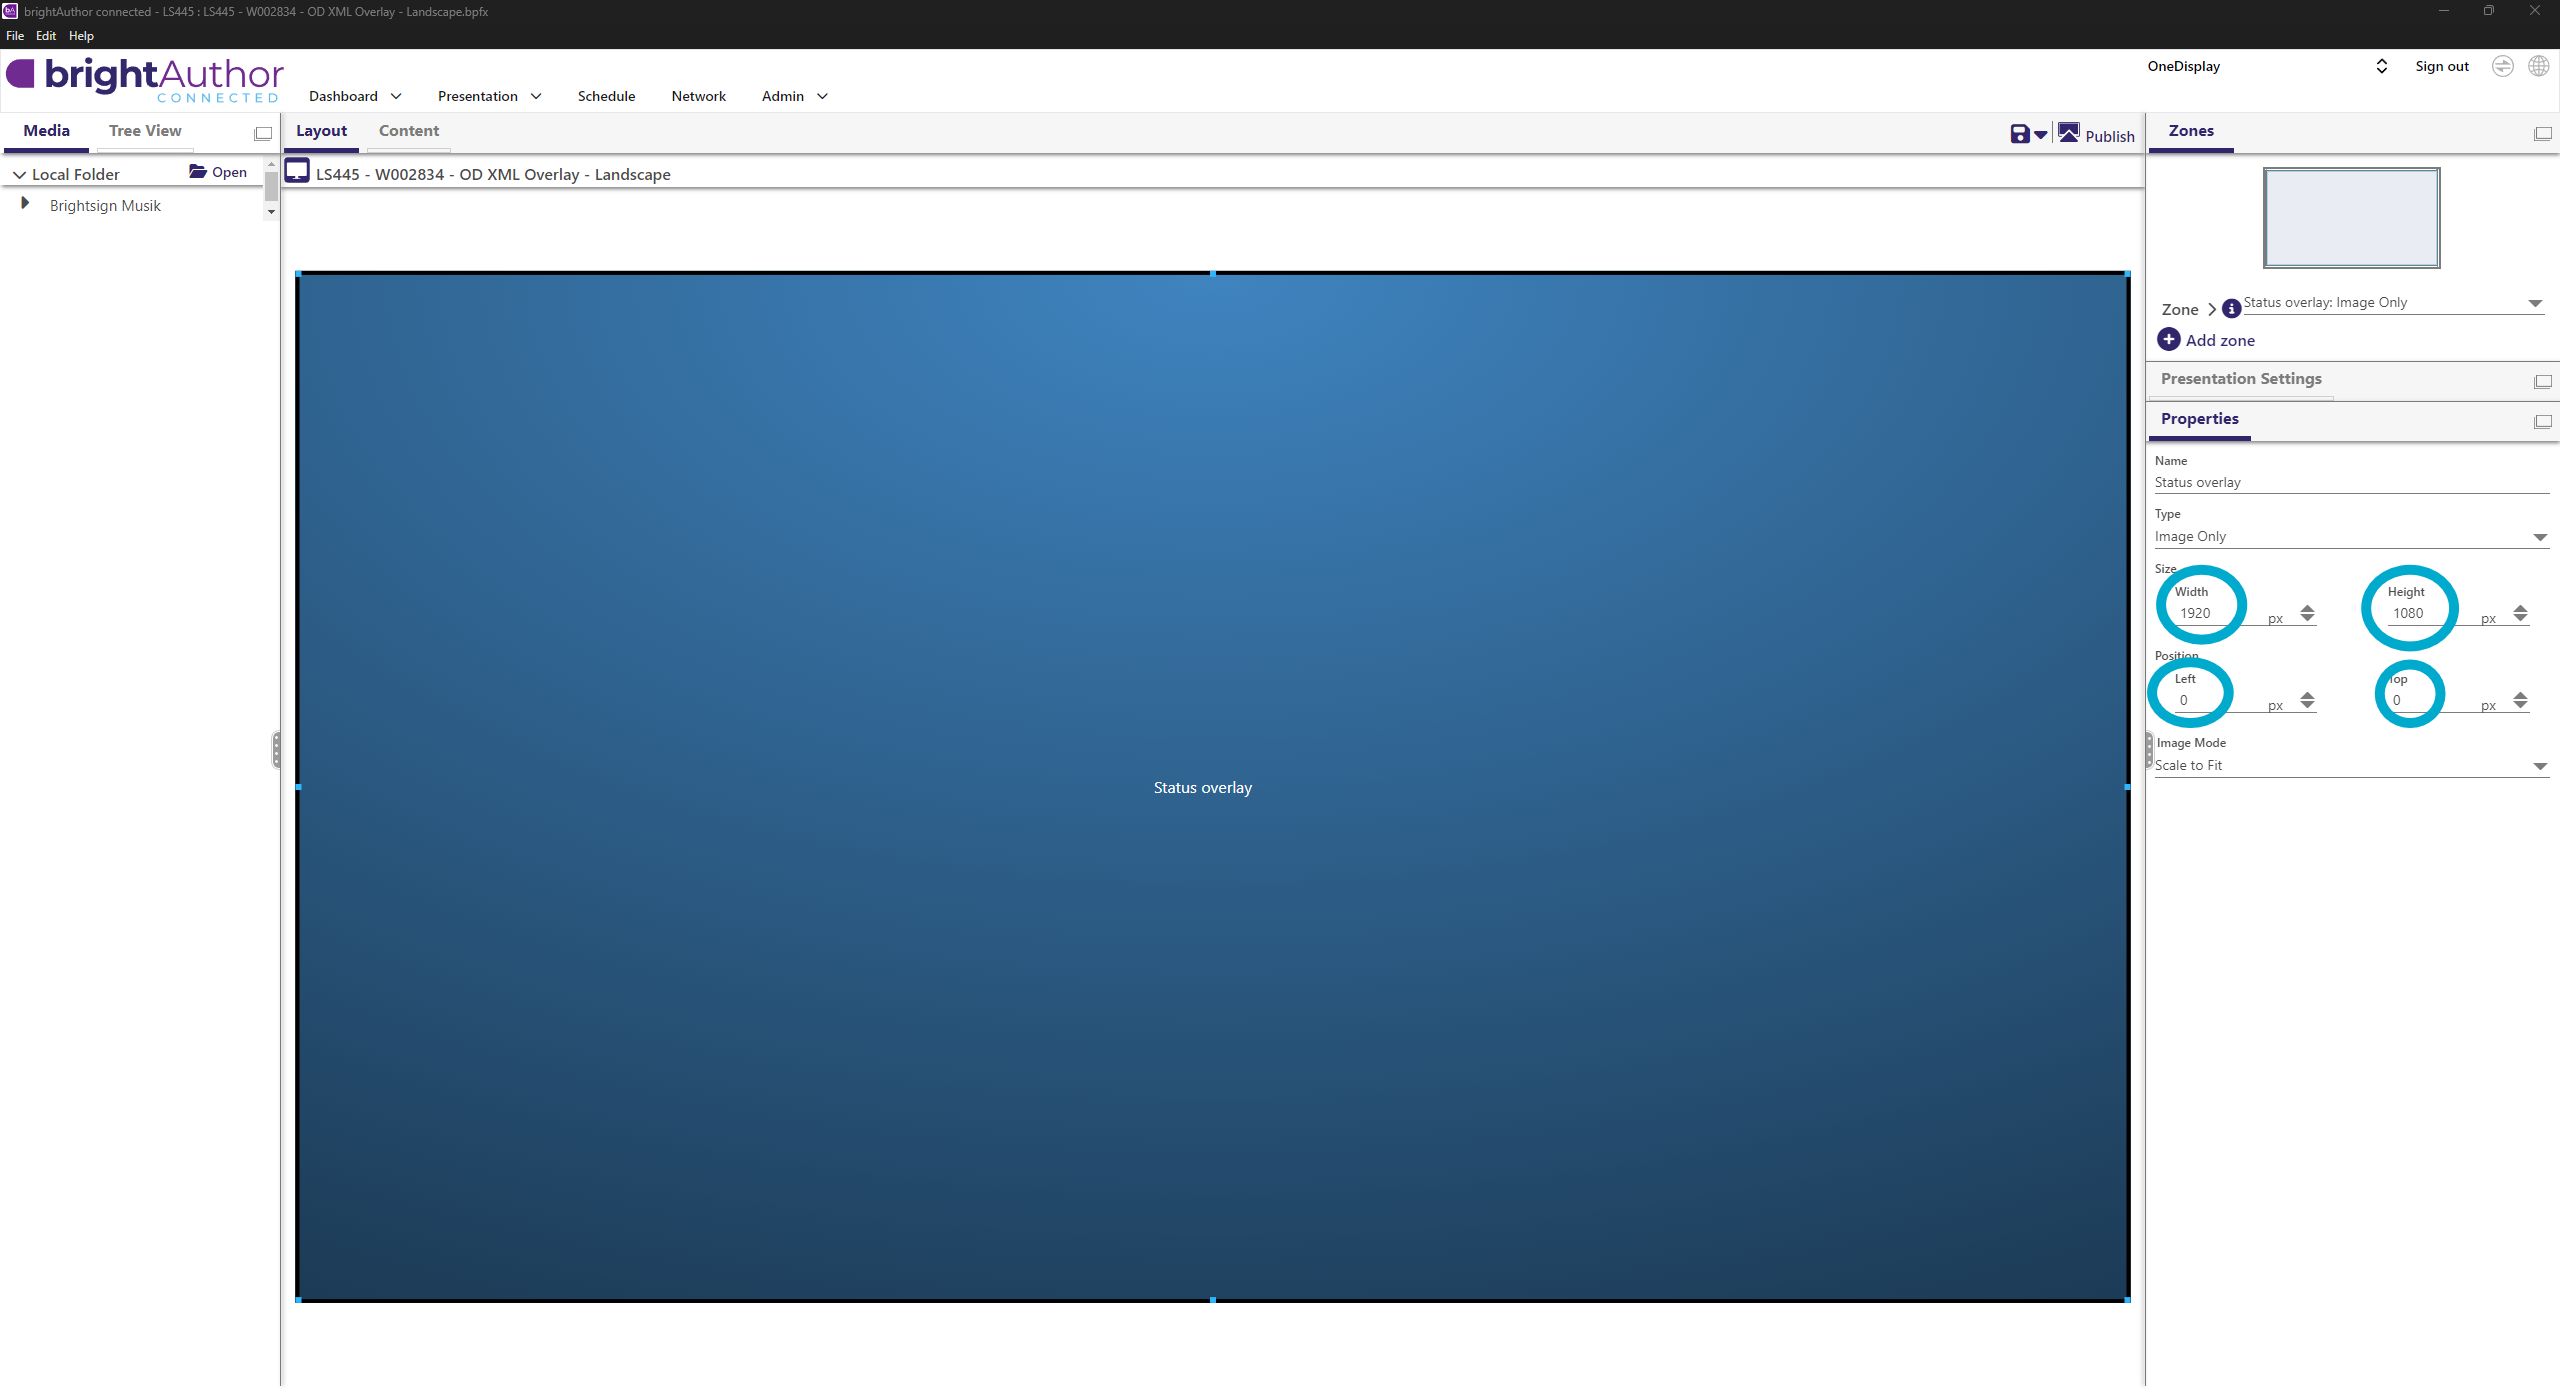
except for "Publish Presentation". - Adjust resolution:
- Click Layout → edit both Status Overlay & Playback zones
- Set Width/Height to screen resolution (e.g. 1152×1024)
- Position: Left 0, Top 0
➡ Continue from step 11
- Click Layout → edit both Status Overlay & Playback zones
OneDisplay + HDMI In with UDP Control
- Complete all steps from the standard installation
except for "Publish Presentation". - Use template:
XT1145 - HDMI - OD XML Overlay – Landscape
Configure UDP Commands
For XML/Live Feed Object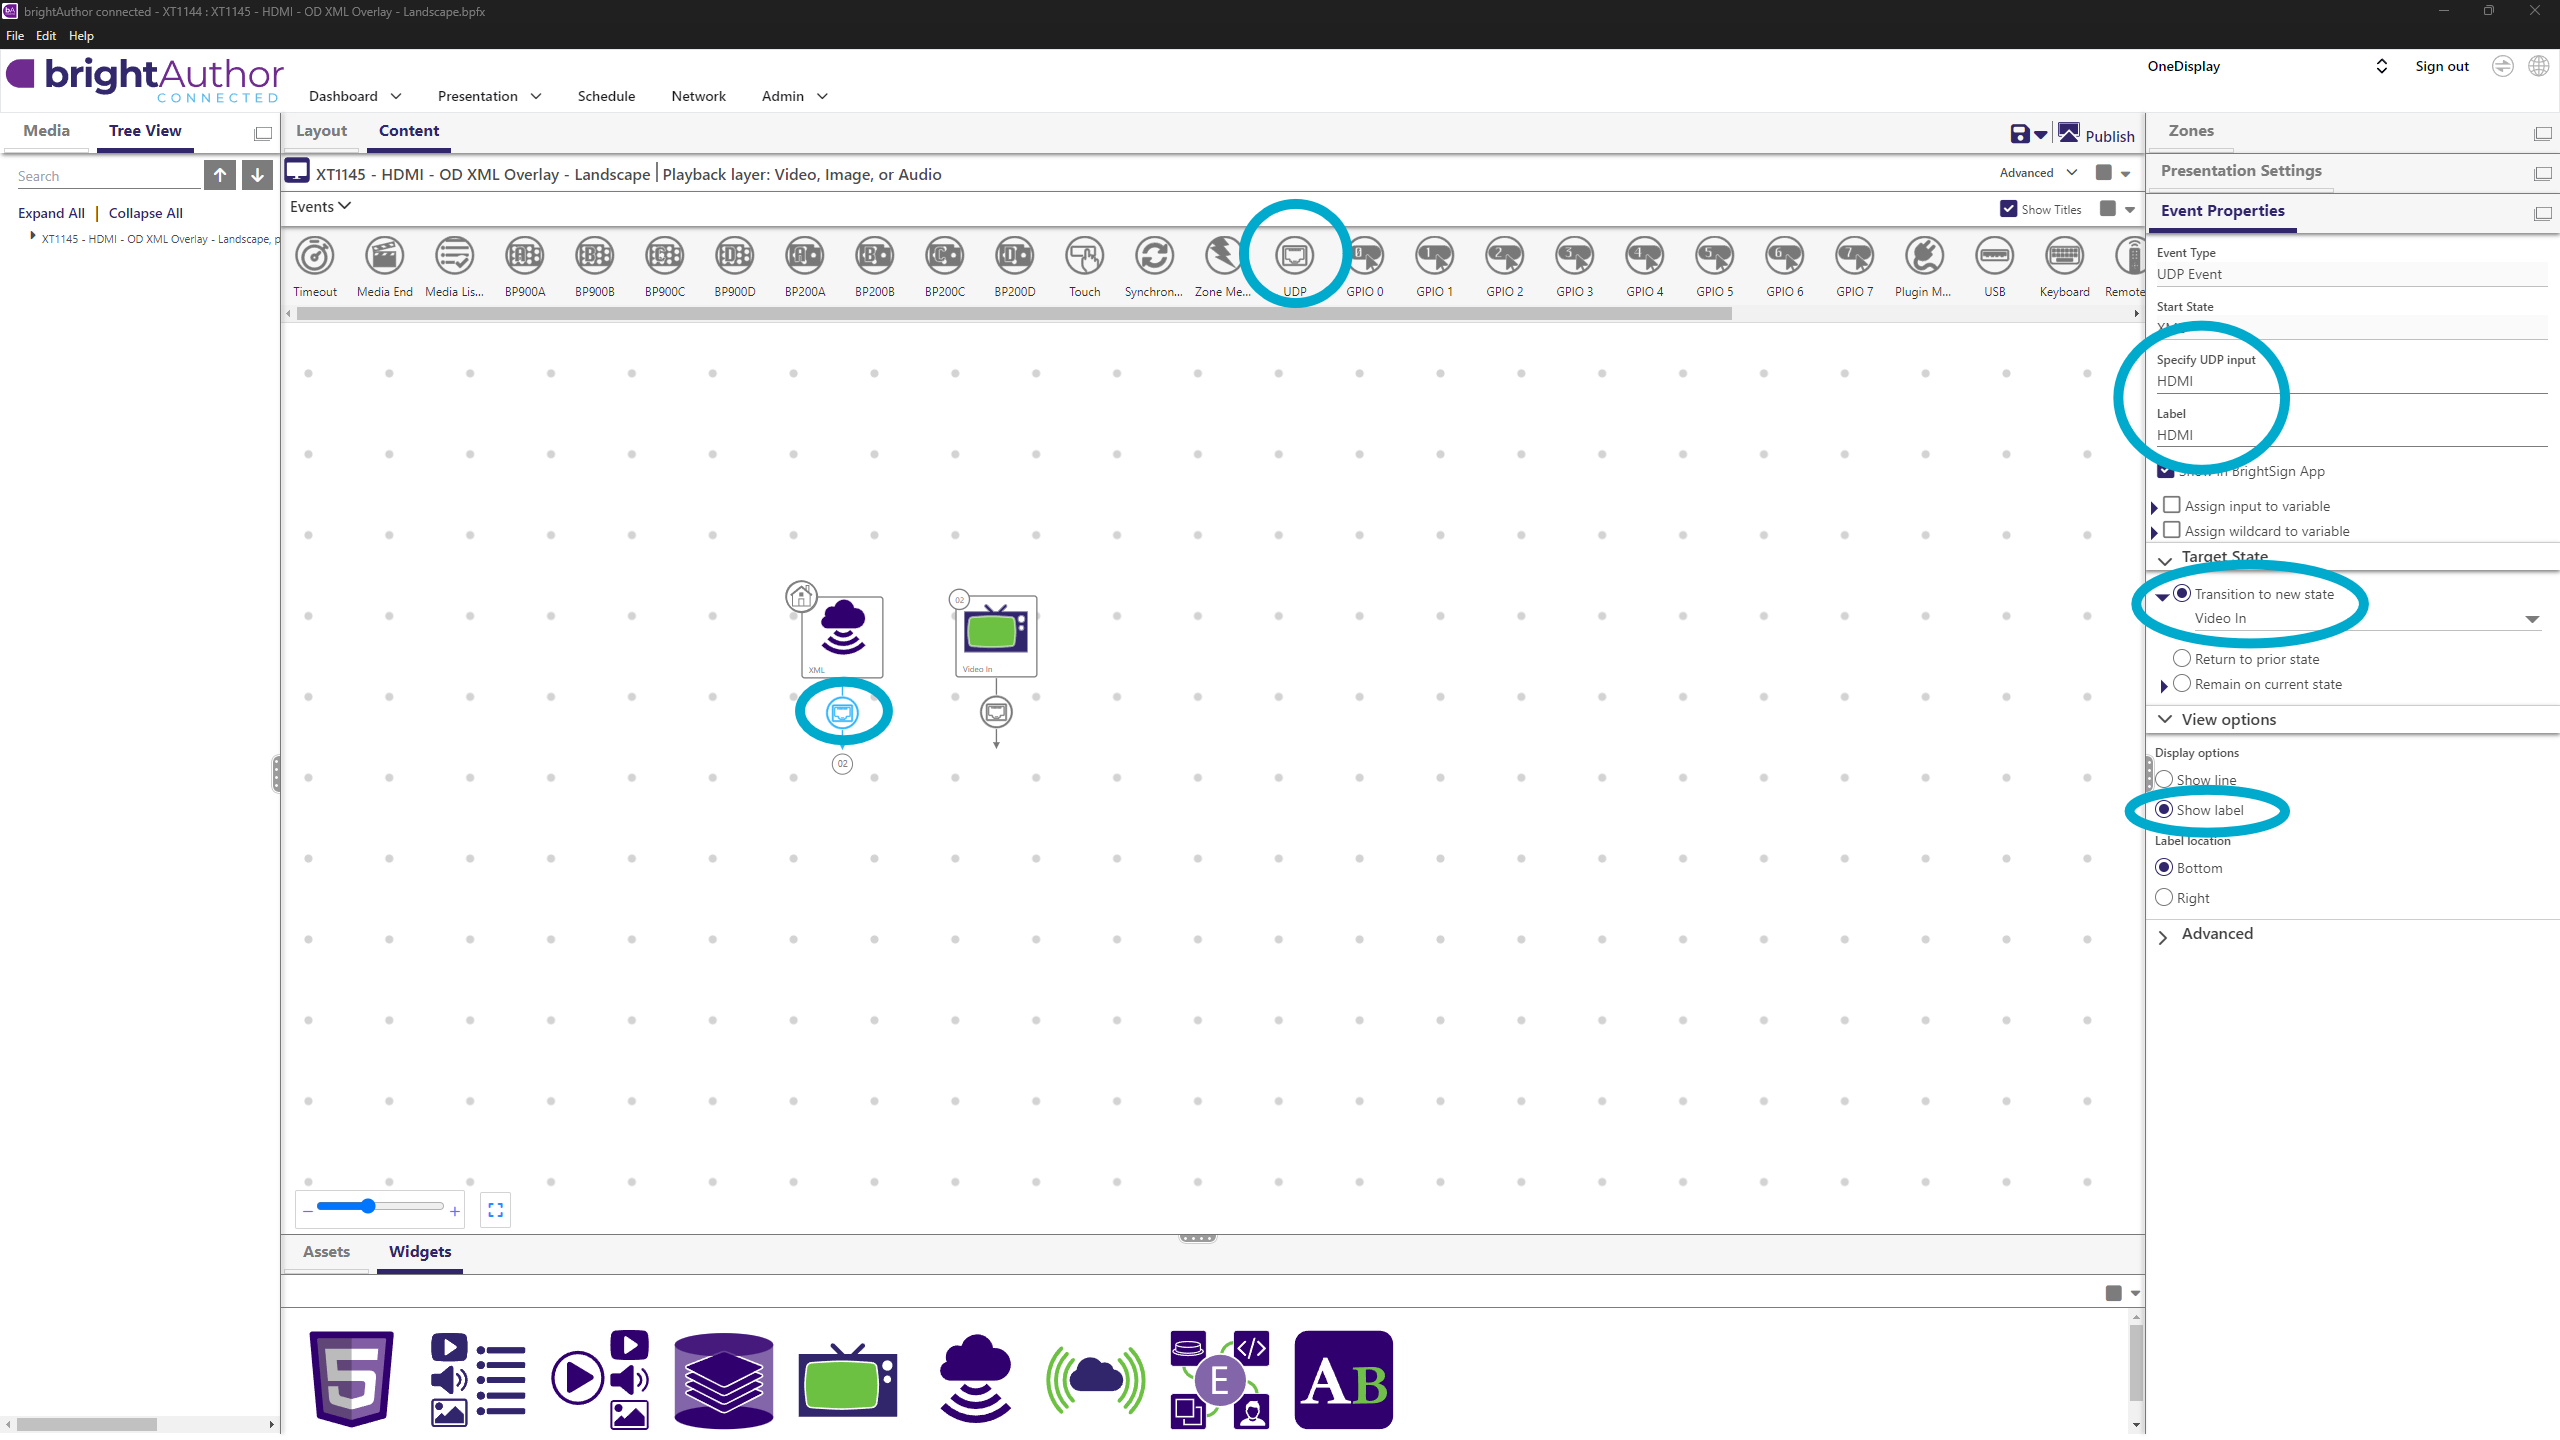
- UDP input:
HDMI - Target State:
Video In - Show Label: enabled
For Video Object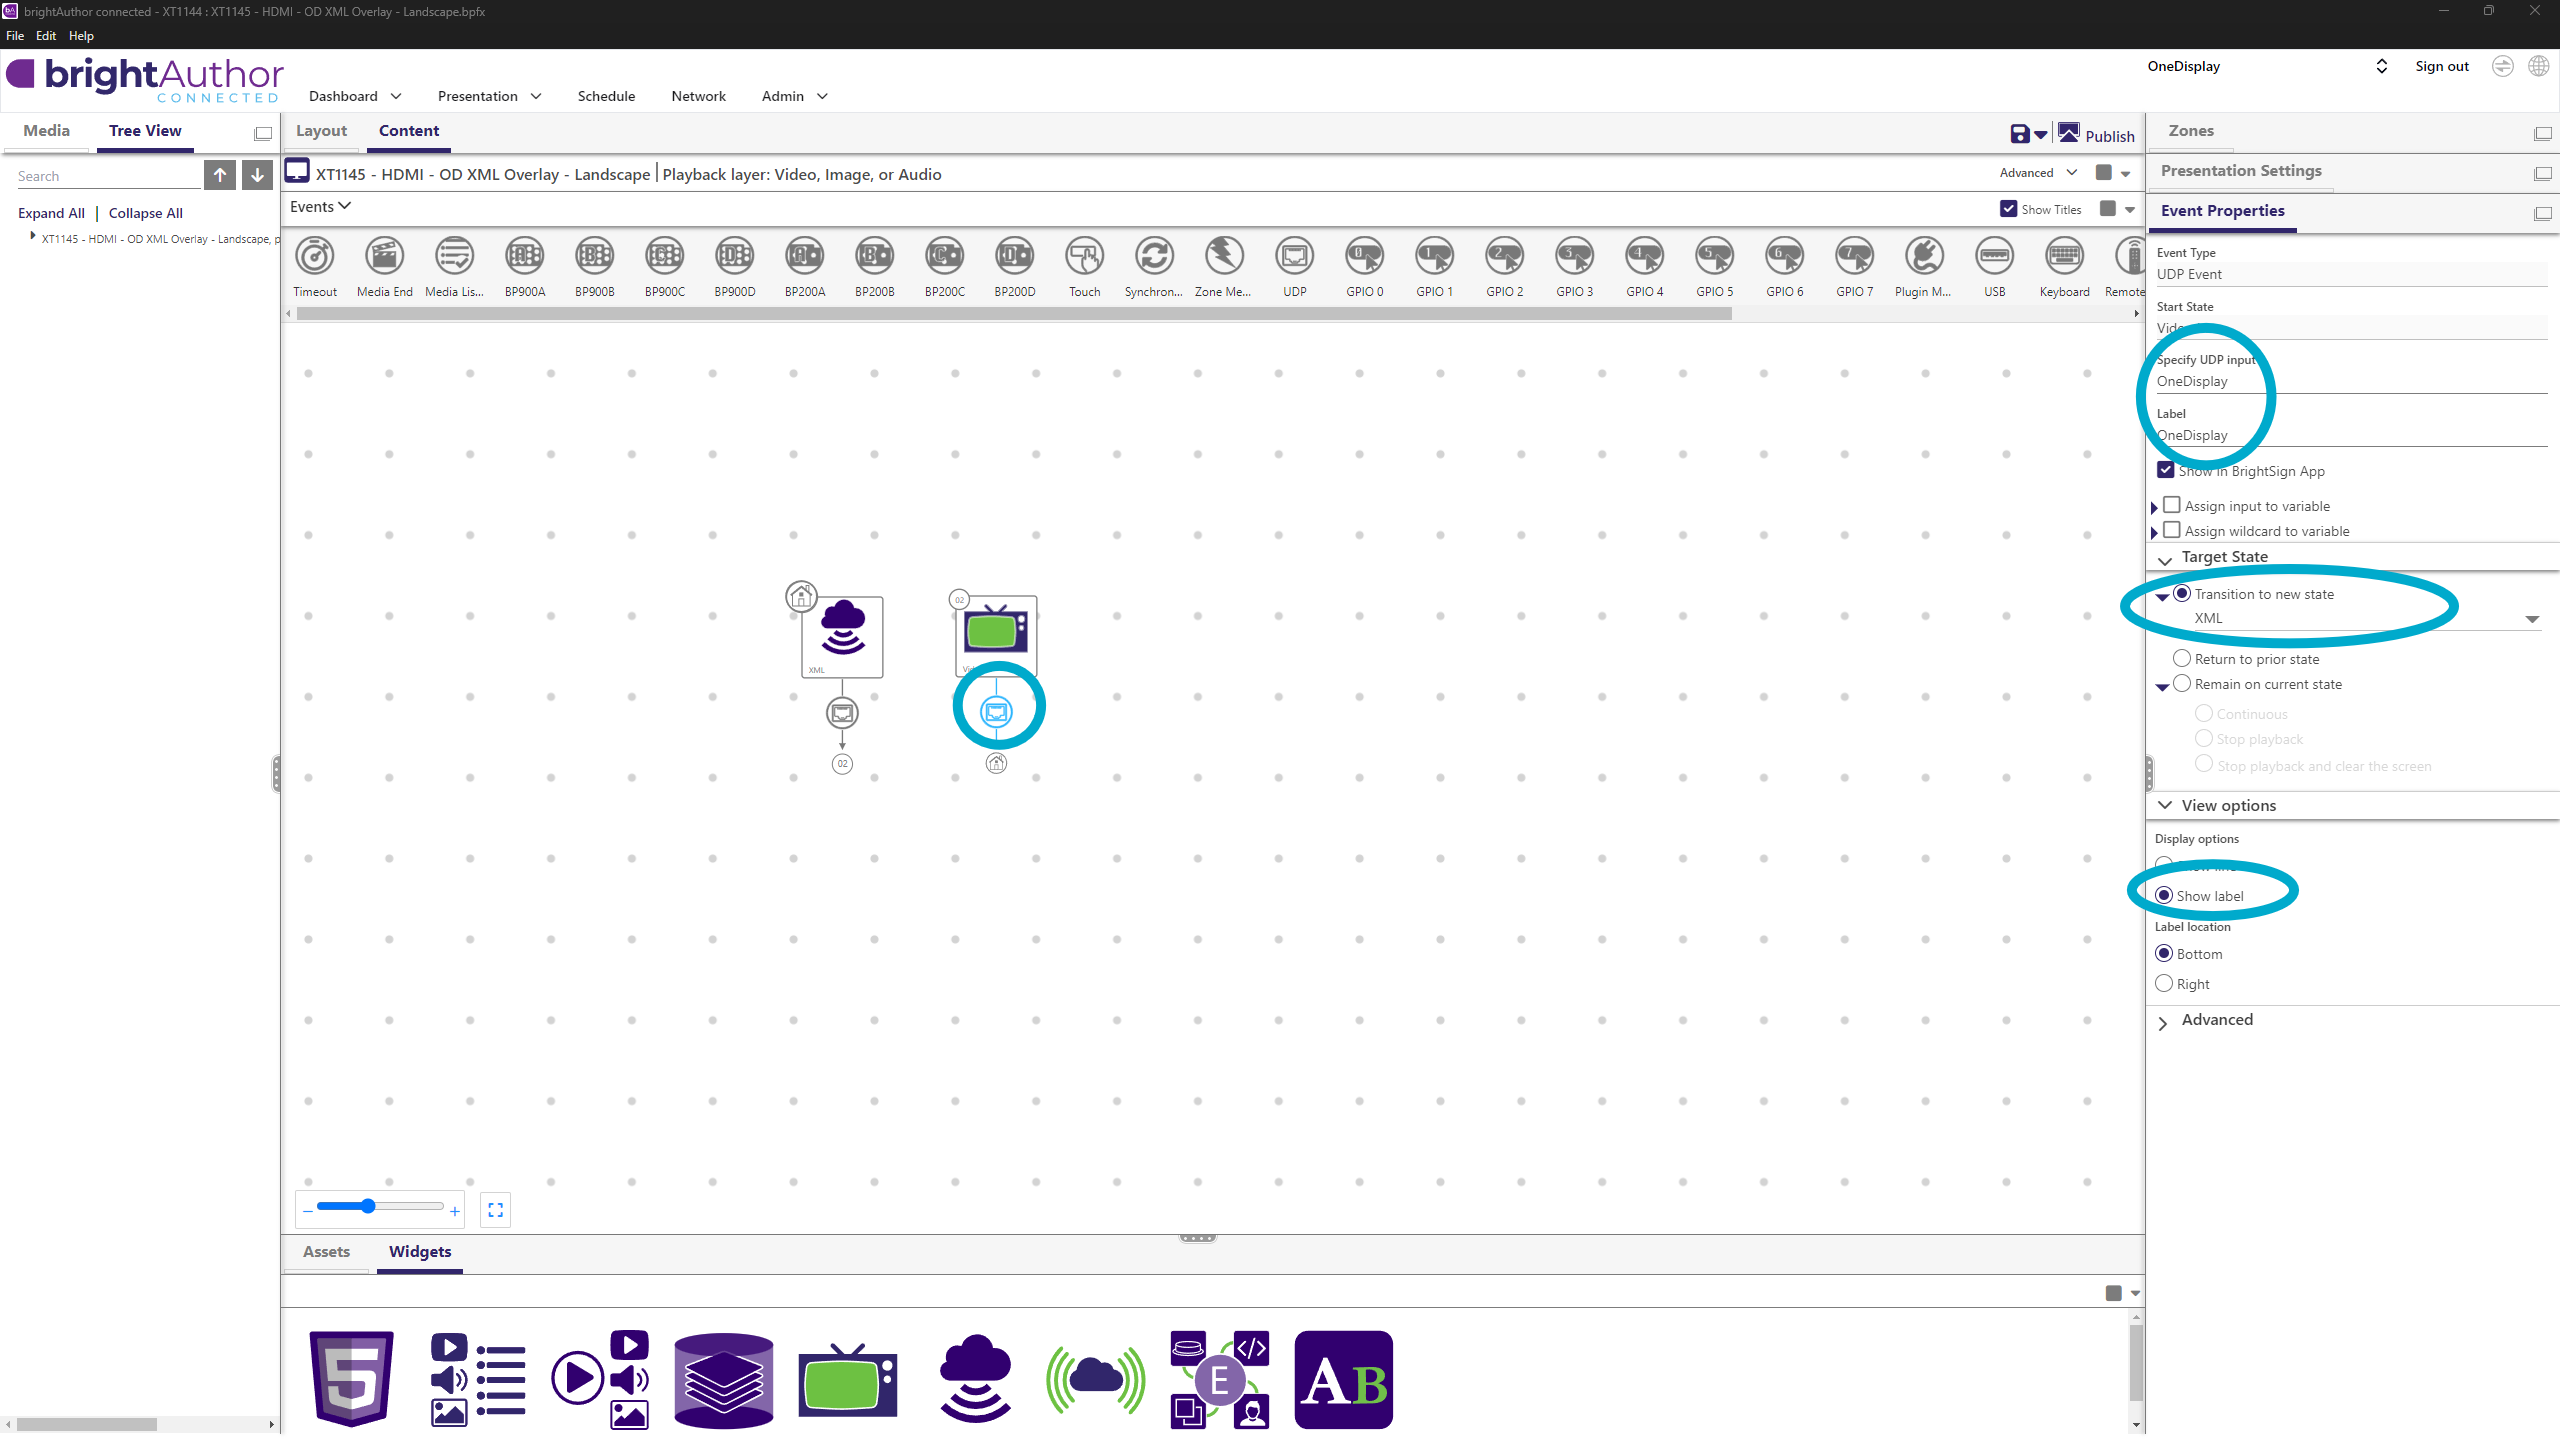
- UDP input:
OneDisplay - Target State:
Video In - Show Label: enabled
➡ Continue from Publish Presentation
LED Screen with OneDisplay + HDMI In
Example: My Restaurant – 1152×1024 px
- Use template:
HDMI LED Scaler - In Layout adjust zones:
- Main Screen: 1152×1024, position 0/0
- Sidekick zone: 1152×376, position Left 0, Top 648

ℹ️ OD status zones are only for XML overlay.
- Sidekick zone content:
- Switch to Sidekick zone
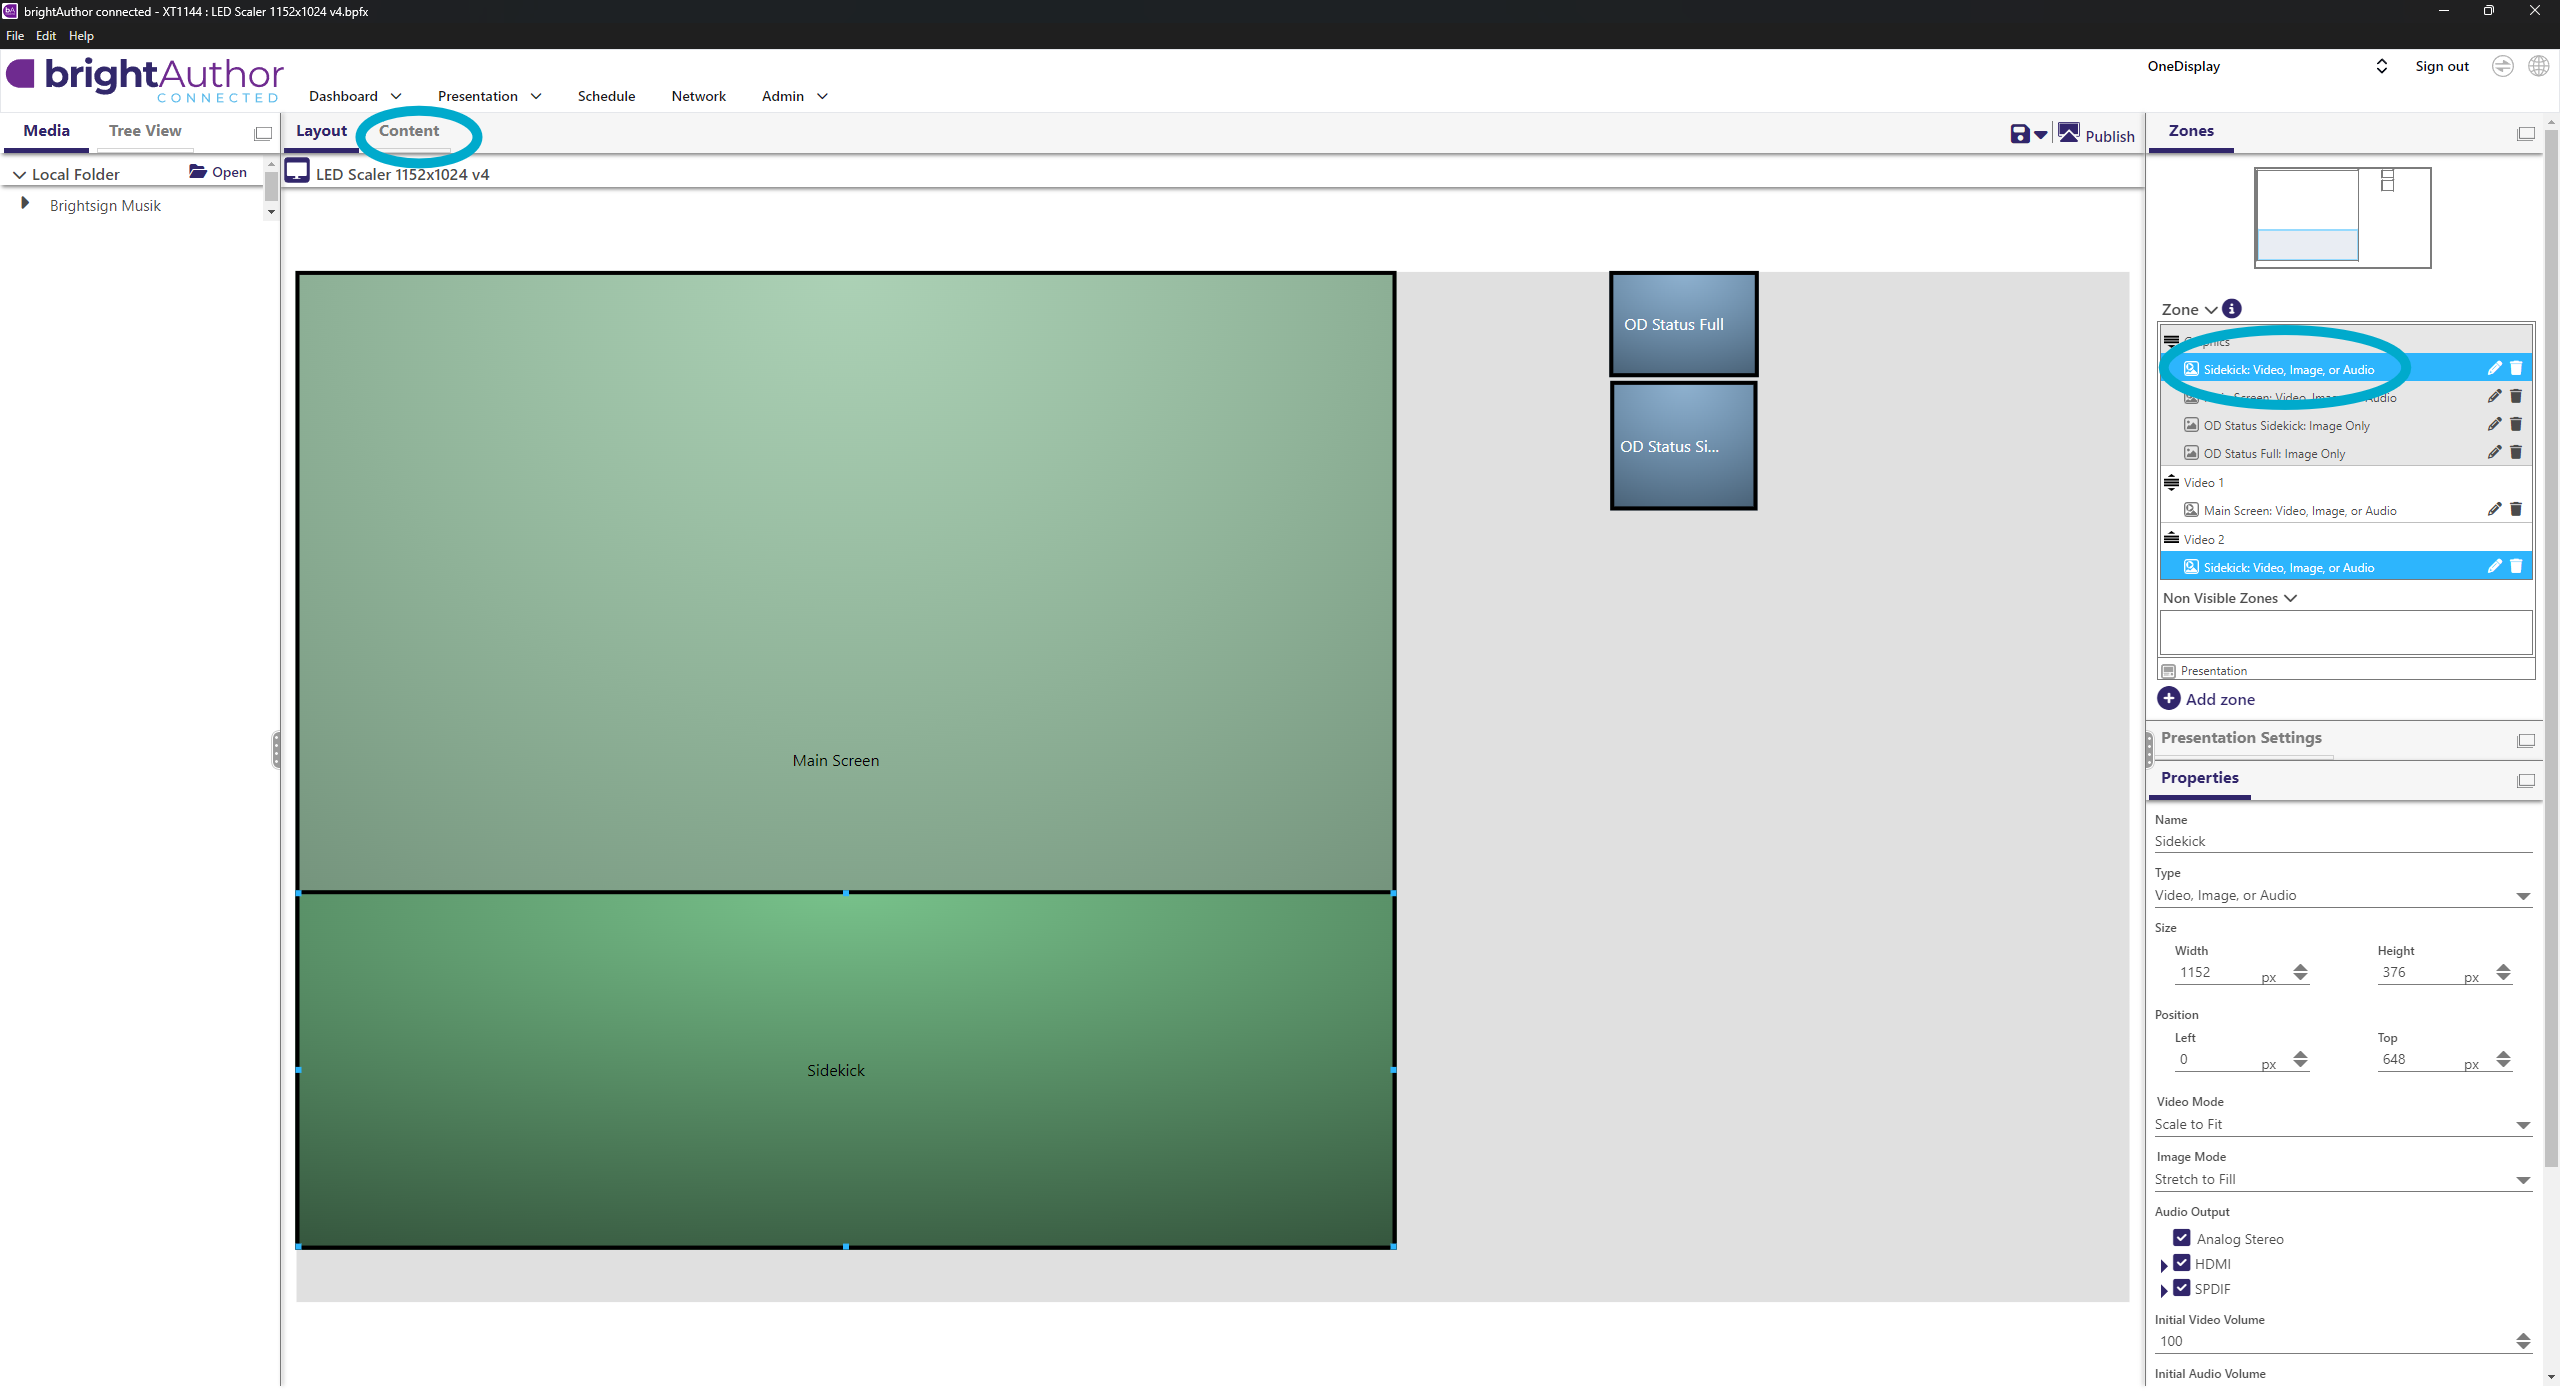
- Paste OneDisplay’s second XML link (
https://cdn.onedisplay.se/...)
- Switch to Sidekick zone
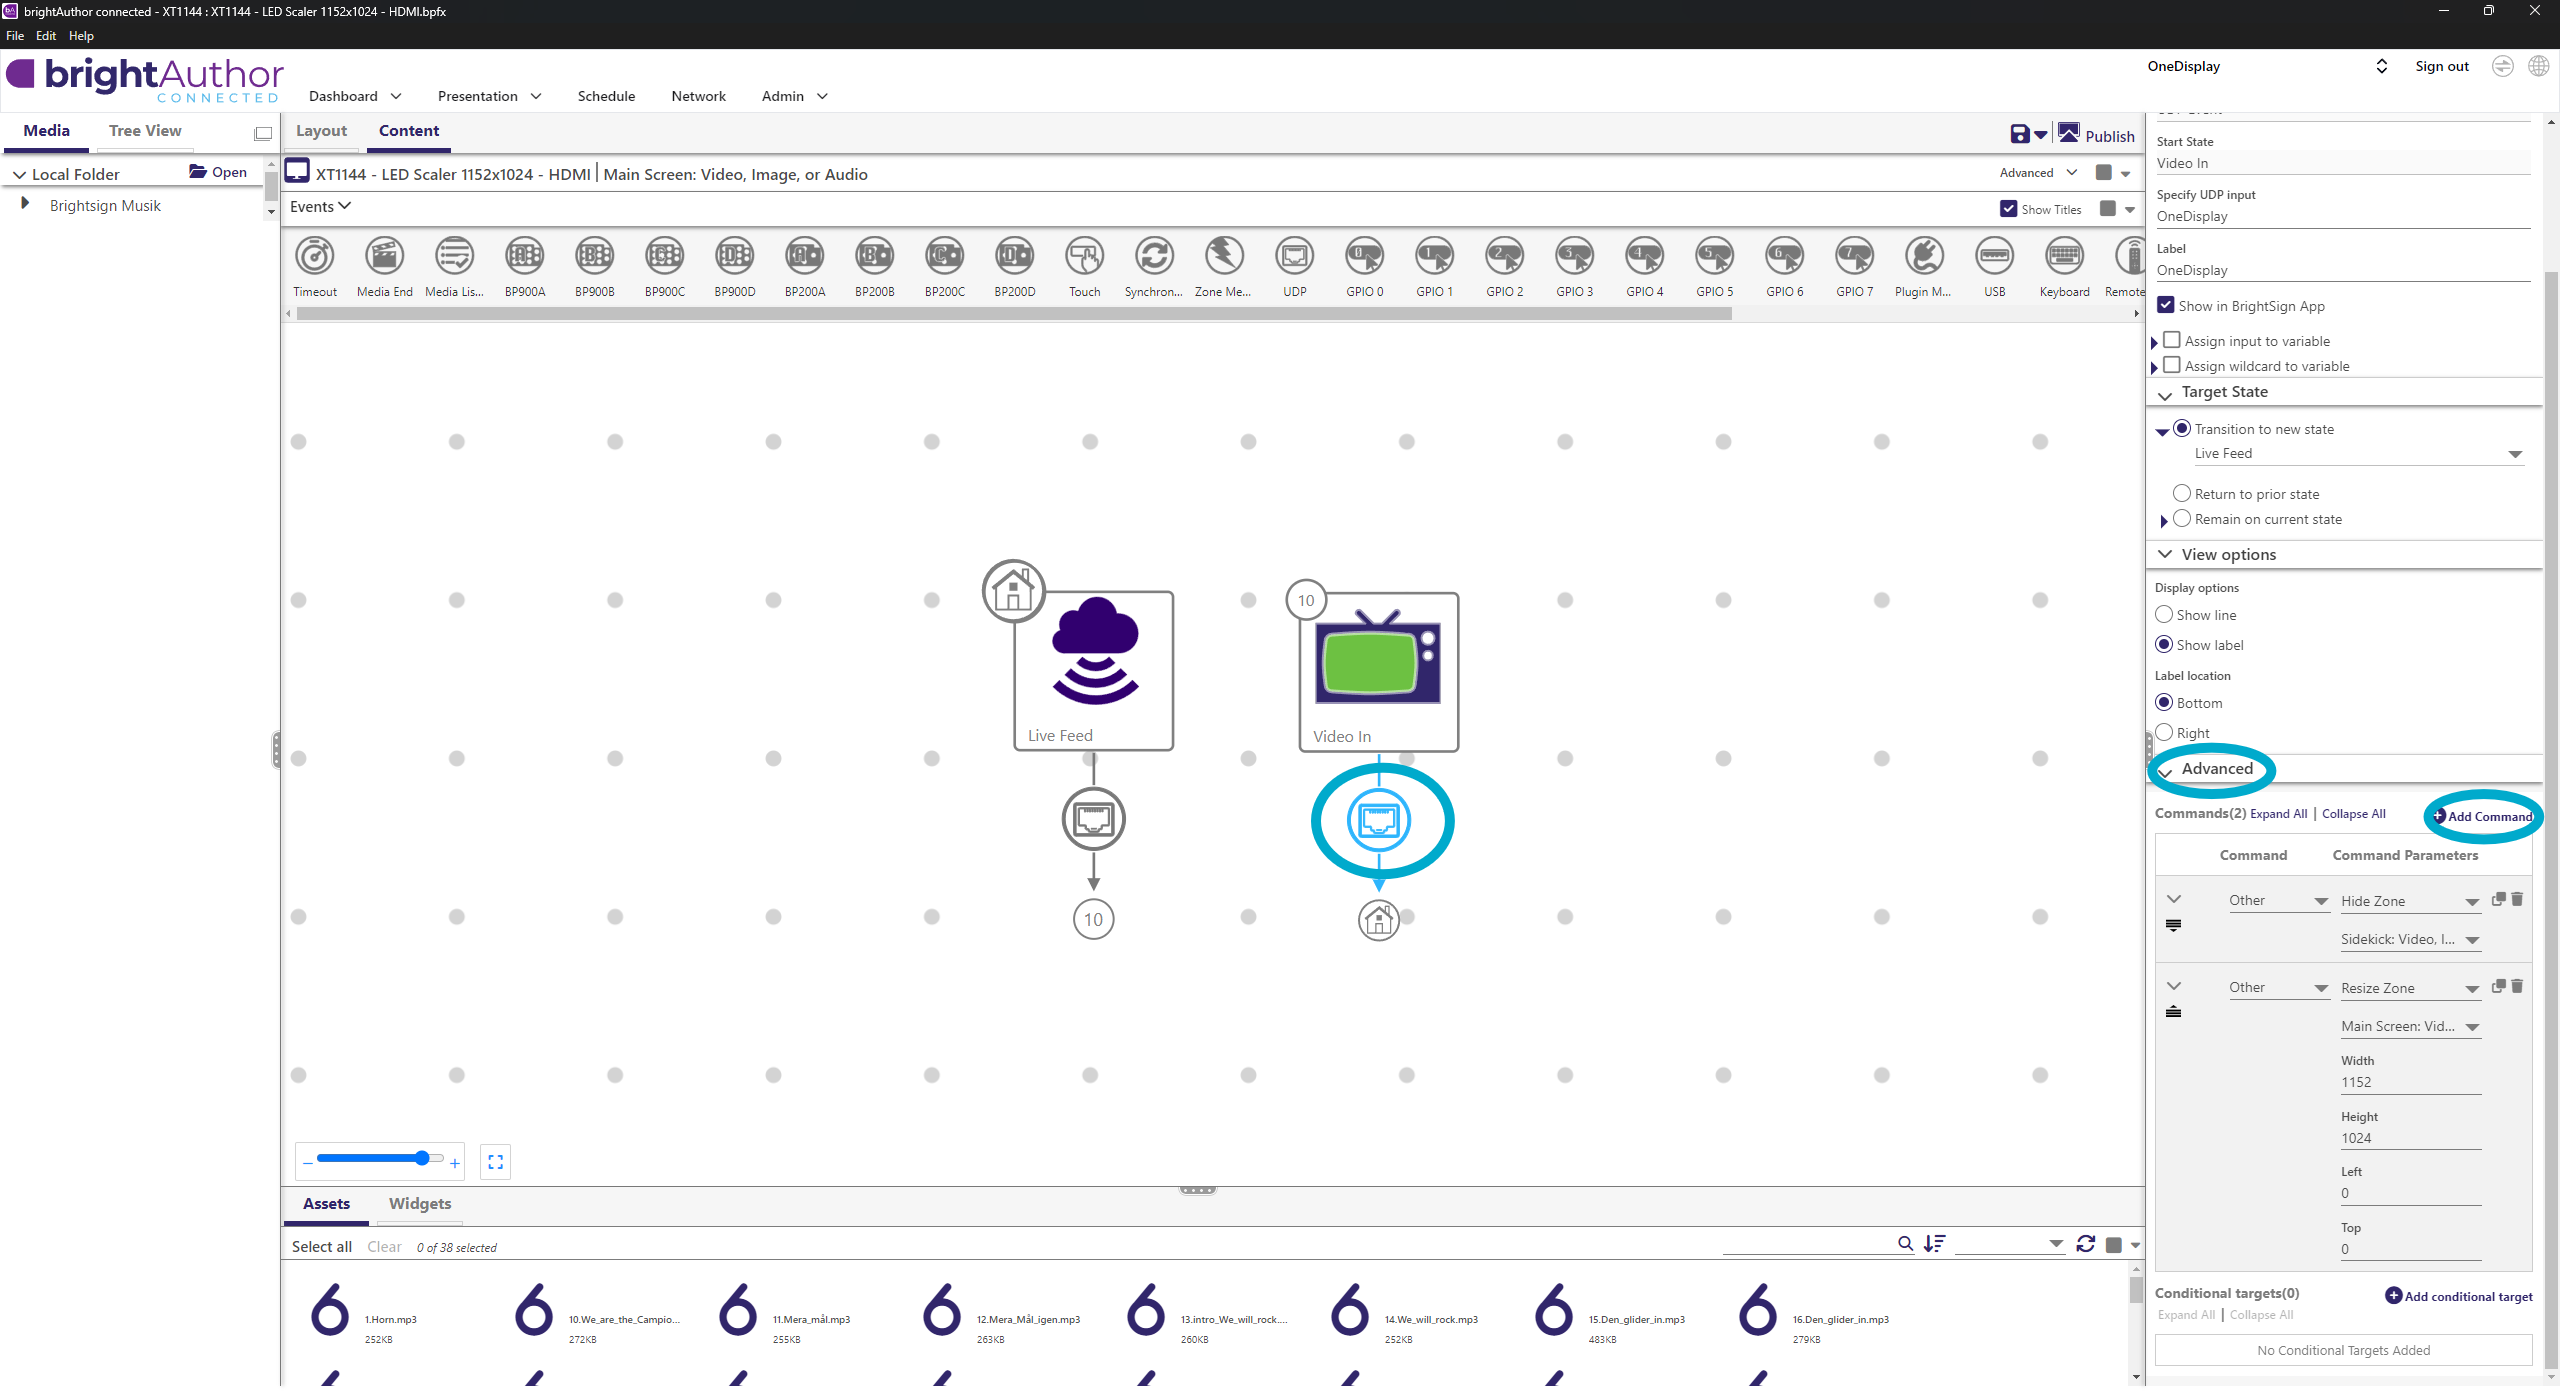
- Main Screen content + UDP:
- For Live Feed object:
- UDP input: HDMI
- Target State: Video In
- Show Label enabled
- Add commands:
- Show zone → Sidekick
- Resize zone → Main screen → 1152×648

- For Video object:
- UDP input: OneDisplay
- Target State: Video In
- Show Label enabled
- Add commands:
- Hide zone → Sidekick
- Resize zone → Main screen → 1152×1024
- Apply XML Overlay links to overlay objects
- For Live Feed object:
➡ Continue from Publish Presentation